Ever wondered why your competitors’ websites have glowing customer reviews prominently displayed? Or why visitors hesitate to buy from you despite great products?
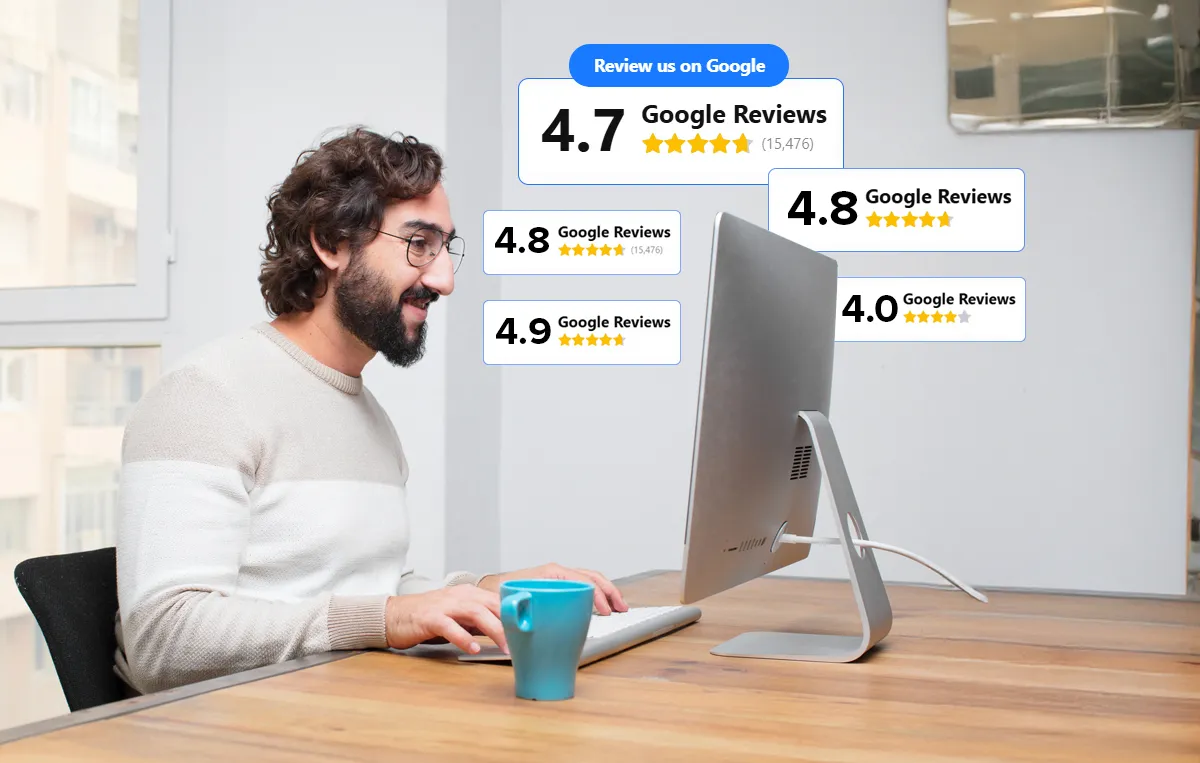
A Google Review Badge can be your secret weapon. It’s a dynamic, real-time showcase of your best customer feedback — boosting trust, SEO, and ultimately sales.
Why does this matter? Well, trust is everything online. When potential customers see genuine, positive reviews, they’re more likely to choose your business.
In short, knowing how to add a Google Review Badge to your website makes a huge difference, it makes your business look more credible, improves visibility, and helps turn visitors into customers—effortlessly!
In this blog, we’ll walk you through the steps to add a Google Review Badge to your website and share the best placement strategies to maximize its impact.
How to Add a Google Review Badge to Your Website (Step-by-Step Guide)
When it comes to embedding Google Review Badge to your website, you’ve got a few solid options depending on how much customization, automation, or simplicity you want. You can:
- Use SocialPilot’s widget for an automated, customizable badge.
- Add a simple manual badge using Google’s code.
- Or just create a quick review link with SocialPilot’s Review Link Generator.
Want fully automated, beautiful, and customizable review badges? Use the following process with SocialPilot’s widget.
Step 1: Log in to SocialPilot
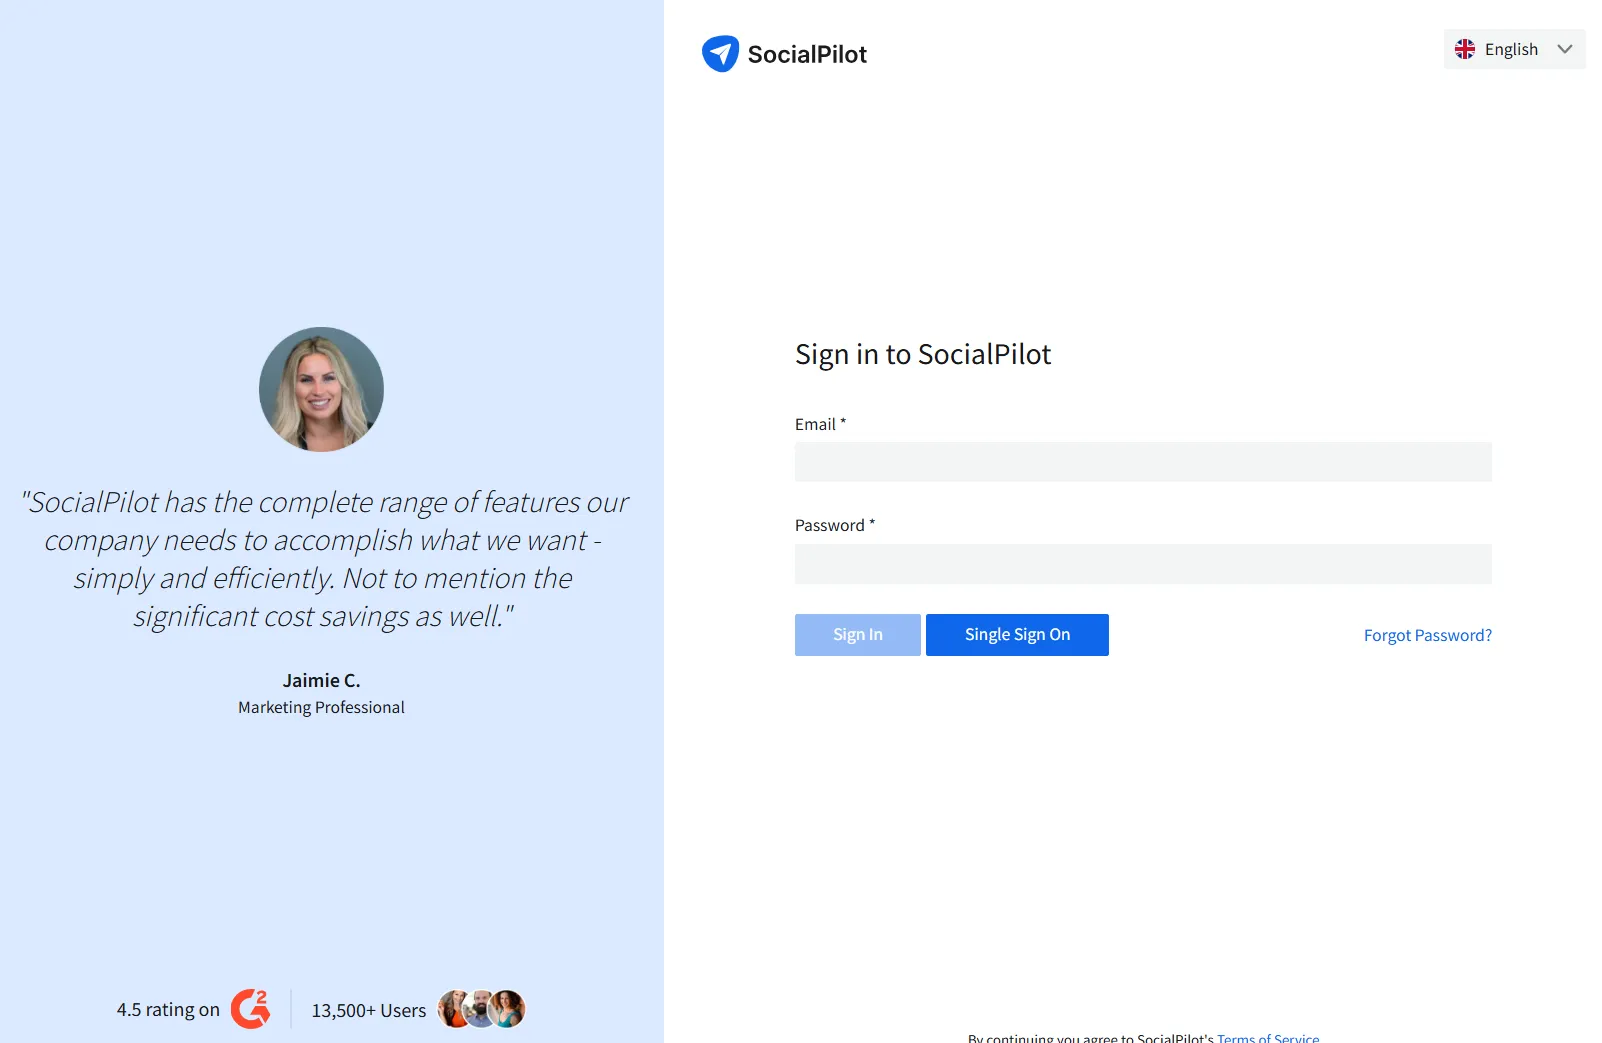
- Go to SocialPilot Reviews and sign in to your account.
Step 2: Navigate to the Review Widgets Section
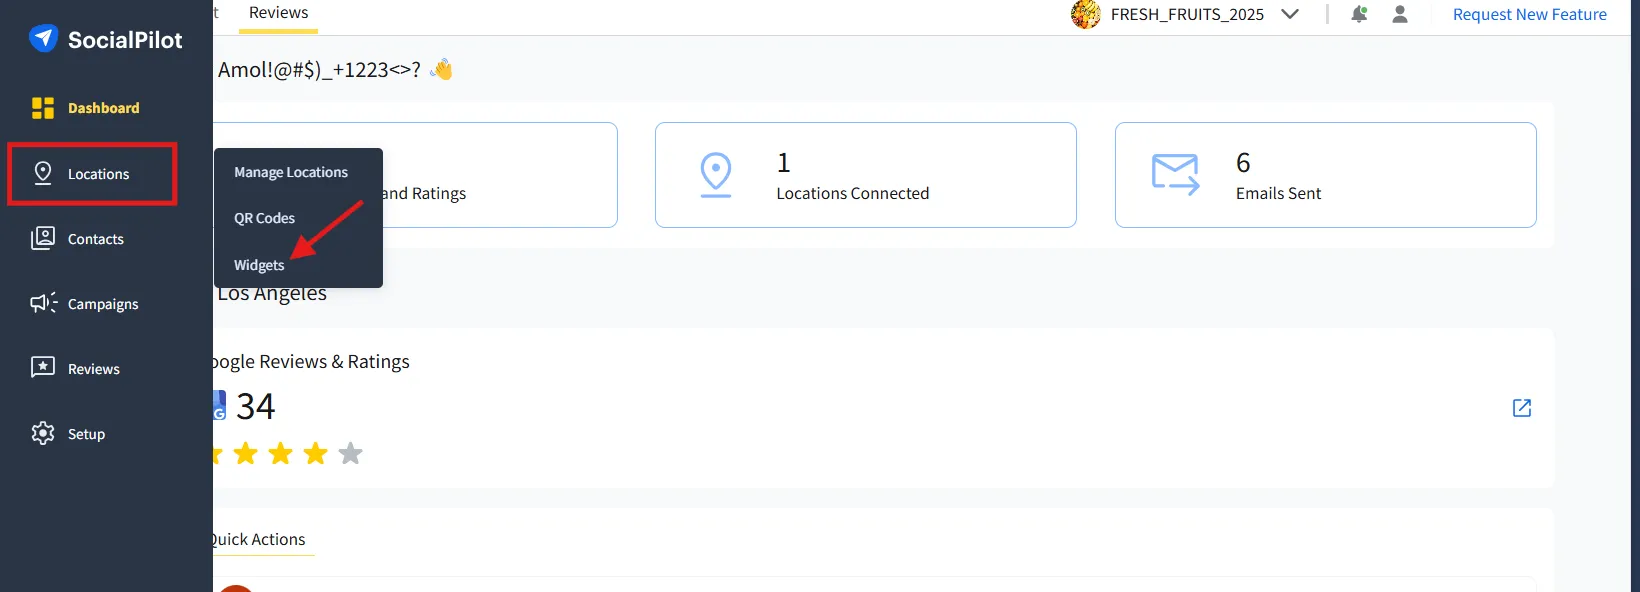
- In the dashboard, find the Widgets tab under Location.
- Click on Widgets.
Step 3: Create a New Review Widget
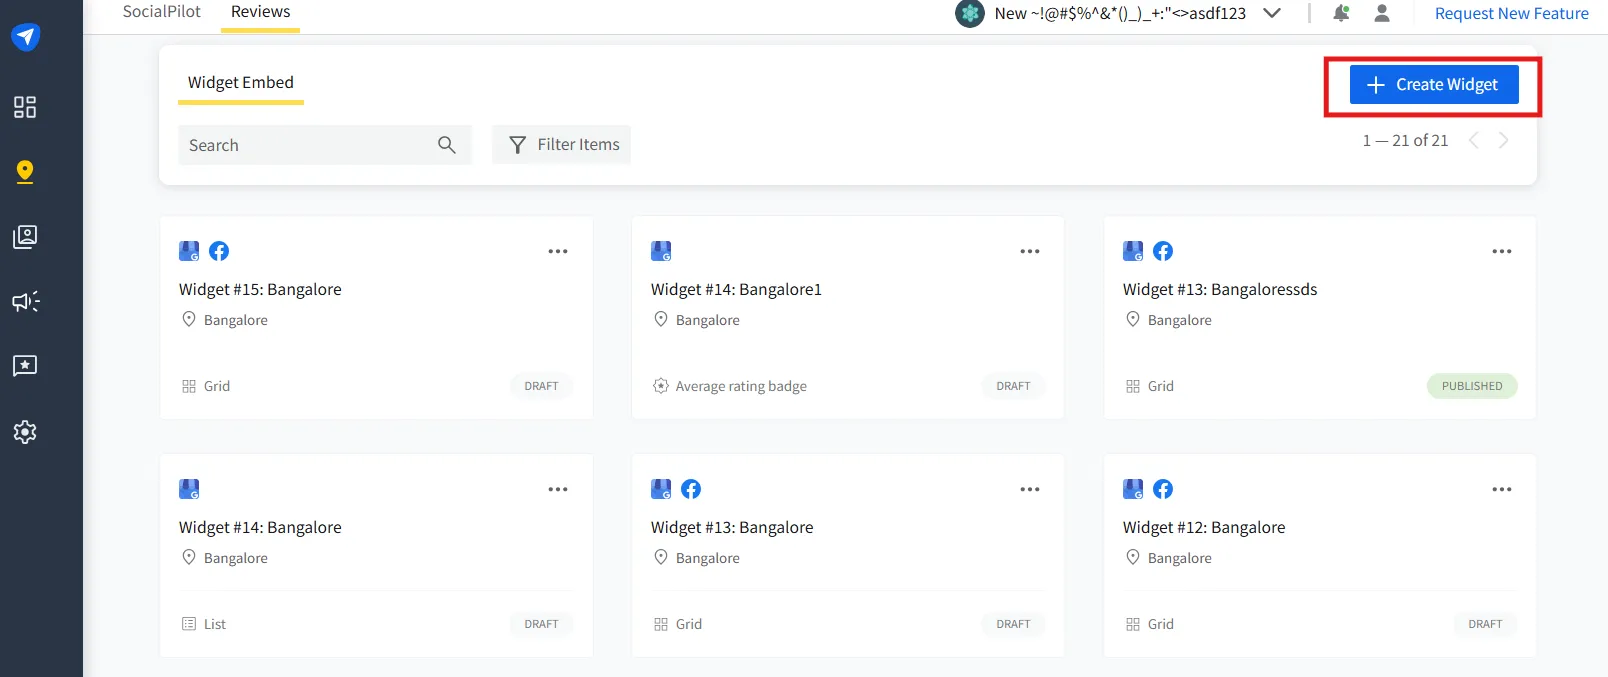
- Click on “Create New Widget.”
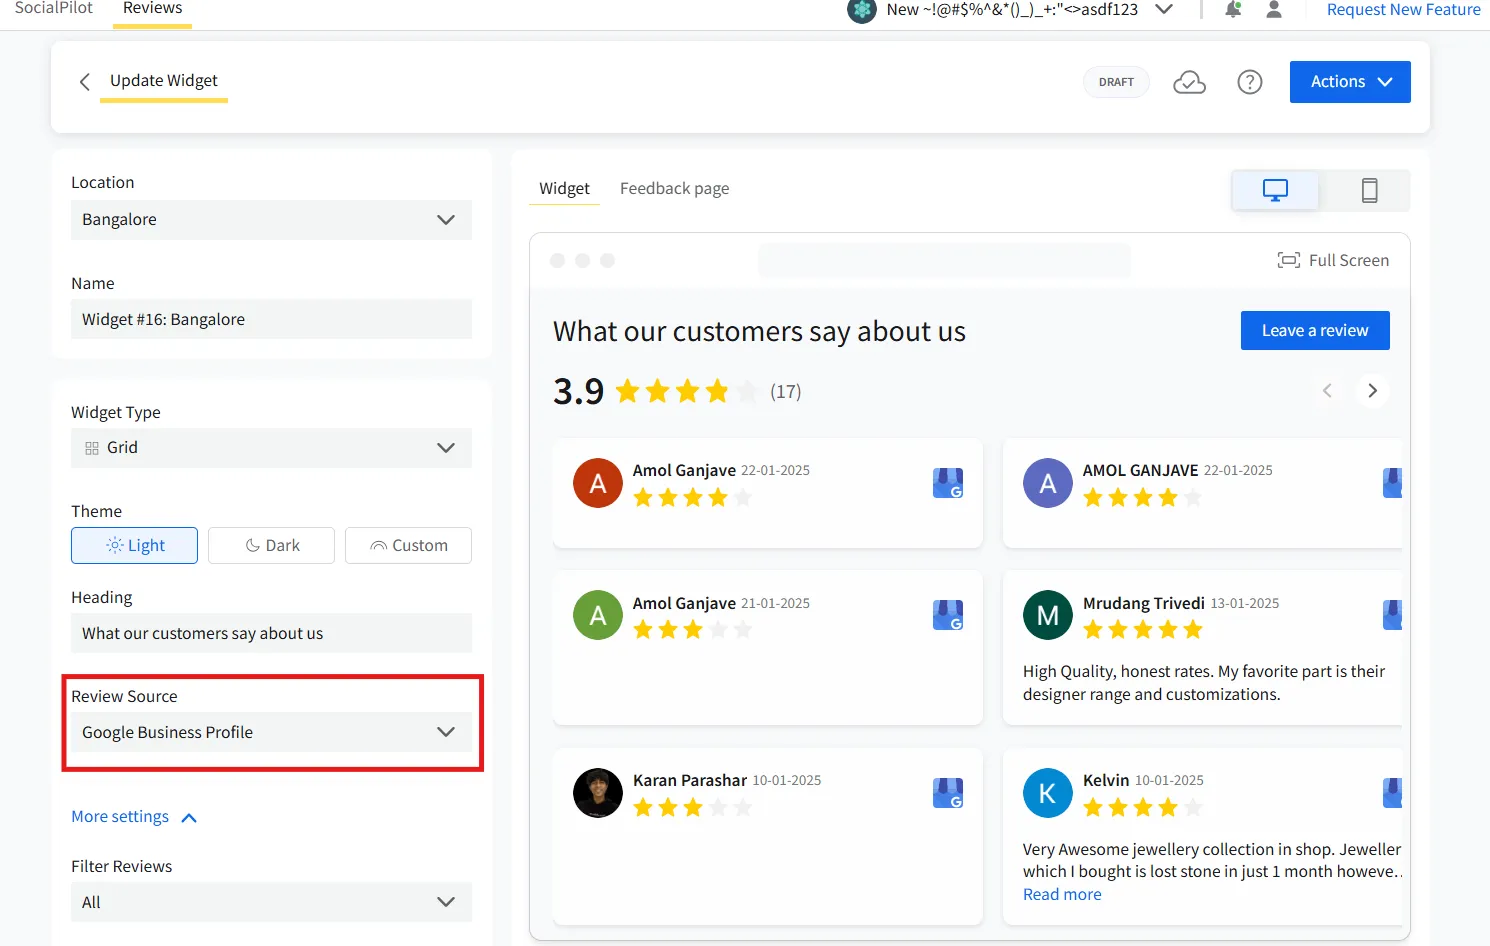
- Select Google Reviews as the source.
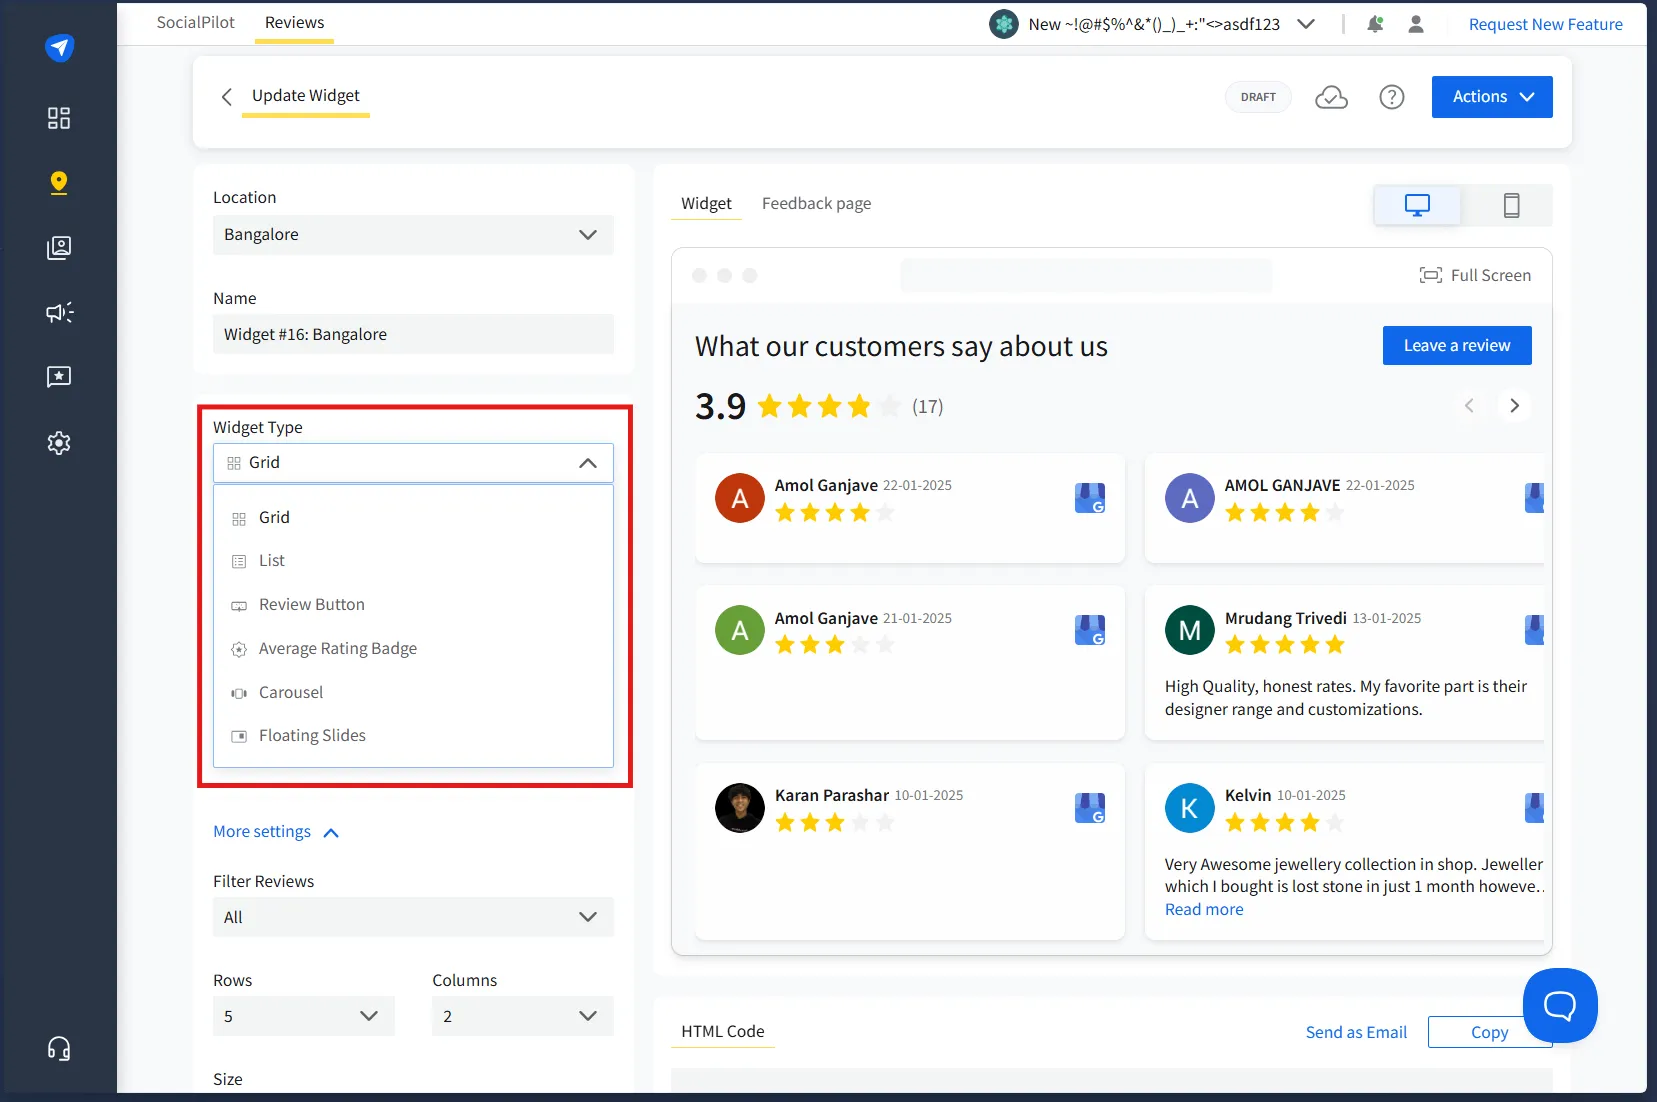
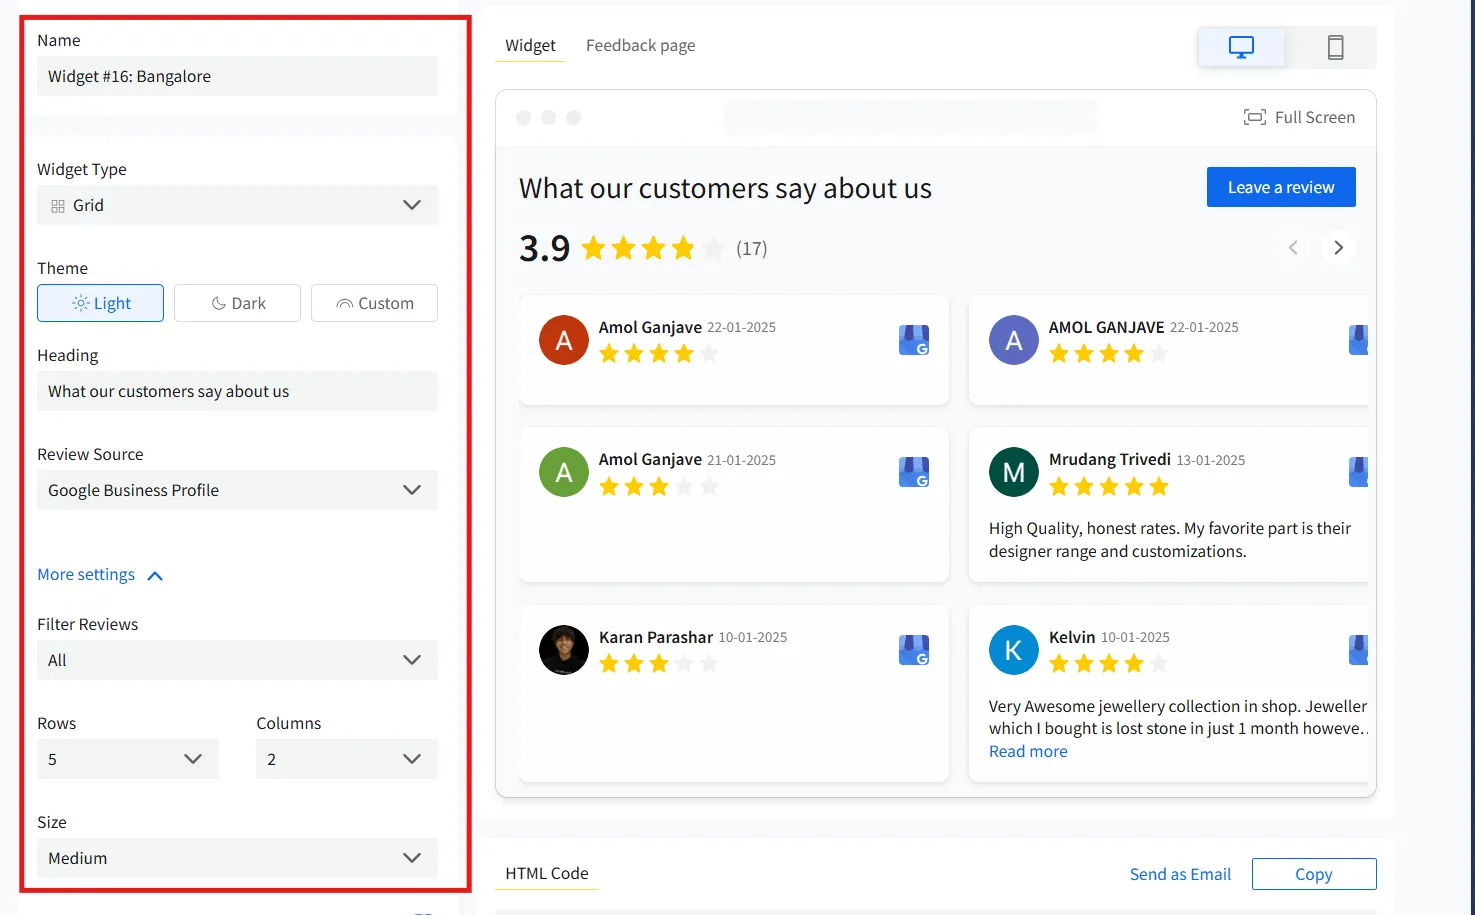
- Choose a widget type (Badge, Grid, Carousel, etc.).
At this stage, you also have the option to choose the theme and also select reviews to display on the bases of their rating.
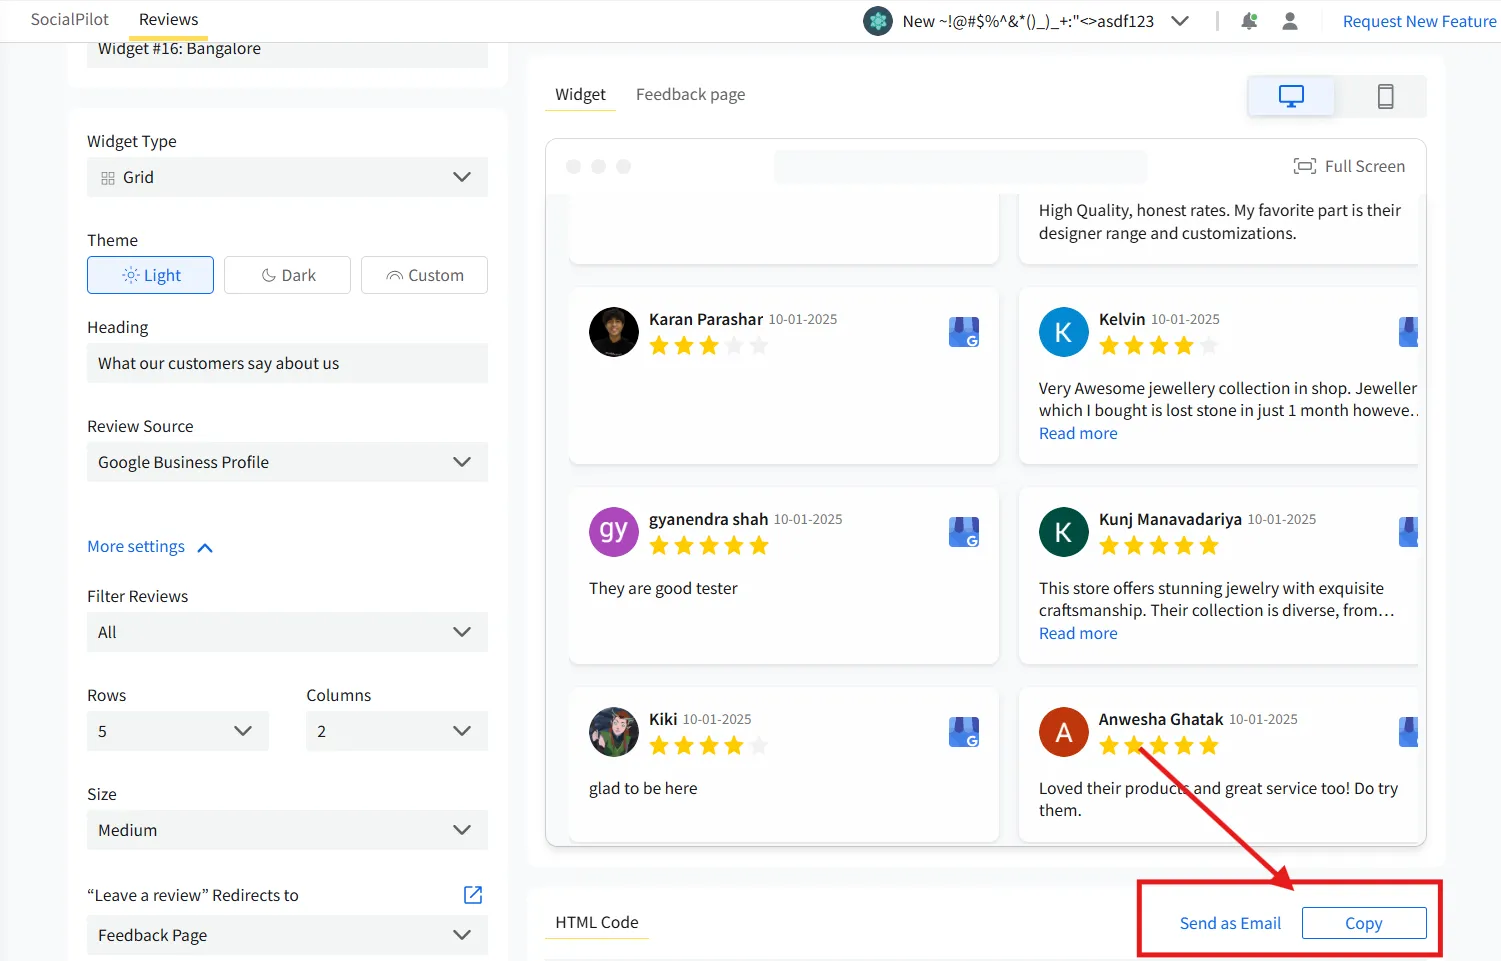
Step 5: Generate & Copy the Embed Code
- Copy the code to your clipboard.
Step 6: Paste the Code Into Your Website
- Go to your website’s CMS (WordPress, Shopify, HTML, etc.).
- Open the page where you want the badge to appear.
- Paste the embed code into the HTML section.
- Save and publish your changes.
Step 7: Verify and Update
- Refresh your website to see the badge in action.
- SocialPilot Reviews will automatically update the widget as new reviews come in.
Here is a detailed help document to help you customize Google review badge for your website.
Add Google Review Badge Using Google’s Manual Review Badge (Free but Limited)
Want a free, simple badge without extra tools? Go with this method, the manual Google badge.
Here’s how to do it:
Note : Google doesn’t provide an official “Google Review Badge” widget, but it does have branding guidelines for displaying Google logos and review content.
For the latest policies and assets, visit Google’s Brand Resource Center. Make sure to comply with these rules to avoid penalties.
Step 1: Find Your Google Business Profile
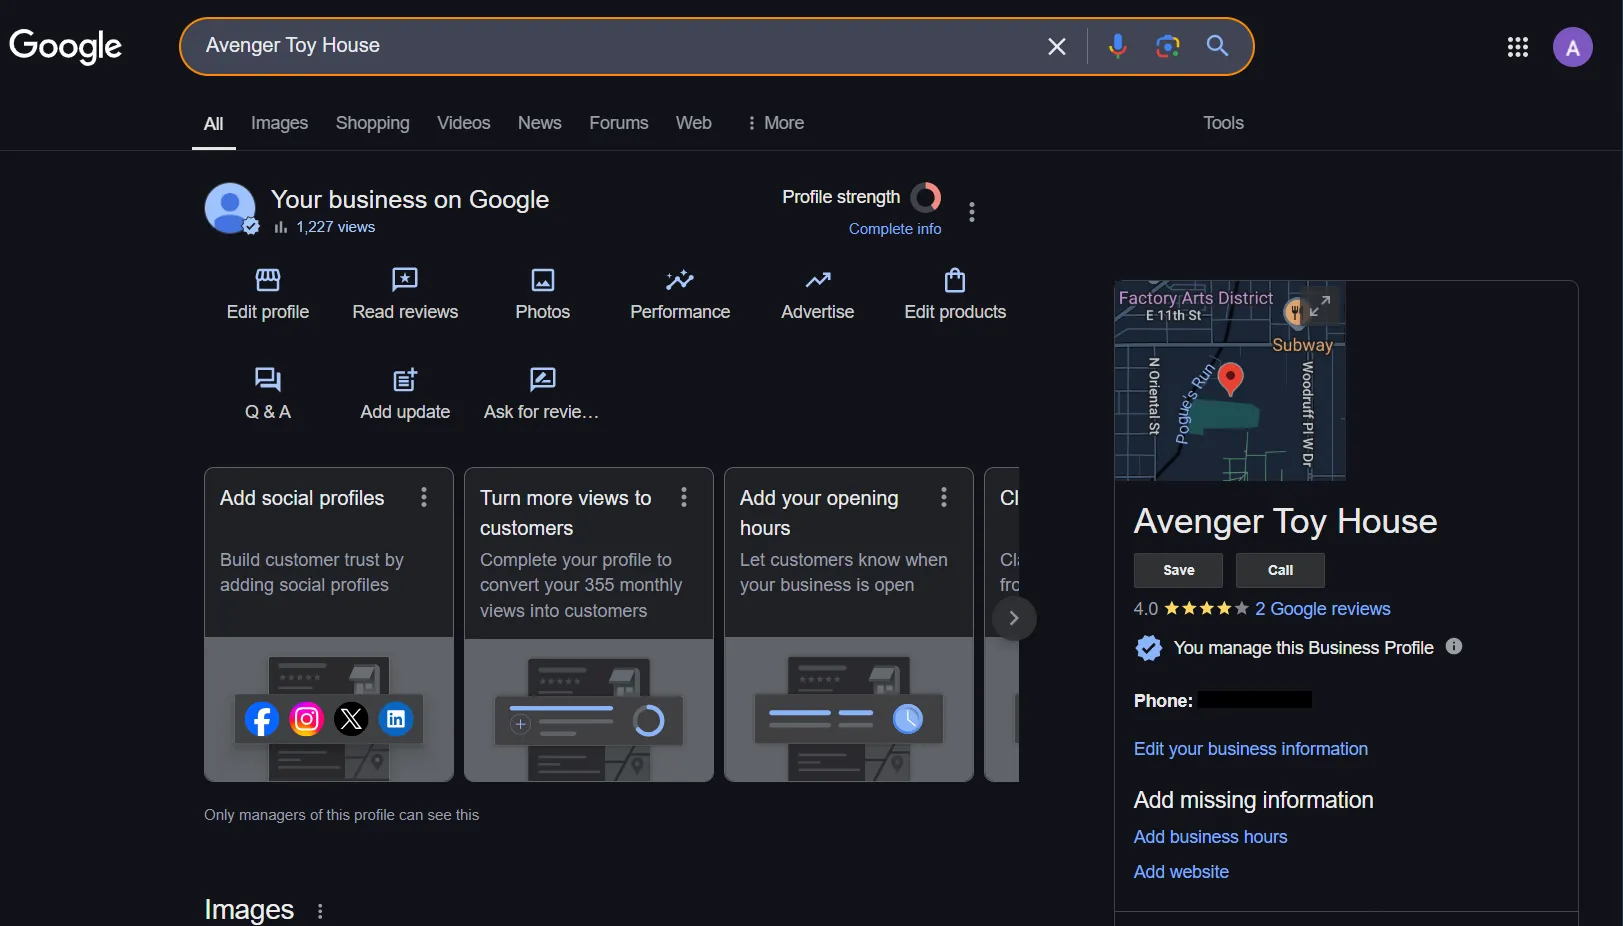
- Go to Google Search and type your business name.
- If you manage the business, you’ll see a Google Business Profile panel on the right side.
Step 2: Copy the Google Review Link
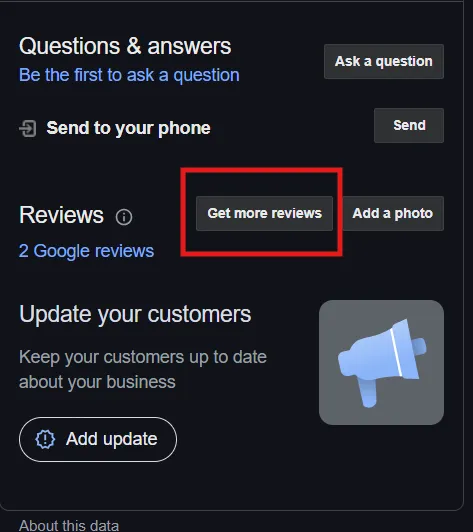
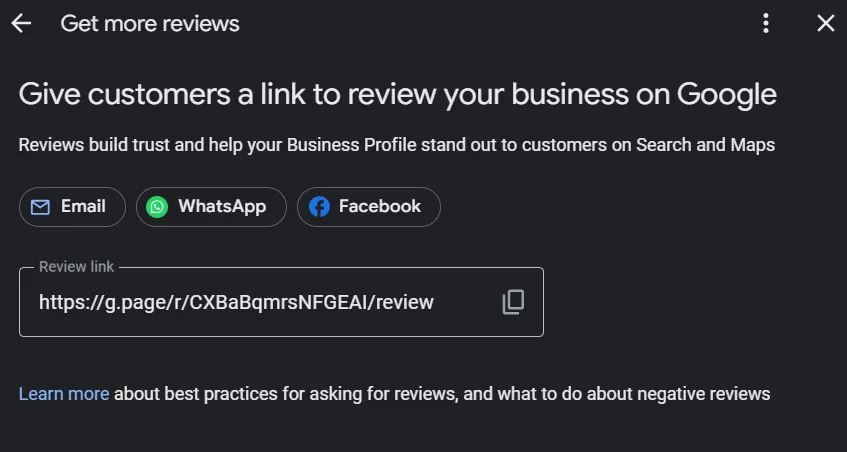
- Click on “Ask for reviews” in your Business Profile dashboard.
- Copy the review request link. This is the URL customers use to leave and view reviews.
Step 3: Generate an Embedded Review Widget
Since Google doesn’t provide an official review widget, you can use Google’s Place ID(generated in step 2) to embed reviews manually.
- Copy the Place ID link from step 2.
- Use the following code snippet to create a simple review link:
<a href="https://search.google.com/local/writereview?placeid=YOUR_PLACE_ID" target="_blank"> <img src="https://upload.wikimedia.org/wikipedia/commons/5/53/Google_%22G%22_Logo.svg" width="50" alt="Google Review Badge"> Leave us a review on Google! </a> - Replace YOUR_PLACE_ID with the actual Place ID of your business.
Step 3: Add the Badge to Your Website
- Log in to your website’s CMS (WordPress, Shopify, Wix, or custom HTML).
- Choose the page where you want the badge to appear.
- Open the HTML editor and paste the code snippet.
- Save and publish your changes.
Step 4: Test the Review Badge
- Visit your website and click the badge.
- It should open your Google Review page, allowing visitors to see and leave reviews.
Just want to share a quick review link? Try this method with SocialPilot’s review link generator.
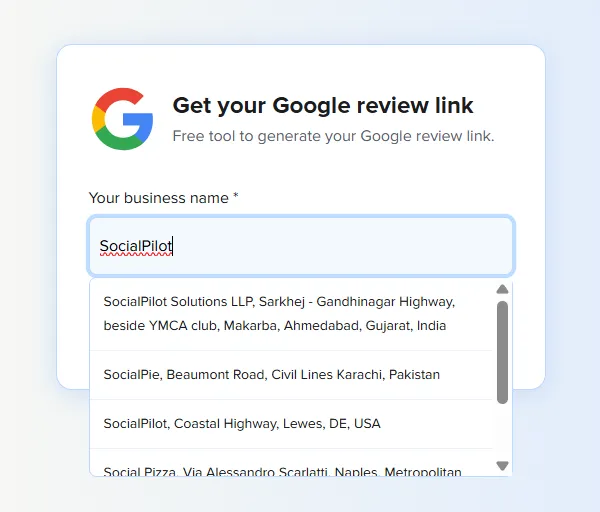
Step 1: Go to the SocialPilot Review Link Generator
Enter your business name.
Step 2: Generate Your Unique Review Link
The tool creates a link that customers can use to leave reviews easily.
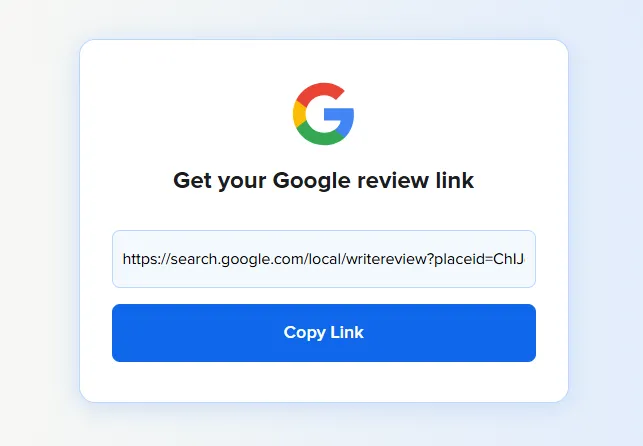
Step 3: Share Your Link or Add It to Your Website
Use this link in emails, social media, or as a clickable button on your website.
No fancy widgets needed, just a direct, easy way to ask for reviews.
Where to Place Your Google Review Badge for Maximum Impact
One important criterion to consider when adding a Google rating badge to your website is where to place it. To maximize the impact of your Google Review Badge, consider these placement strategies:
1. Homepage
Place the badge above the fold (a portion of a webpage that is visible to users without scrolling) to build instant trust with new visitors. A comment widget on your homepage can ensure visitors immediately recognize the quality of your products and services.
2. Service or Product Pages
Display the badge on these pages to influence buyers right before they make a decision. By placing reviews near product descriptions, pricing details, or call-to-action buttons, you can reinforce trust and reassure the visitors of your product’s credibility.
Seeing real customer feedback in context can boost confidence, reduce hesitation, and ultimately increase conversions.
3. Contact & Lead Generation Pages
Placing customer reviews here will help you reinforce trust before visitors submit inquiries by placing the badge on these pages.
By featuring positive feedback from satisfied customers, you can reassure your prospects that they are making the right choice, increasing the likelihood of them reaching out to your business.
4. Dedicated “Client Reviews & Testimonials” Page
When you generate a Google reviews badge for a website, you can create a specific page to host it. When you generate a badge for your website, adding it to this page enhances engagement by providing visitors with a space to explore detailed feedback.
Beyond improving customer confidence, having a testimonials page also offers SEO benefits, as fresh user-generated content can improve search rankings and visibility.
5. Website Header
The top right corner of the header is often the best spot, as it’s typically where a user’s eye lands first when opening a webpage. A well-placed badge in the header ensures that social proof remains visible throughout the browsing experience, subtly reinforcing trust across all pages.
Use the footer, especially for multiple badges. The footer is a useful spot for Google Review Badges, especially when you have several pages. It keeps them visible without cluttering the main content.
Also, users often look to the footer for additional information or validation, making it an unobtrusive yet accessible place to build trust and credibility.
Sidebars on blogs or content-heavy pages offer a consistent, visible space for your Google Review Badge without interrupting the main content flow.
This placement allows readers to see your positive reviews while they’re engaged with your articles or blog posts, reinforcing your credibility and building trust as they consume your content. It’s a subtle but effective way to showcase social proof.
Benefits of Adding a Google Review Badge to Your Website
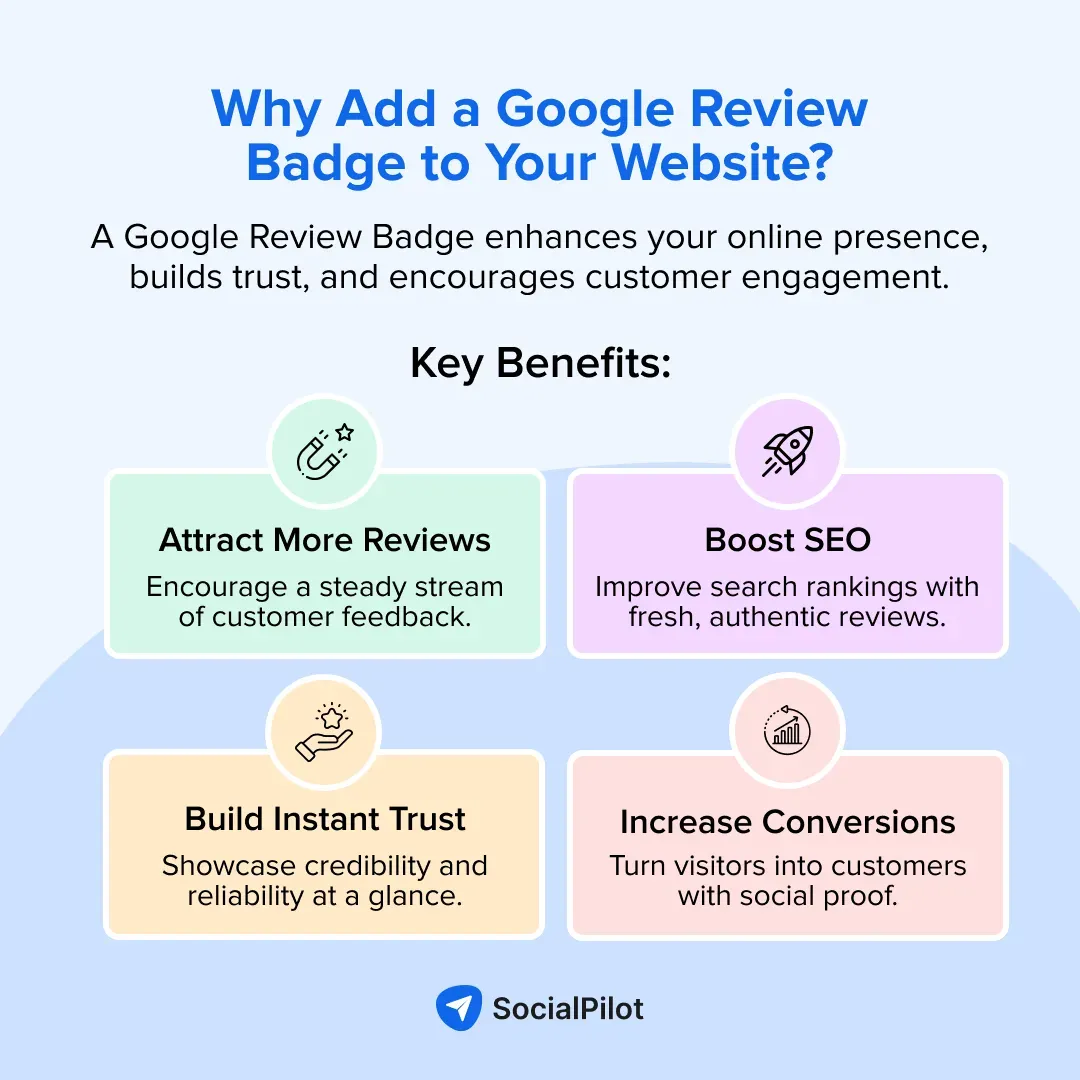
Adding a Google Review Badge or widget to your website not only builds instant trust but also improves your local SEO by showcasing authentic Google Business Profile reviews
1. More Reviews Attract New Reviews
Displaying a Google Review Badge can create a ripple effect. When potential customers see glowing reviews, they’re more likely to leave their own, helping you build a strong online reputation effortlessly.
Here is how you can gather more customer reviews on Google:
- Ask at the right time
- Make it very simple to leave reviews
- Incentivize (Without Violating Google’s Policies)
- Respond to Every Review (Good or Bad)
- Promote Your Google Reviews Everywhere
2. Boost Your SEO
Want better search rankings? A Google Review Badge can help. By showcasing your ratings and reviews, your site gains credibility and relevance, which can increase clicks and drive more organic traffic.
Reviews naturally include keywords, improving your ranking for relevant searches. Plus, fresh user-generated content signals to Google that your business is active and trustworthy. Higher ratings also lead to a better click-through rate (CTR), increasing organic traffic. The more engagement and positive feedback your business receives, the stronger your search visibility, helping you attract more potential customers effortlessly!
3. Build Instant Trust
People trust real customer feedback. Seeing verified ratings and comments acts as powerful social proof, making visitors feel confident about choosing your business.
When visitors see positive reviews from others, they feel more confident in choosing your business. This trust can lead to higher engagement, more inquiries, and increased conversions, helping you stand out from competitors.
4. Increase Conversions
High ratings and positive reviews influence buying decisions. A visible Google Review Badge can encourage more users to take action.
When people see authentic reviews, they feel more confident in making a decision—whether it’s purchasing a product, booking a service, or contacting your business. This added credibility can significantly boost conversions and drive more sales.
5. Stay Updated Automatically
No need for manual updates. The badge syncs with your latest Google reviews, ensuring your site always displays fresh, relevant feedback. No need for manual updates or constantly adding new testimonials—your site will always display fresh, relevant feedback in real-time.
This ensures visitors see up-to-date, authentic experiences from your customers, boosting trust and engagement. Plus, frequent updates signal to Google that your business is active and well-reviewed, helping improve your SEO and search rankings.
Common Mistakes When Adding a Google Review Badge (And How to Avoid Them)
You can add the Google review badge on your website with the help of SocialPilot Reviews widget or directly through Google. However, in both the cases there are certain things that you need to avoid to ensure a smooth deployment of the badge on your website.
Here are the common mistakes that are most likely to happen when you try to embed a Google review badge on your website. Keep them in mind and try to avoid these mistakes:
1. Using an Outdated or Incorrect Badge
Google updates its branding guidelines regularly. Therefore using an old or modified badge (like changing the colors or adding effects) can get you in trouble. Hence, we recommend that you download the latest version of the badge.
How to Avoid This Mistake:
- Always download the latest badge directly from Google’s official branding resources.
- Avoid modifying the badge—stick to the approved design and color scheme.
- Check Google’s branding guidelines regularly to stay updated with any changes.
- By using the correct and latest version, you ensure that your badge remains credible, professional, and compliant.
2. Not Linking to Your Google Reviews Correctly
Often, businesses commit the mistake of linking a badge to the homepage instead of the Google Business Profile. Copy the right review link and carefully link the badge to the correct profile.
How to Avoid This Mistake:
- Get the right link:
- Sign in to your Google Business Profile.
- Click on “Ask for reviews” to generate the correct link.
- Copy the link and use it for your badge.
- Double-check the link after embedding it to ensure it leads directly to your Google Reviews page.
A properly linked badge makes it easier for customers to engage, leading to more reviews and higher conversions.
3. Hiding the Badge Where No One Sees It
Your badge won’t be effective if it’s buried in the footer or embedded on a random page. Place it where it gets noticed, easily such as on your homepage, contact page, or next to testimonials.
How to Avoid This Mistake:
- Place the badge in high-visibility areas, such as:
- The homepage (above the fold)
- The contact page
- Next to customer testimonials
- On the checkout or booking page to influence decisions
- Test different placements to see where it drives the most engagement.
A well-placed badge reinforces trust, attracts clicks, and boosts conversions.
4. Ignoring Mobile-Friendliness
If your badge looks perfect on desktop but breaks on mobile, that’s a problem. After all, 80% of customers read feedback on their mobile phones. Therefore, ensure it’s responsive so it adjusts properly on all screen sizes.
How to Avoid This Mistake:
- Use responsive design so the badge automatically adjusts to different screen sizes.
- Test it on various devices (smartphones, tablets, desktops) before publishing.
- If using a widget, choose one that scales properly on all screens.
A mobile-friendly badge ensures that every visitor, regardless of their device, can see and interact with your reviews effortlessly.
5. Not Encouraging Clicks
A badge alone won’t do much if people don’t know what to do with it. Add a clear call-to-action like “Check out our reviews or leave one!” to encourage people to engage with it.
How to Avoid This Mistake:
- Add action-oriented text near the badge, such as:
- “Check out what our happy customers are saying!”
- “Loved our service? Leave us a review!”
- “See why customers trust us—read our reviews!”
- Use bold colors or buttons to make the badge stand out.
- Consider an animated hover effect to draw attention.
A well-placed CTA turns passive visitors into active customers, increasing engagement, trust, and conversions.
Troubleshooting Common Issues with Google Review Badges
Even with a well-set-up Google Review Badge, sometimes technical hiccups can happen. Here are solutions to some of the most common problems you might encounter:
1. Badge Not Showing on My Site
- Double-check the embed code: Make sure you’ve copied and pasted the entire code snippet correctly into your website’s HTML or widget section.
- CMS or theme restrictions: Some website platforms or themes may restrict custom HTML or scripts. Verify that your CMS (like WordPress, Shopify, Wix) supports embedding third-party widgets or custom code.
- Clear cache: Sometimes changes won’t appear immediately due to browser or website caching. Clear your browser cache and, if you use caching plugins, clear your site’s cache too.
2. Reviews Not Updating Automatically
- Verify API connections: If you’re using a third-party widget (like SocialPilot), ensure your Google Business Profile API connection is active and properly linked.
- Check subscription status: Many widget services require an active subscription to keep syncing reviews. Confirm your plan is up-to-date to avoid interruptions.
- Widget refresh settings: Some tools offer manual or automatic refresh intervals—check your widget’s settings to make sure it’s set to update regularly.
3. Badge Looks Broken or Unresponsive on Mobile
- Use responsive embed options: Choose widgets or code snippets designed to be mobile-responsive to automatically adjust to different screen sizes.
- Test on multiple devices: Preview your site on smartphones, tablets, and desktops to see how the badge displays across devices.
- Apply custom CSS fixes: If needed, work with your developer to add CSS rules that optimize the badge’s size, alignment, or spacing for mobile screens.
Conclusion
A Google Review Badge isn’t just a fancy widget. It’s a powerful trust booster for your business. By showcasing your best reviews, you build credibility, improve SEO, and increase conversions effortlessly. But remember, placement matters. Keep it visible, ensure it’s mobile-friendly, and always link it correctly to your Google Business Profile.
Now that you know how to add it and what mistakes to avoid, it’s time to put your reviews to work. Start displaying your best customer feedback today.
Try SocialPilot’s Google Review Widget—a hassle-free solution to showcase your top ratings and attract more customers. Get started today!
