Done with creating your business page on Facebook? Have you listed your services yet?
If you run a plumbing, house cleaning, or other service-based business, you should definitely list your services on your Facebook page.
However, after Facebook’s layout change, the process of adding services has drastically altered. Maybe that problem has brought you here.
What’s even more challenging is that Facebook’s own support page only shows how to display a list of basic services. But what if you want to add customized services, such as health appointments, video shoots, or other specialized offerings?
Don’t worry! We have the answer
In this step-by-step blog, we will show you how to add services on your Facebook page in 2024 without any hiccups and start boosting your sales right from the get-go.
How to Add Services on Facebook Page: Step-By-Step
Meta has completely changed how you can add, optimize, and show your services so that people can book them.
For better understanding and clarity, we have divided the process into two parts:
- The first part is to create services and fill in the basic information
- The second is to edit services and list a “Book Now” button on your page for service booking
Steps to Create Services on Your Facebook Page
Here is how to create your services:
Step 1: Log in to your Facebook account and click your profile picture in the top right corner.
Step 2: Click “See all profiles” to reveal every page connected to your account, and select the profile on the page you need.
Step 3: Once your page opens up, navigate to the left-hand menu and click on your page name to open the dashboard.
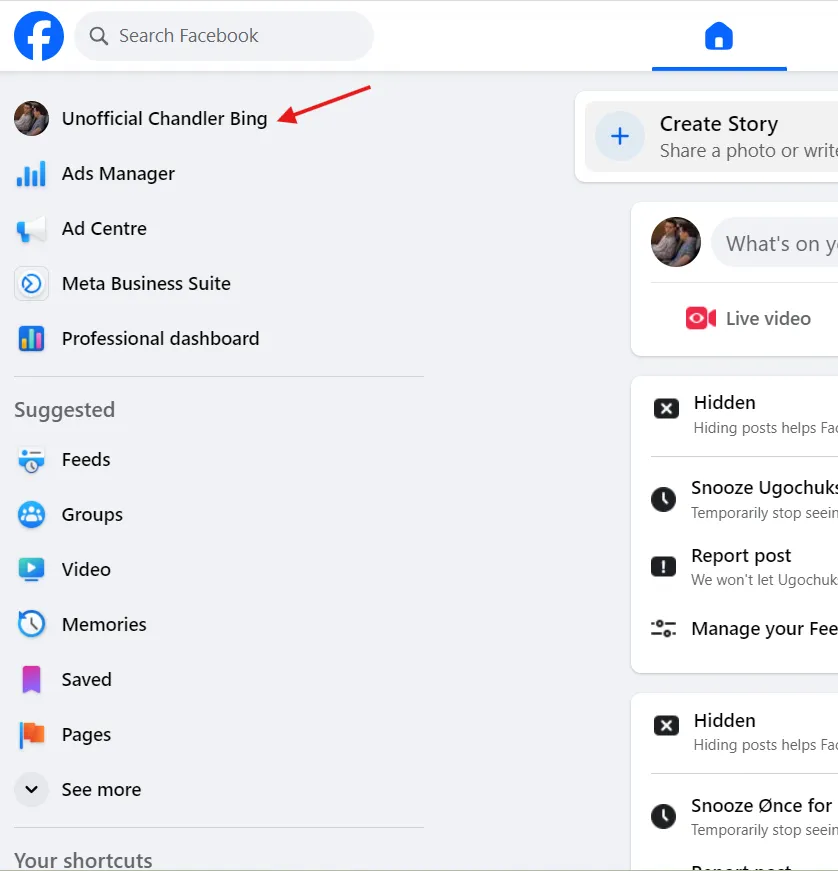
Step 4: From your page dashboard, click on the “Meta Business Suite.”
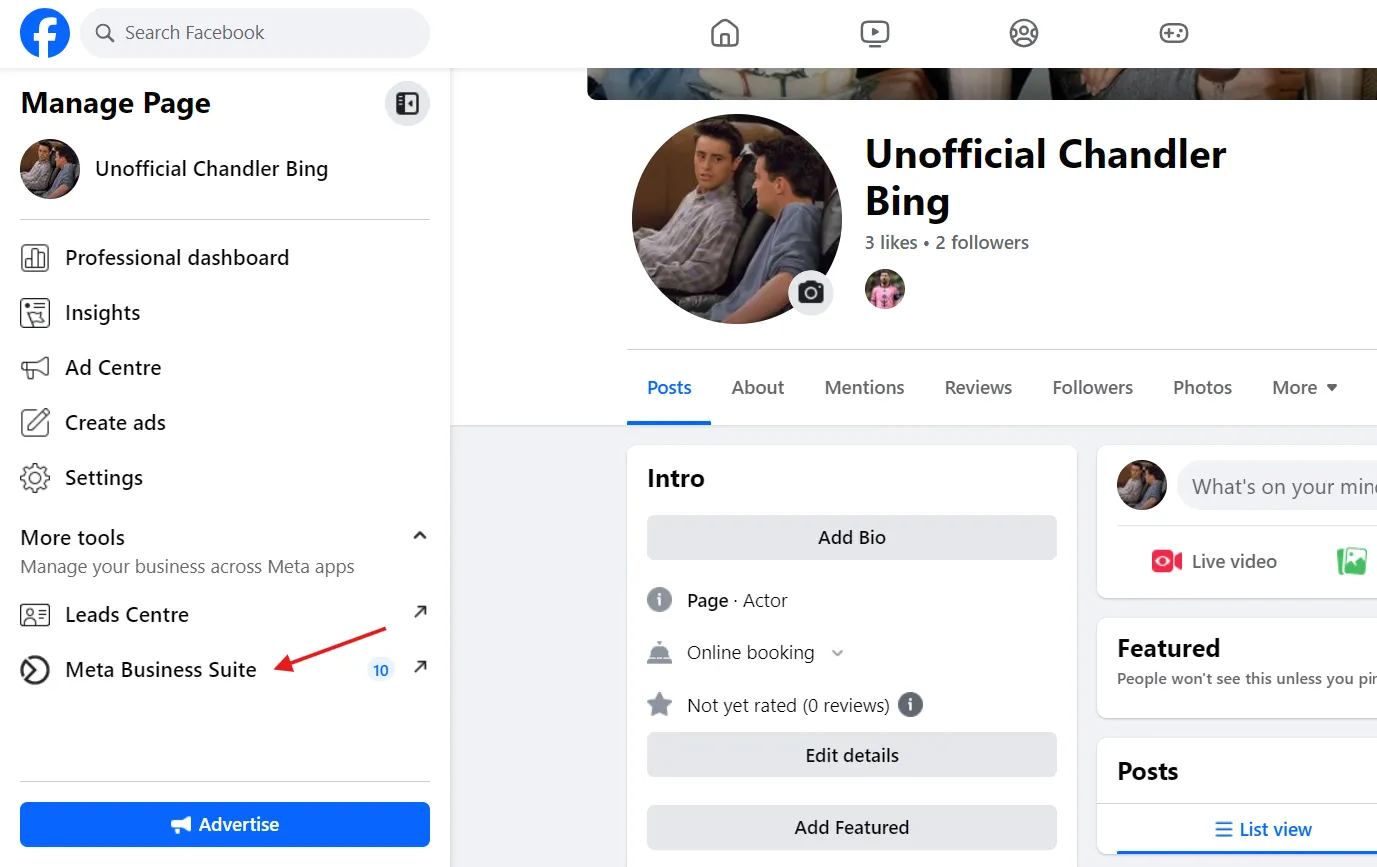
Step 5: Navigate to “All tools” and tap to open a new window.

Step 6: Search “Sell products and services” and select “Services.”
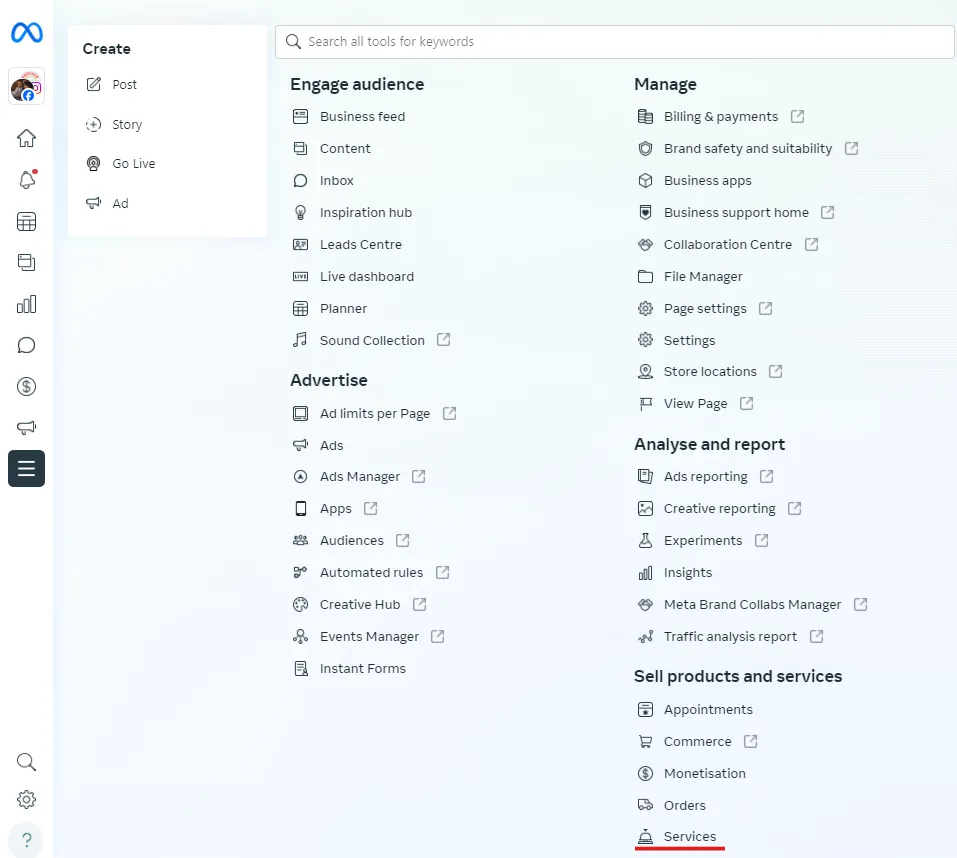
Step 7: Click “Add a Service” and fill in all the required information.
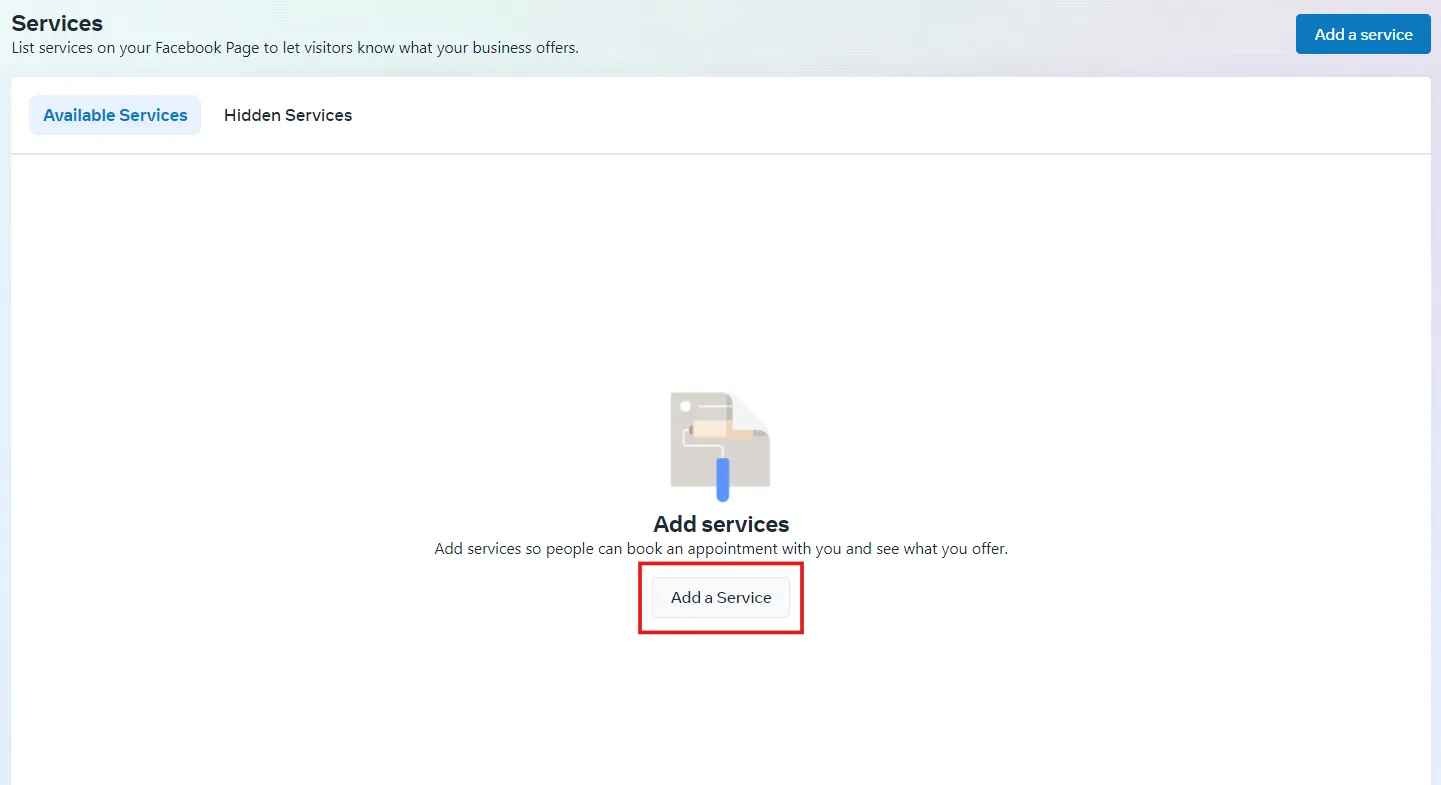
Step 8: Here, you can upload a photo and add a description, pricing, and booking timings for your service. Once everything is filled out, click on “Add Service.”
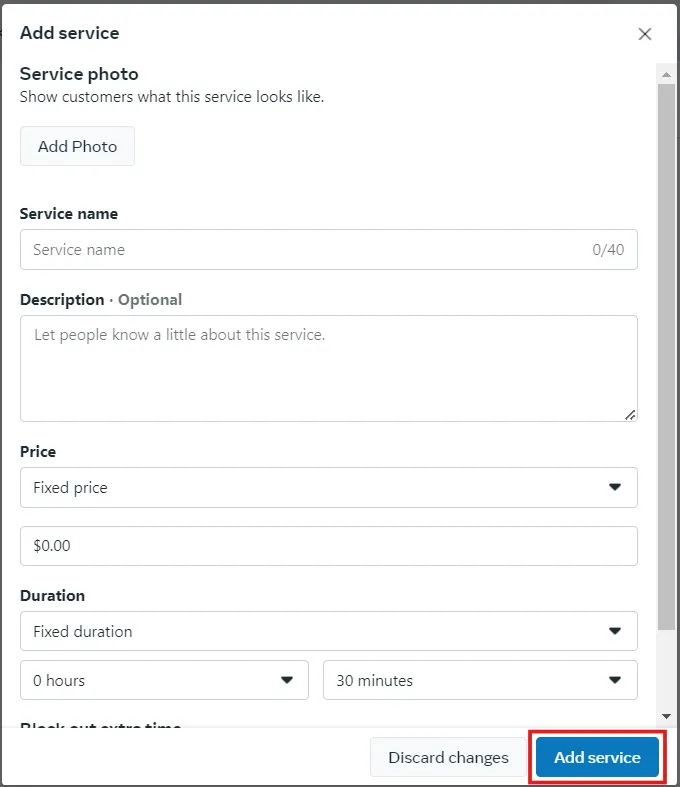
The job is not done yet. After adding your services, when you head over to your Facebook page dashboard, you won’t find “Services” listed there.
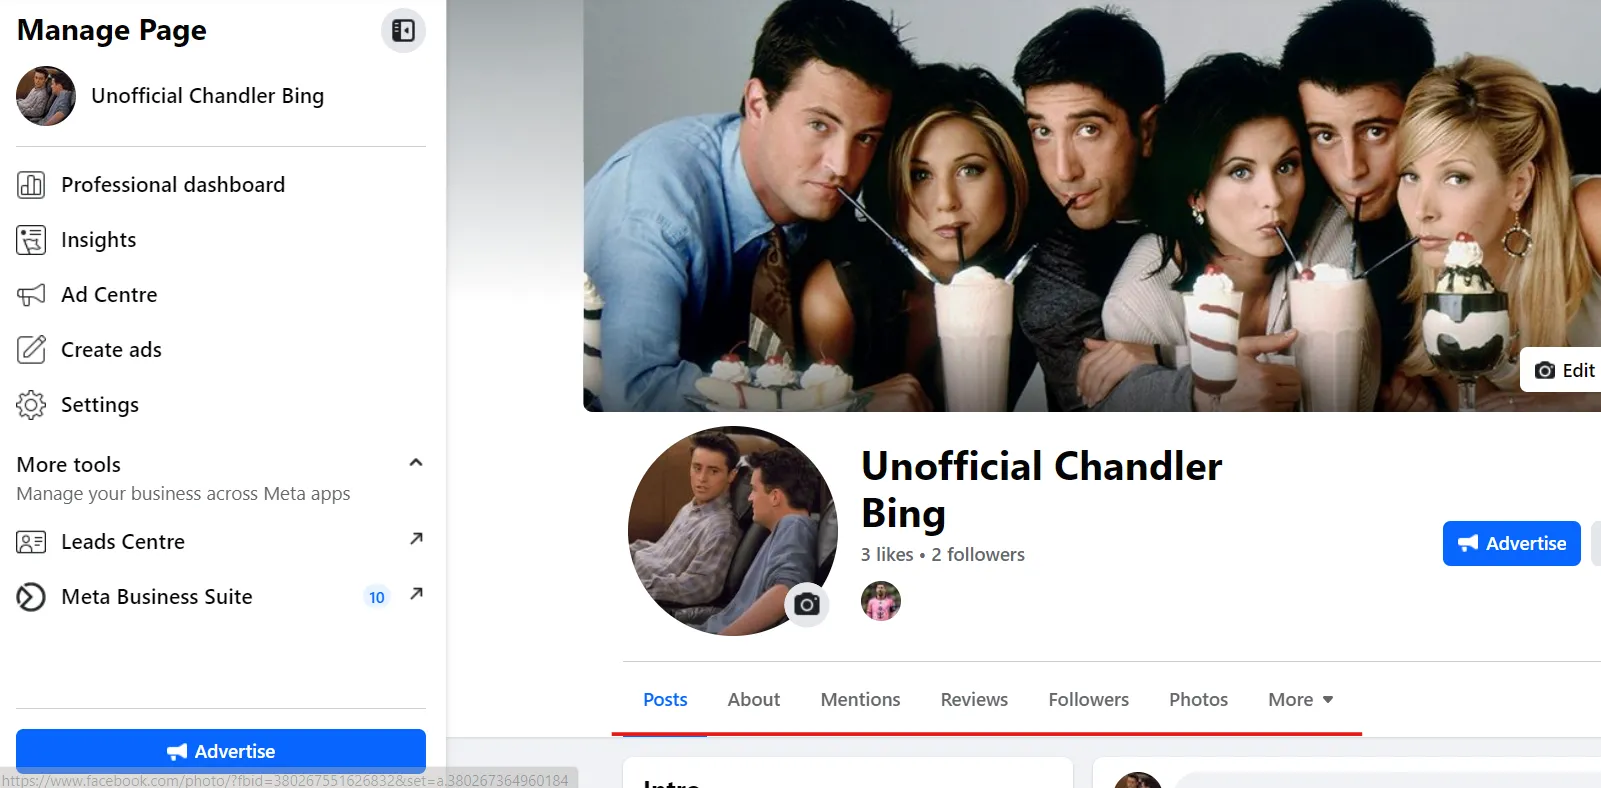
To make your service appear on the profile dashboard, you need to perform the second part of the process.
Steps to Edit Services on Facebook Page
You will need to perform a few more steps to add your service to your page for visitors to book it. Let’s break down the process.
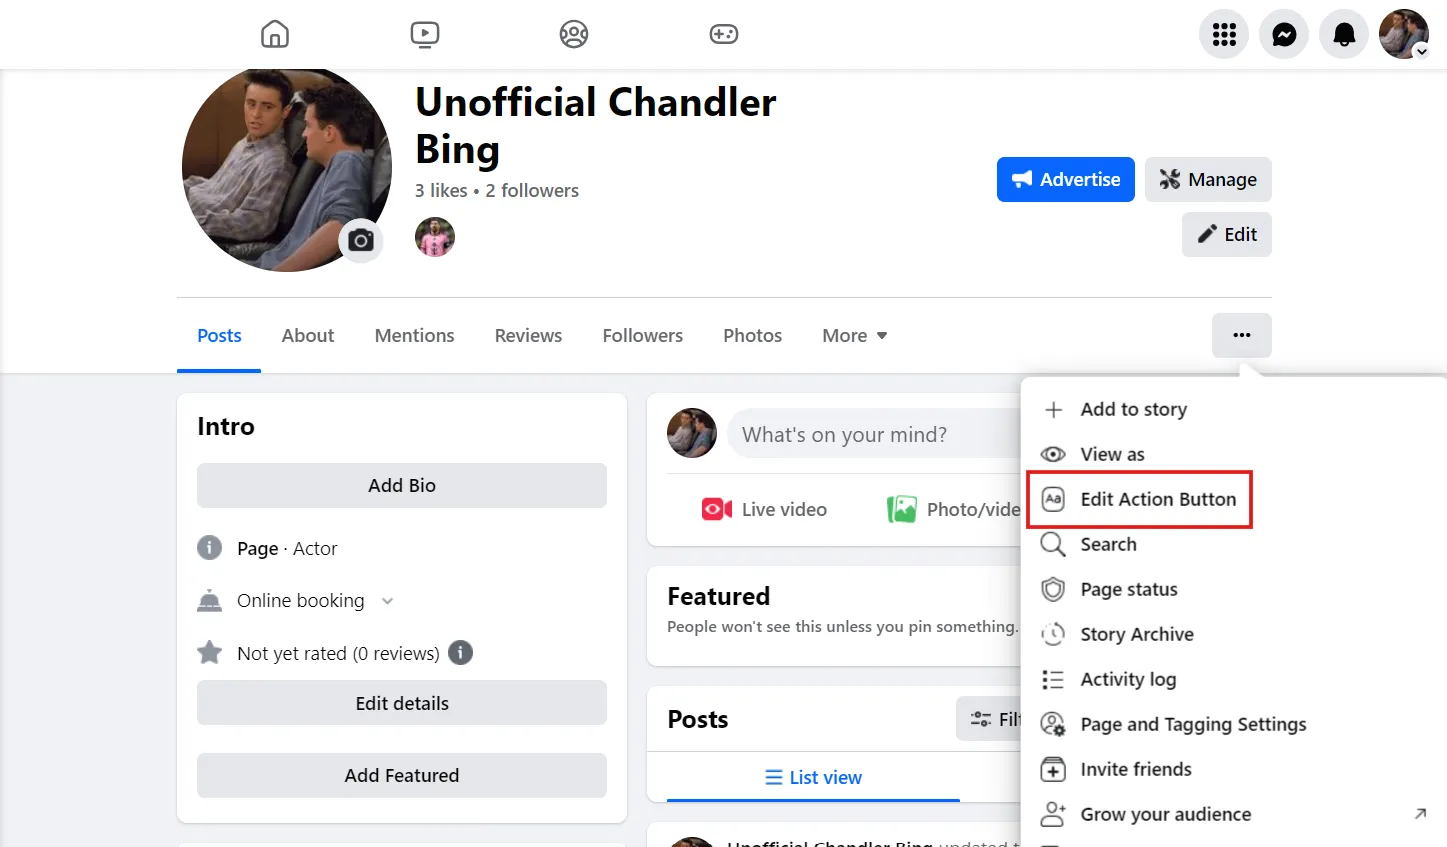
Step 1: Click on the three dots on the Facebook page and tap “Edit Action Button.”
Step 2: In the next window, hit “Try It.”
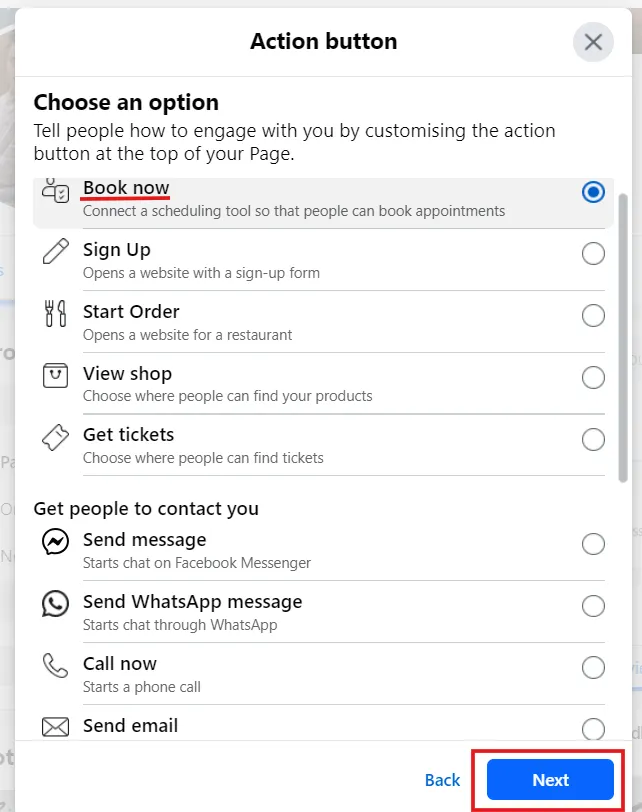
Step 3: From here, click “Book now” and then “Next.”
Step 4: From this popup, select “Scheduling tool.”
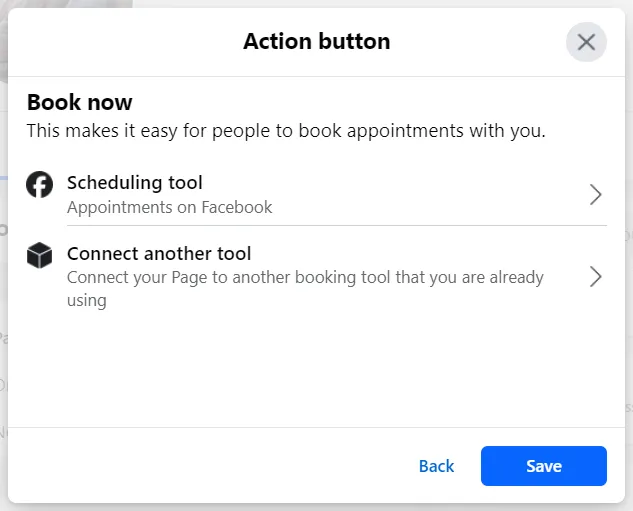
Step 5: In “Edit Services,” you will see all your services, which you can shuffle up or down accordingly.
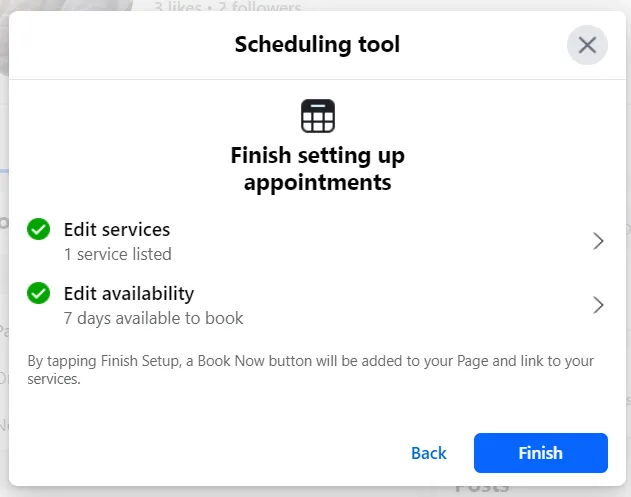
Step 6: Click “Edit availability” and add your booking hours. You can toggle on or off “Manually approve appointments.”
Step 7: Finally, tap “Finish” and switch back to your personal Facebook profile.
Step 8: Go to your Facebook page, and you should be able to see a “Book Now” button with the services listed.
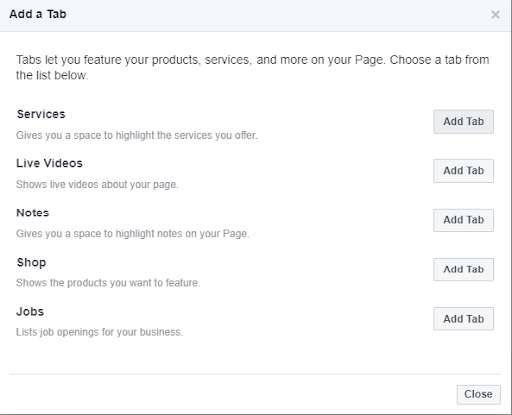
Finally, you have successfully listed your services on your Facebook page. Your clients can now easily book and schedule your services directly from your page based on the available calendar timings.
What Information Should You Add About a Service?
Facebook allows you to customize the order of your services, which determines how they will be presented to users during the booking process.
But you can customize more than just rearranging services. You can add information about your offerings, such as service title, description, pricing, duration, etc.
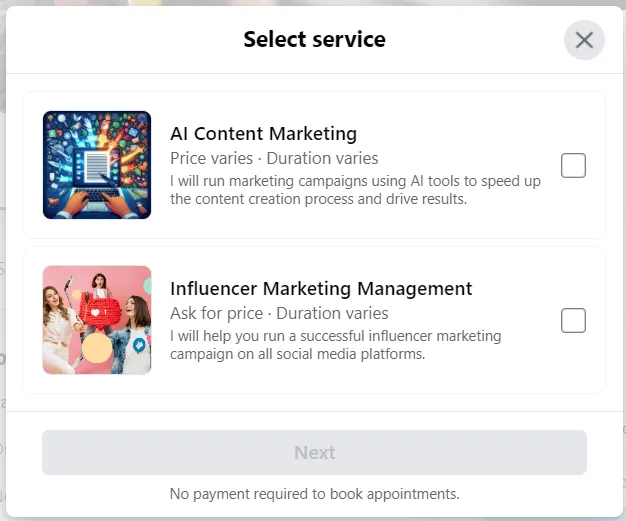
Here are some key information you should add in your services:
Add description
Since you have limited space for describing your service, make sure you describe it in a way that shows its value. Treat the description like an elevator pitch and try to inspire your target audience to book your service.
Start with the most important details at the beginning. Then, add any additional information within the 600-character limit. This way, when prospective customers click on a service, they will see the key information first and can click ‘More’ to read further details.
Add images
Though adding information about your services will do the needful, adding related imagery can help you enhance branding, too. If you have an image available for each service that you have added to your website, use those images on your Facebook business page.
Add the price of your service
You can add a fixed price to your services on your Facebook page. This helps you avoid wasting time with customer inquiries who can’t afford it and frees up time for you to focus on more serious leads. Potential customers can quickly understand if your service pricing aligns with their budget.
Meta allows you to add multiple pricing options, such as “Starting from,” “Variable price,” “Ask for a price,” and “No price.” This flexibility enables you to set prices according to your business model.
How Does Adding Information About Services Help Your Business Grow?
The biggest benefit of adding the Services tab to your Facebook business page is the enhanced visibility of your offering and smooth accessibility to book them. The quick glimpse enables you to make a user-friendly experience for your audience.
Let’s break down all the benefits so that you can’t miss adding them:
Increases Awareness and Visibility
By listing your services on your Facebook page, you provide immediate clarity to your potential customers on what your business offers. This visibility helps you attract the right customers, especially those who are searching for a specific service. To make the most of this visibility, consider following these tactics to improve your Facebook business page so your services section works alongside an optimized page.
Direct Communication Channel
The Services tab allows customers to reach out to you directly with any inquiries. Providing prior knowledge of available timings, pricing tiers, and visual descriptions it streamlines the interaction process and increases conversion rates.
Improve Search Rankings
Facebook pages are a great medium to reach the massive audience base of Facebook and display your services. However, as more and more businesses are making their service pages, the competition to become visible in search results has become stiff.
Providing detailed descriptions with proper use of target keywords helps your page rank higher in Facebook’s search results when people search for related services in relevant locations.
Feedback and Testimonials
Customers can leave feedback and reviews about your services on your page. This not only acts as social proof for your potential customers but also helps them learn more about your services and their benefits.
Tips to Follow When You Add the Services Section to Your Business Page
You should follow some must-dos to optimize your service section so that it grabs maximum eyeballs and converts.
Keep Information Up-To-Date
Always ensure that the service information added to your Facebook page is up-to-date and does not miss any important element. Check whether the information about your pricing, working hours, service description, location, and images is updated.
This will help you avoid unnecessary criticism and ensure a great customer experience at all times. Also, make sure you delete any service you are no longer offering from your page.
Ask for Customer Reviews
Ask customers to leave reviews and ratings for your services. Having a good number of authentic reviews on your service page acts as social proof and builds trust among new visitors. Respond to all reviews, whether they’re positive or negative, to show how much you care about your customer’s feedback.
Add Your Business’s Local Address
Add your location to your business page; it enables customers to visit your physical store. This is crucial for brick-and-mortar businesses relying on foot traffic. Even for online services, adding an address boosts credibility, optimizes local search rankings, and draws customers preferring in-person interactions, especially those less tech-savvy or averse to online transactions.
When you add a new service to your official page, the next step is to share it on your timeline. This increases the service’s visibility and keeps the audience updated. This way, interested clients can reach out to you and generate leads for your services.
Cheat Codes to Remember While Adding Your Service to Facebook
- The picture size for a service is the same size as your profile picture. Facebook recommends dimensions of 180px by 180px. However, you can keep it to a minimum of 160px by 160px. Remember: The image should have a ratio of 1:1.
- You cannot reorder your services once you have entered them. Be careful and add the services in the order you would want your visitors to see them.
- Use the pricing option to encourage a Call to Action. For instance, use “Ask for Price” to start a conversation.
- To further build trust and credibility, you can also verify your Facebook business page so your profile stands out as authentic and professional.
Thats it! You have finally made it.
This is how adding the services section to your Facebook page helps you generate more leads for your business. It’s definitely not to say that a Services section will boost your brand’s ROI or take your business from zero to one. But what it will do for sure is encourage your prospective customers to want to know more about you and probably do business with you.


