

A Facebook group can help you build a community around shared interests, connect with customers, or bring people together for discussions, support, and collaboration. In October 2024, Meta reported that almost 1.8 billion people use Facebook Groups every month, across 25 million monthly active public groups.
Whether you’re creating one for your business, school, nonprofit, or personal network, the right setup can make it easier to attract relevant members and keep conversations meaningful.
Before launching your group, consider who it’s for, whether its posts should be public or private, and who will manage membership and moderation. A clear purpose, appropriate privacy settings, and simple group rules give members a better experience from the start.
This guide covers the key decisions and setup considerations to help you create a Facebook group that serves its purpose.
How Do You Create a Facebook Group, Step by Step?
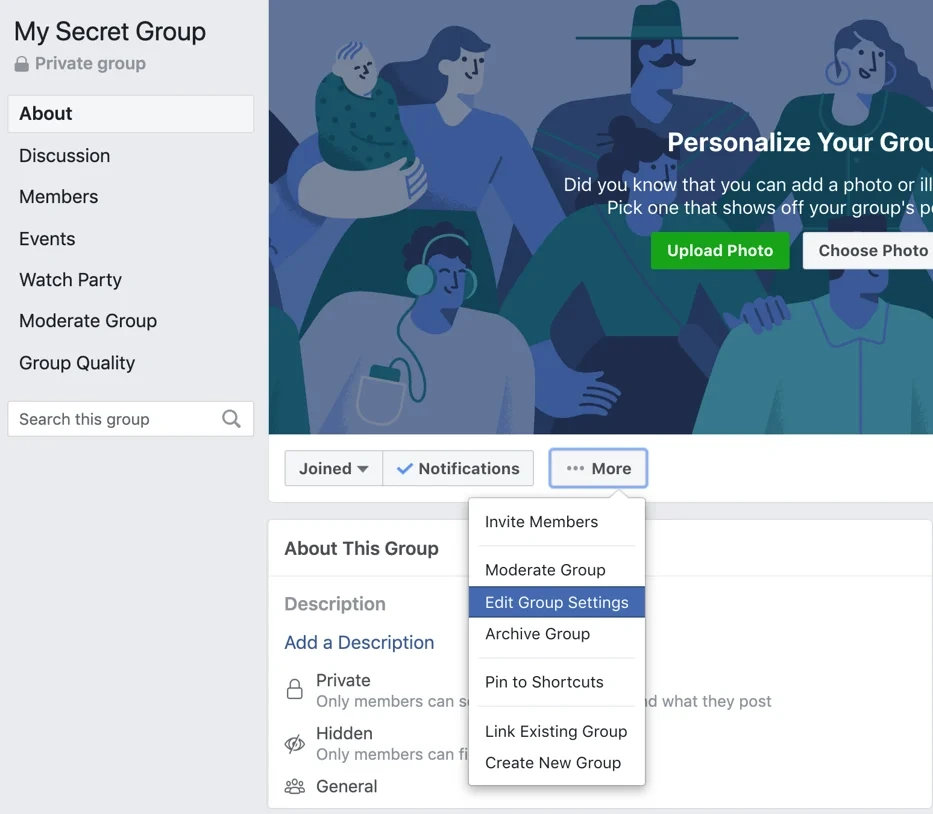
To create a Facebook group, open Facebook, go to Groups, and choose Create new group. Enter a name, choose public or private (and visible or hidden for a private group), invite people if you want, then click Create. Add a cover photo and description right after. The whole process takes a few minutes on desktop or mobile.
Before You Start: What You Need
Having these ready saves you from changing things later.
| What you need | Why it matters |
| A Facebook account you can log into | Groups are created from inside Facebook. To create one as your business Page, you switch into the Page from your account. |
| A group name | Members find you by it. Facebook only lets you rename a group once every 28 days, so pick one you can live with. |
| A privacy decision | Public or private, and visible or hidden. You can change it later, but some changes are restricted for big, older groups. |
| A cover photo | A wide image that shows what the group is about. |
| Two or three sentences of description | Who the group is for and what people do in it. |
For a business or organization, also decide whether the group belongs to your profile or your business Page. That route has its own section below.
How to Create a Facebook Group on Desktop
Here’s how to make a Facebook group from a computer, following Facebook’s “Create a Facebook group” help page.
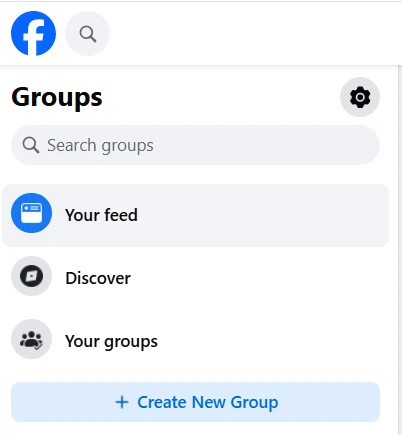
- From your Feed, click Groups in the left menu. If you don’t see it, click See more and click on Create New Group.

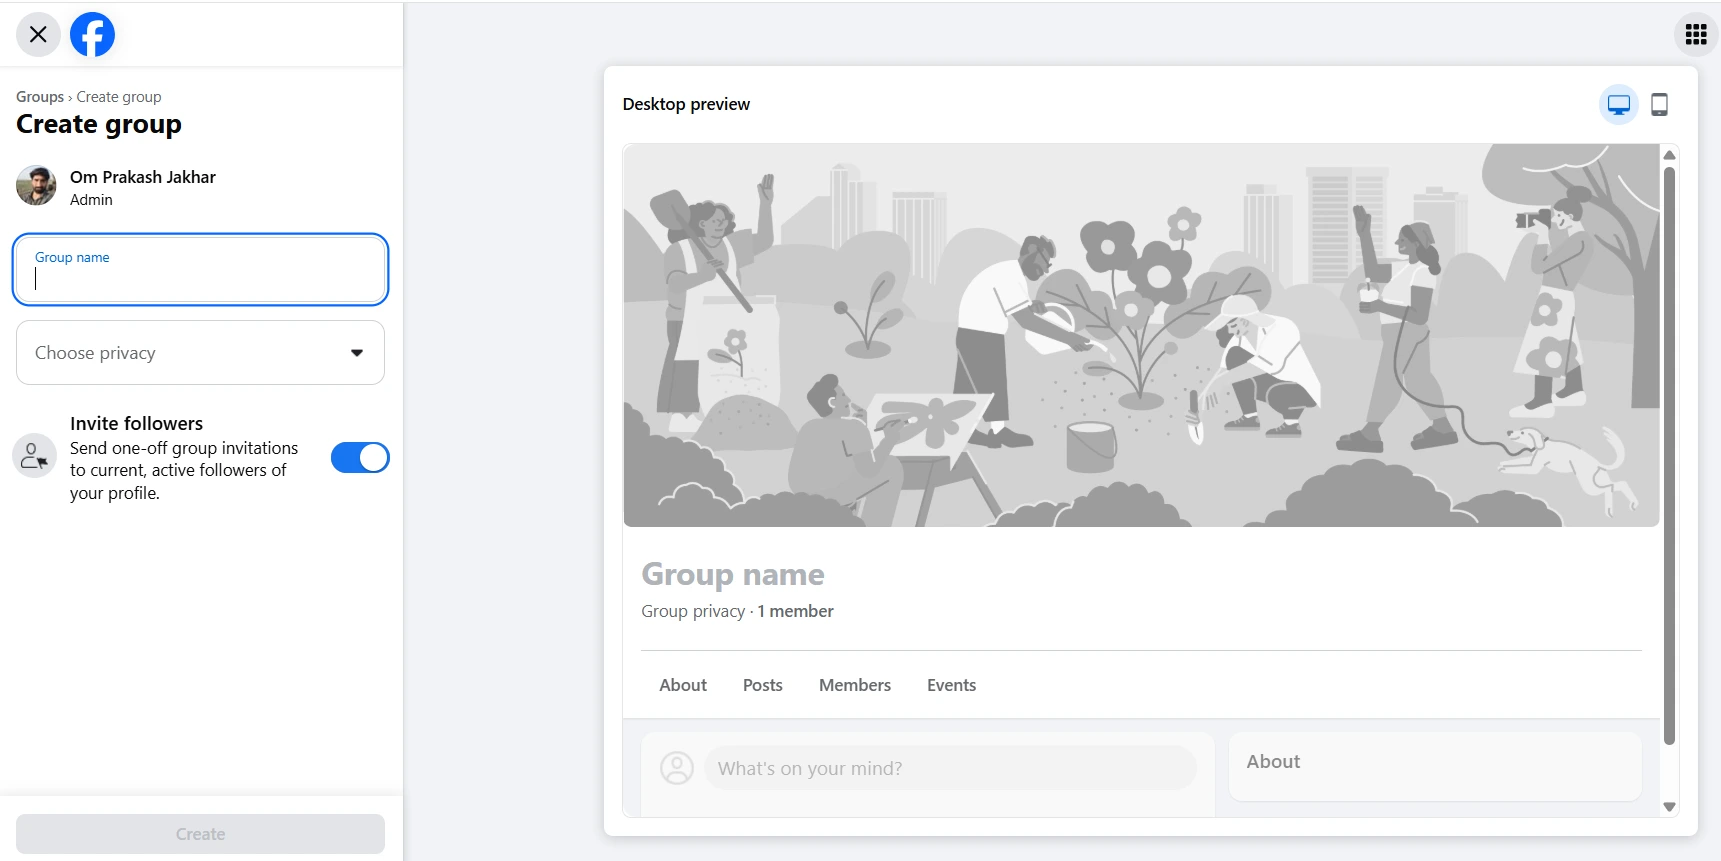
- Enter your group name.

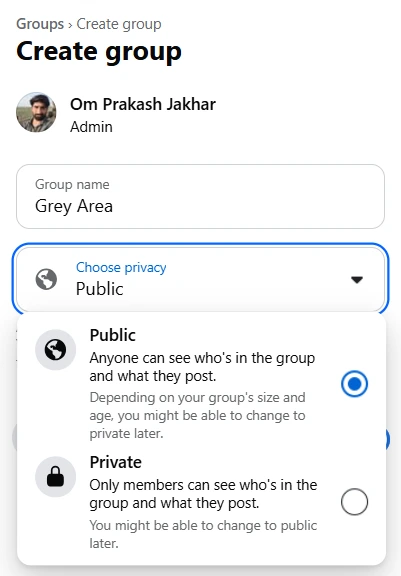
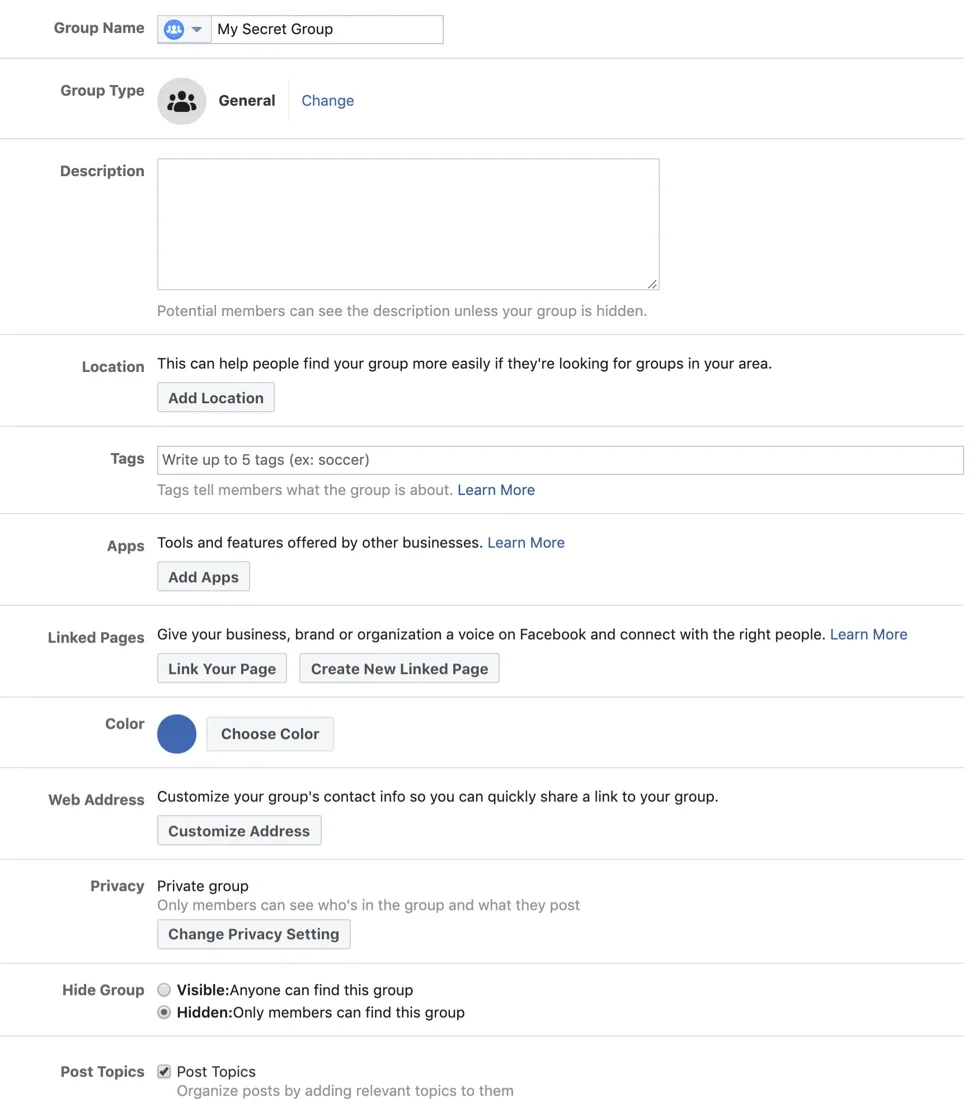
- Select the privacy option. If you choose Private, also choose whether the group is Visible or Hidden.

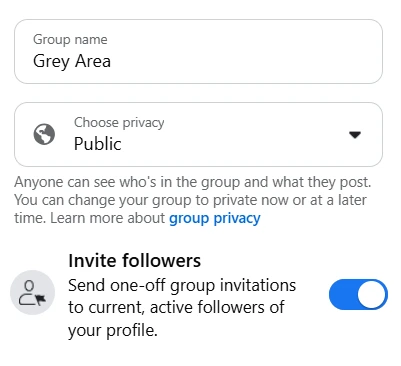
- Invite people to your group. You can skip this and invite people later.


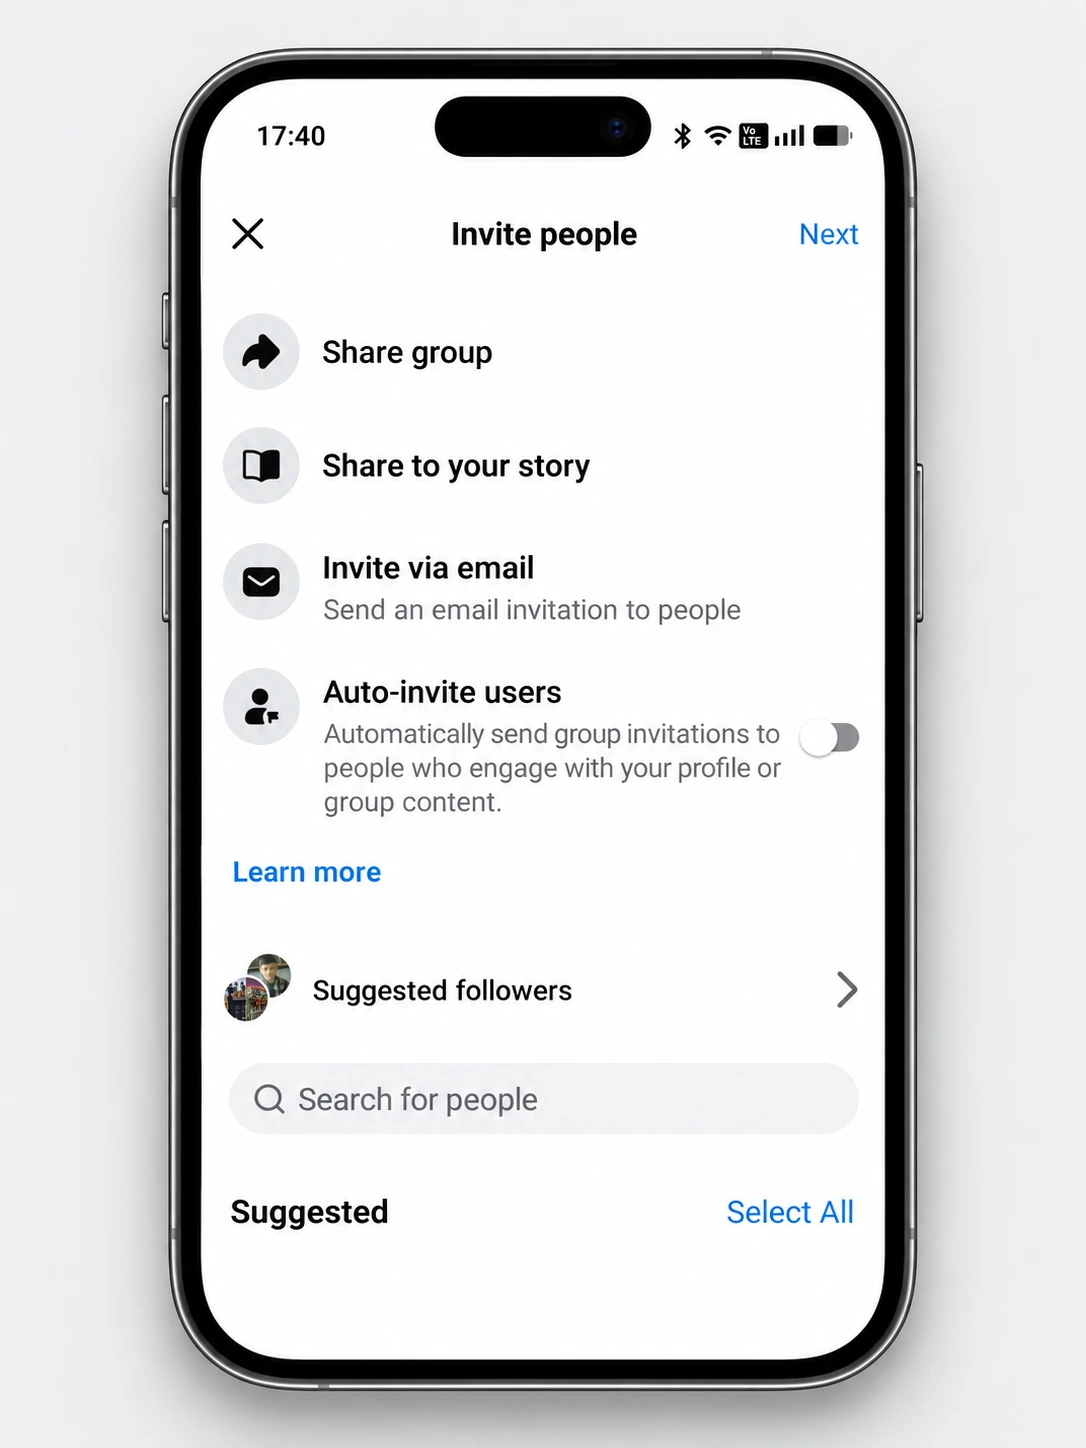
- Click Create.
How to Create a Facebook Group on Mobile
The Facebook app on iPhone and Android follows the same order with different buttons. This list follows Facebook’s mobile help for creating a group:
- Tap Menu in the top left of Facebook, then tap Groups. If you don’t see Groups, tap See more.
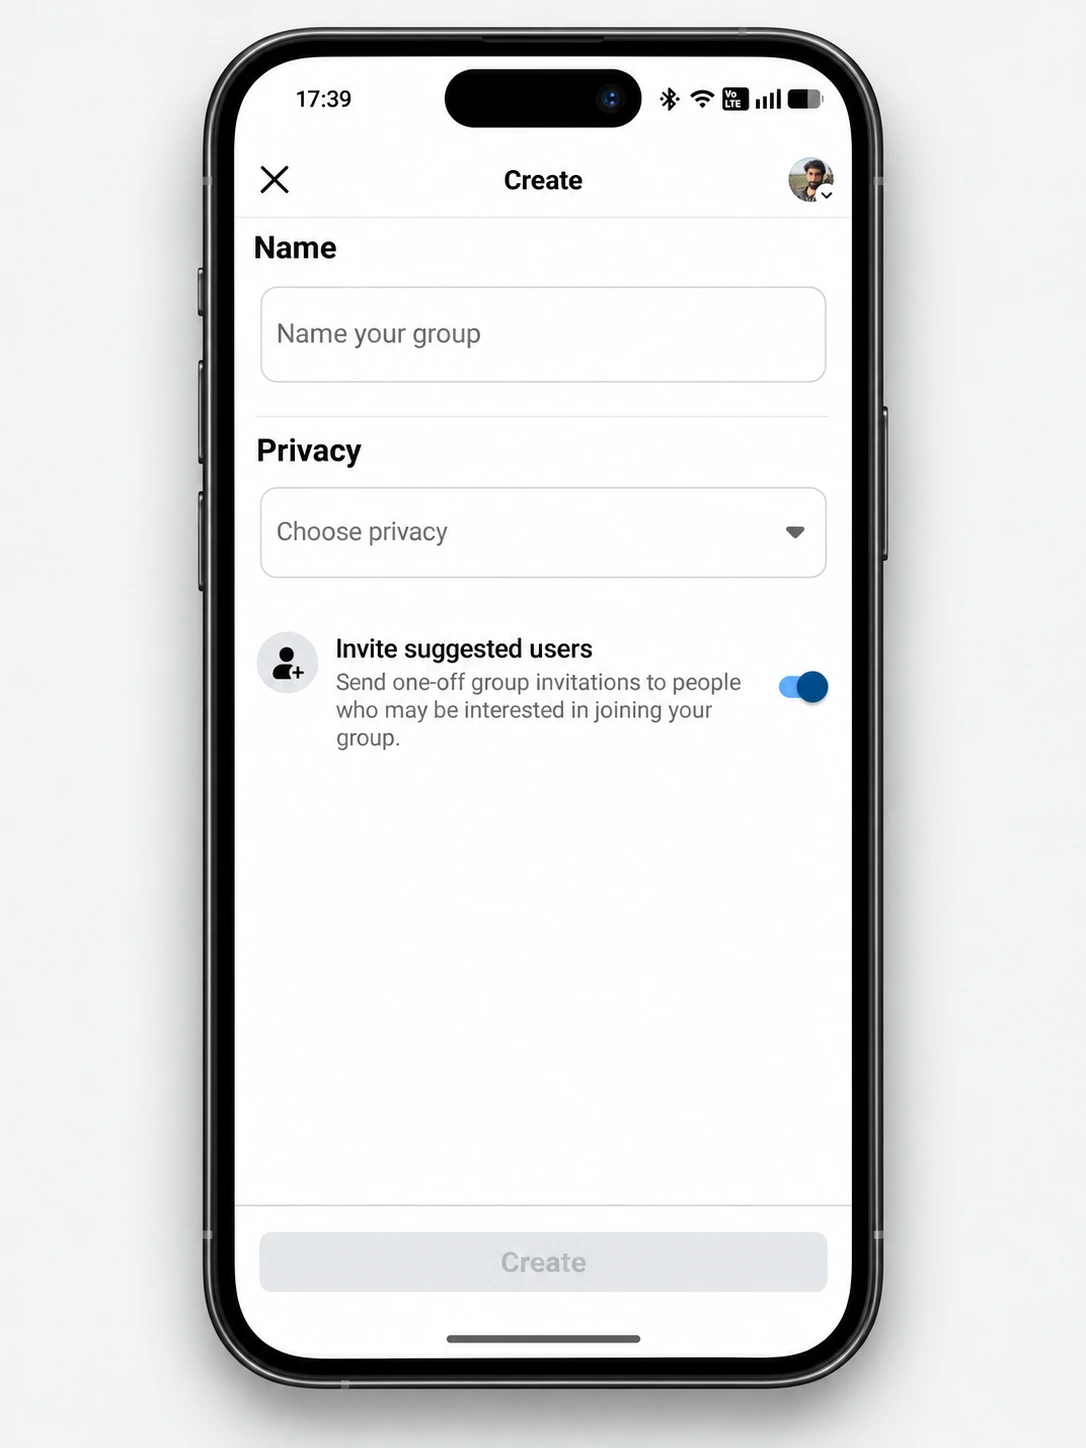
- Tap Create, then Create group. On iPhone, Facebook’s help places Create in the top right and labels the option Create a Group.
- Enter your group name.
- Select a privacy option. If you choose Private, pick Visible or Hidden. Facebook’s mobile help says you then choose a group size.
- Tap Create Group.
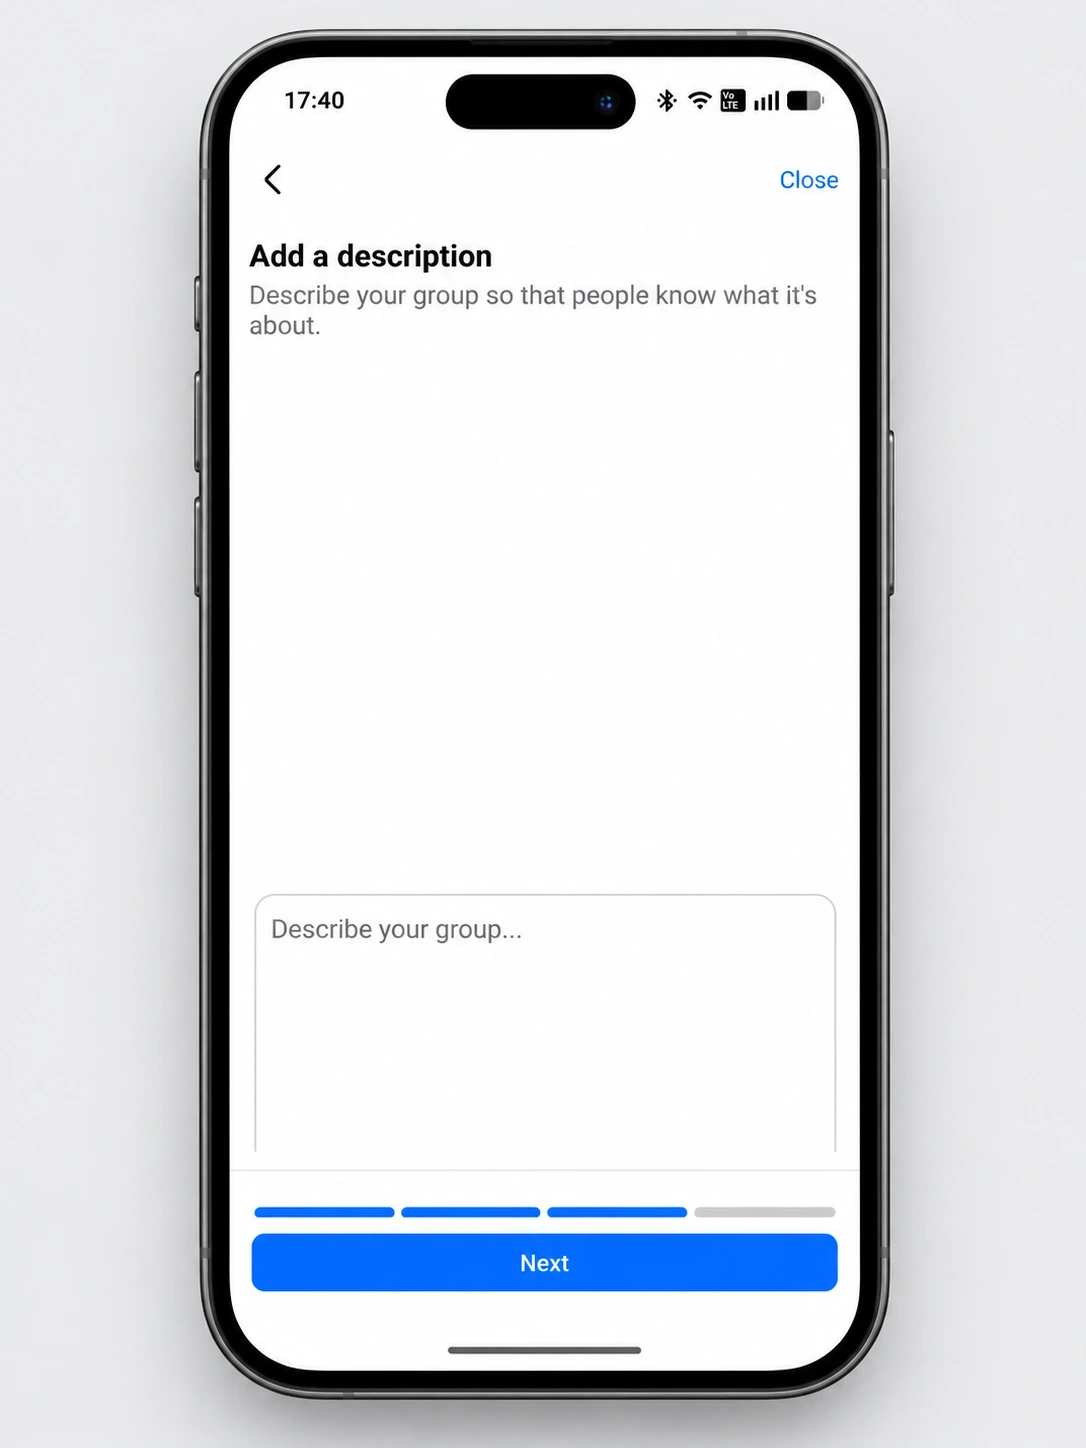
Public or Private? Choosing Your Privacy Setting
A public group lets anyone see its posts and members. A private group shows posts and members only to members. If you go private, you also choose whether the group is visible (people can find it and ask to join) or hidden (only members and invited people can find it). Most community and customer groups pick private and visible.
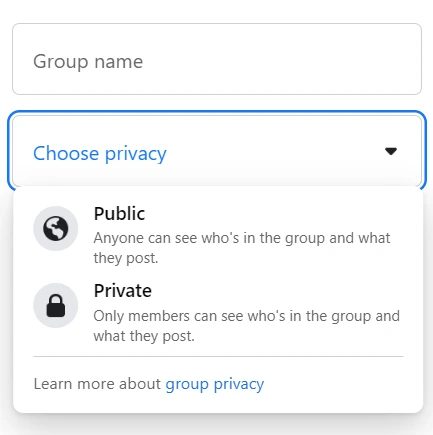
The table compares the options, using Facebook’s help page on the differences between public and private groups and its page on hiding a private group.
| Setting | Who can see posts | Who can see the member list | Who can find the group | How people join |
| Public | Anyone, on or off Facebook | Anyone on Facebook | Anyone | Anyone can join |
| Private + Visible | Members only | Members only | Anyone on Facebook | Request to join, approved by admins or moderators |
| Private + Hidden | Members only | Members only | Current, invited and former members | By invitation or link |
- Pick public for open discussion with nothing personal in it.
- Pick private and visible for most customer, local and interest groups. People can find you, but only members see what’s said.
- Pick private and hidden for staff groups, paid client groups or support groups that shouldn’t show up anywhere.
If you change your mind later, Facebook lets a public group switch to private unless it has 10,000 or more members and is 30 or more days old.
A private group can go public, but posts from its private days stay visible only to people who were members then.
Public groups are always visible, so a group must be private before you can hide it. If you think the group may need to go private one day, make that call before it gets big.
Finish Setup: Cover Photo and Description
Once the group exists, Facebook’s help says you personalize it with a cover photo and a description. Do both before you invite anyone, because they’re the first things a new member sees.
Make the description answer three questions: who the group is for, what people do there, and what isn’t allowed. If a business runs the group, say so. Facebook recommends that admins share any commercial or business affiliation in the group.
For the cover photo, pick an image that makes the topic obvious at a glance. Skip busy text, since phones and computers crop it differently.
Should You Create a Facebook Group or a Facebook Page?
Create a Facebook Page if you want to publish to followers as a business, brand or public figure. Create a group if you want members to talk to each other. A Page is a one-to-many channel. A group is a shared space where any member can post. Many businesses run both: the Page for announcements, a linked group for the community.
Facebook Group vs. Page: The Key Differences
The first row matters most day to day, because it decides who gets to post.
| Facebook Page | Facebook group | |
| Who posts | The Page (you or your team) | Any member, unless admins turn on post approval |
| Who sees it | Public: anyone can see it | Public or private, your choice |
| People are called | Followers | Members |
| Best for | Announcements, offers, customer service, ads | Discussion, support, peer help, events for a set group of people |
| Who runs it | Page admins with access to the Page | Group admins and moderators |
| Can it have both? | Yes. A Page can create and run its own groups | Yes. A group can have a Page as an admin |
Still unsure what a business Page offers? Here’s what a Facebook business Page is and what it’s for.
What People Mean by a “Group Page”
A lot of people search for “how to create a Facebook group page” or “a Facebook page for a group.” Facebook doesn’t have a product called a group page. People usually mean one of two things:
- A Facebook group, the community space itself. If that’s you, follow the steps in the first section.
- A Facebook Page that runs a group, so the group belongs to your business or organization rather than to you personally. If that’s you, jump to the section on creating a group with your Page as the admin.
Most businesses want the second one, so the brand name shows as admin and the group appears on the Page.
Can You Convert a Facebook Page to a Group?
No. Facebook’s Help Center doesn’t describe any way to turn an existing Page into a group, and followers don’t become members. What you can do is create a new group with your Page as its admin, then invite people from the Page to join it. The Page and its followers stay as they are.
Facebook’s business help covers the reverse situation, creating a Page for your group, as a manual move rather than a conversion.
Can You Create a Facebook Group Without a Personal Account?
Not according to Facebook or Meta instructions. Even when a group is created as a business Page, Facebook’s instructions start with logging into Facebook and switching into the Page from your profile menu. Once the group exists, your Page can be the admin, so members see your brand name rather than yours.
How Do You Create a Facebook Group for a Business or Organization?
A Facebook group for a business or organization starts from your business Page. Switch into the Page first, then create the group from the Page’s Groups menu, and the Page becomes the group’s admin. If you already run a group from your personal profile, you can add your Page as an admin of that group instead.
Create a Group with Your Page as the Admin
This route ties the group to your brand rather than to you, which helps when a team runs it. You need a Page first. If you don’t have one yet, start with creating a Facebook Page for your business.
Facebook’s help page Create a Facebook group as your Facebook Page gives these steps:
- Log into Facebook, then click your profile photo in the top right.
- Click See all profiles, then select the Page you want to switch into.

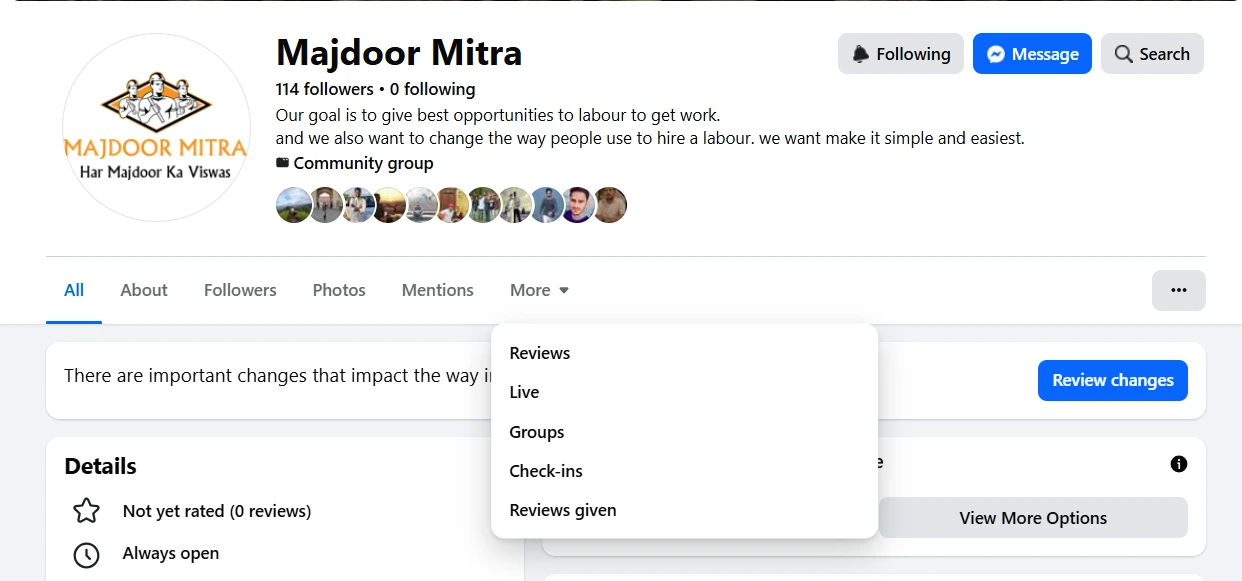
- From your Feed, click Groups in the left menu.

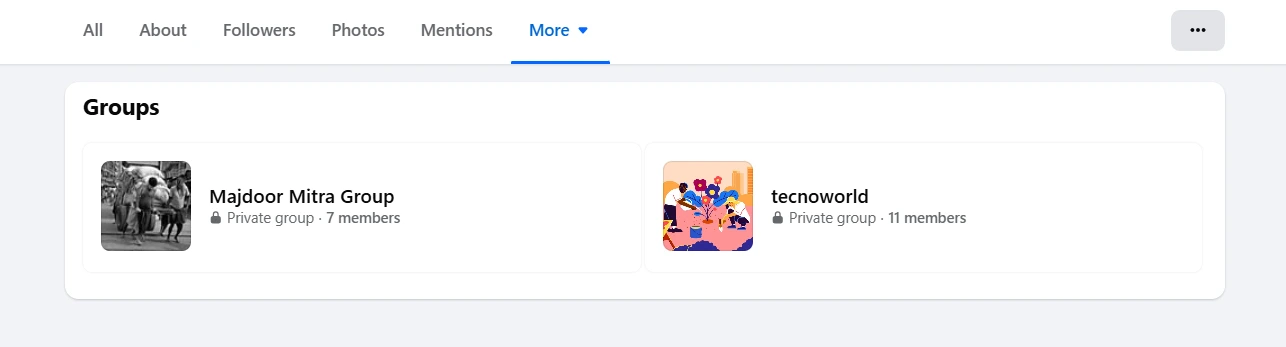
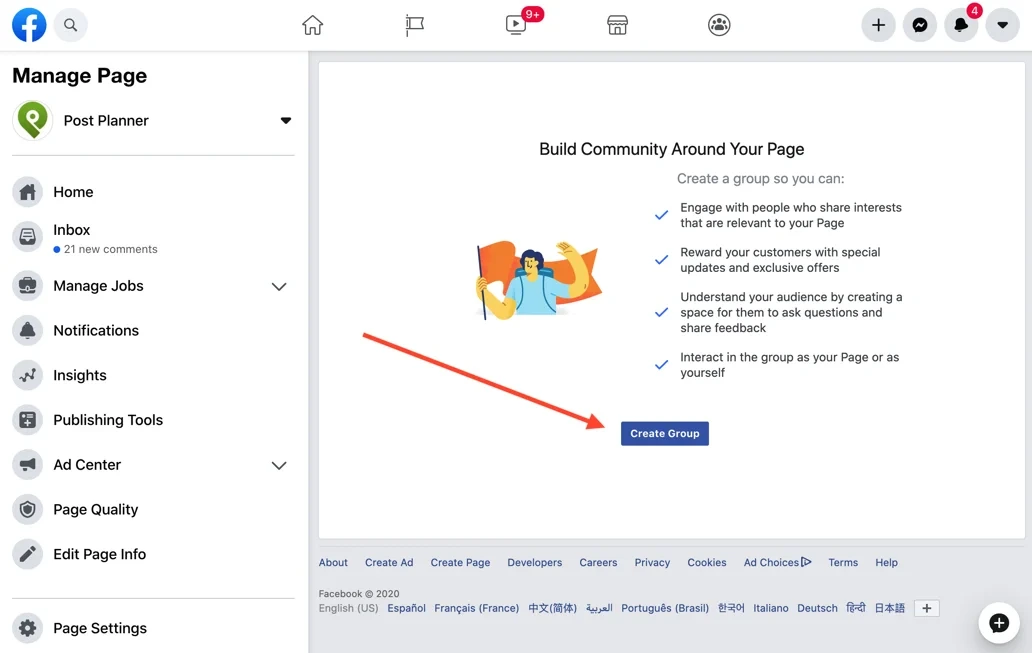
- Click Create New Group in the left menu.

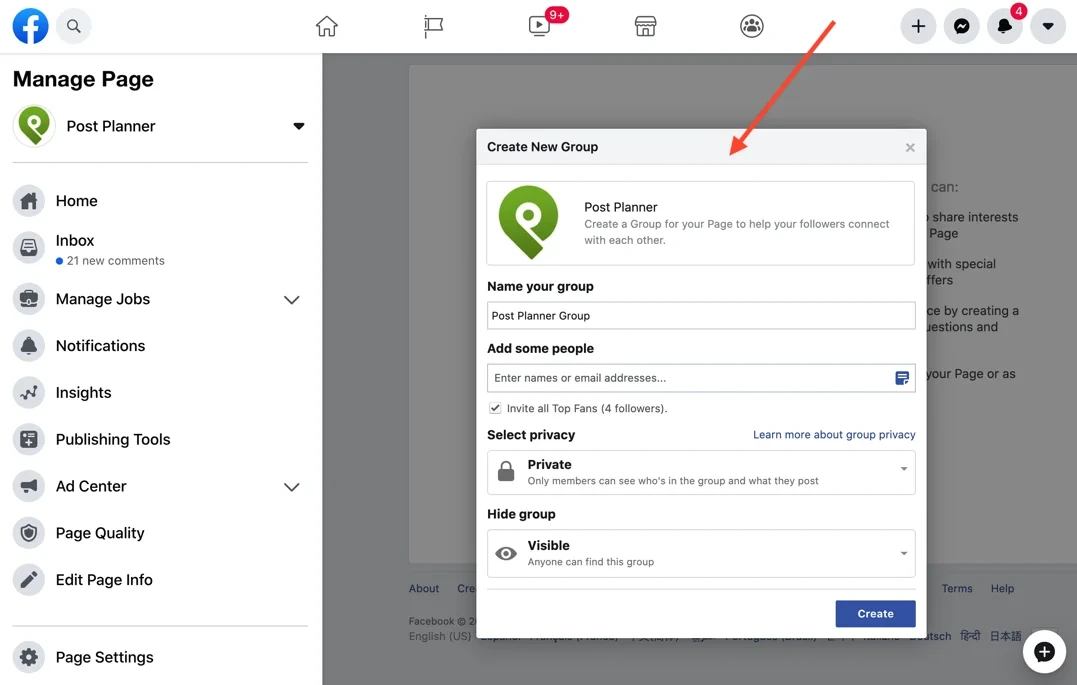
- Fill out the onscreen sections for your group.
- Click Create.

Three rules from Facebook’s help to know before you start:
- A Page can be the admin of up to 200 groups, and those groups are listed on the Page.
- Pages with age restrictions can’t be connected to a group.
- To act as the Page in a group, you need Facebook access to the Page.
Add Your Page as an Admin of an Existing Group
Already have a group you created from your personal profile? You don’t need to start over. Facebook lets a group admin make a Page an admin in two stages.
First, the Page joins the group. Groups can’t invite Pages to join, so the Page has to request to join while you’re switched into it. If the group doesn’t let Pages join, turn that on in the group’s settings first.
Then, from your personal profile as group admin:
- From your Feed, click Groups in the left menu and select the group.
- Click Members or People below the cover photo. If you don’t see them, click More.
- Click Options next to the Page.
- Select Invite as admin, then Send Invite.
Accept the invite while acting as the Page, and the Page is now an admin alongside you.
Create a Group for a Club, School, or Nonprofit
The steps are the same for a club, school or nonprofit, and the differences show up in the setup choices, since these groups are usually about members rather than marketing.
| If your group is… | Privacy | Run it from | First thing to set up |
| A parents’ group for one class or school | Private + Hidden | A volunteer’s profile, with 2 or more admins | Membership questions to confirm people belong |
| A nonprofit’s volunteer or supporter group | Private + Visible | The nonprofit’s Page | Rules on what can be posted and shared |
| An alumni, hobby or sports club | Private + Visible | The club’s Page, or two committee members | A pinned welcome post with the event calendar |
| A public cause or campaign | Public | The organization’s Page | Post approval so spam doesn’t spread |
One thing matters more for volunteer groups than any other kind: never run the group with a single admin. Facebook’s help explains that if the only admin leaves or deletes their account, the group is automatically paused unless a new admin accepts within seven days. Volunteers move on. Add a second admin on day one.
What Should You Set Up Right After Creating Your Group?
Three things should be in place before you invite your first members: written rules, at least one other admin or moderator, and membership questions with approval turned on. Together they take about 20 minutes. They decide who gets in, what people may post, and who deals with problems when you’re not online.
Write Group Rules, With Copyable Examples
Rules work best when they’re short, specific and easy to point to when you remove a post. You’ll find the option for group rules in your group’s admin tools (look under Manage).
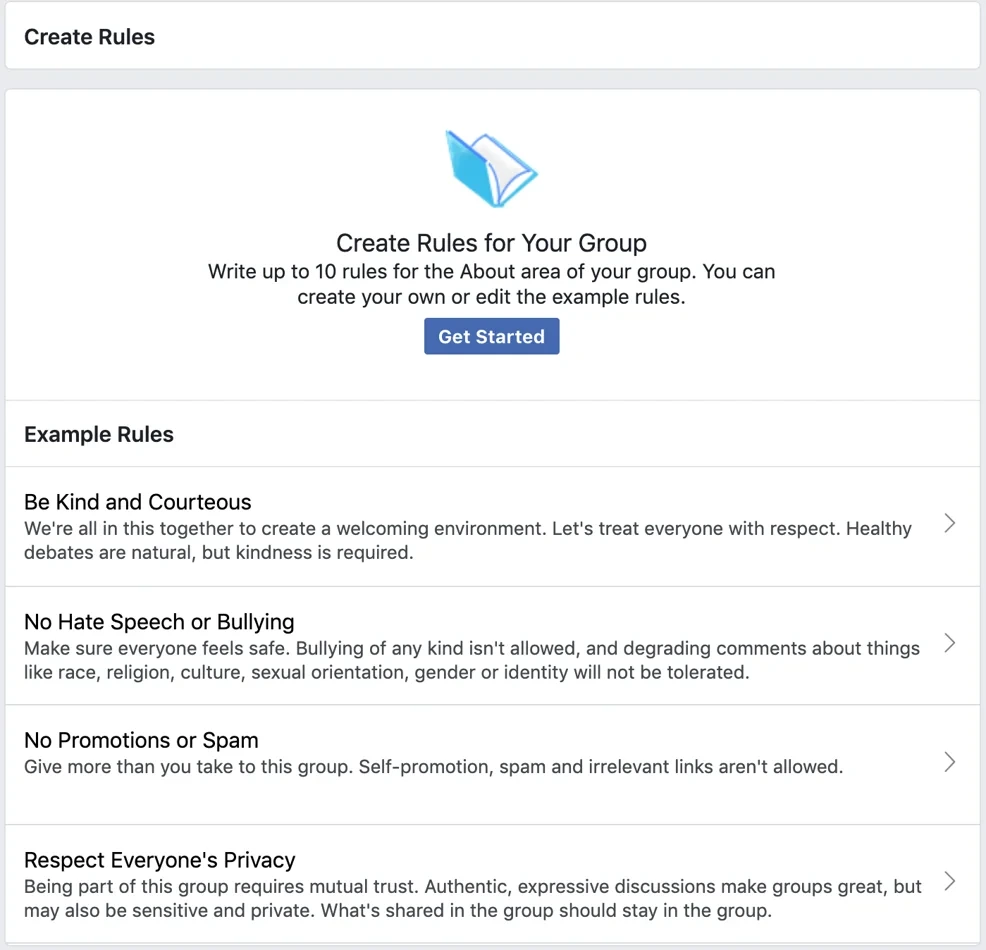
Here are rules you can copy and edit. Pick the five or six that fit your group rather than all of them.
For any group
- Be kind. Disagree with ideas, not people. Insults, name-calling and pile-ons get removed.
- Stay on topic. Posts should be about [your topic]. Off-topic posts may be removed without notice.
- No spam or self-promotion. Don’t post links to your products, services or pages unless an admin has said it’s okay. Use the weekly promo thread instead.
- Respect privacy. What’s shared here stays here. Don’t screenshot or share members’ posts outside the group.
- Admins have the final say. If a post is removed, you can message an admin to ask why.
Extra rules for a business or customer group
- Support requests go to [link or email]. We can’t handle orders or account issues here.
- This group is run by [Business Name]. Our staff are marked as admins.
Extra rules for a club, school or nonprofit group
- Members only. Please don’t add people who aren’t part of [organization].
- Children’s photos are only shared with a parent’s permission.
You can also show the rules in the new member intro that greets people when they join.
Add Admins and Moderators
Facebook gives you two roles for sharing the work. Admins can do everything, including changing settings, while moderators handle day-to-day work like approving posts and members. The full split, from Facebook’s help page on admin and moderator roles:
| Action | Admin | Moderator |
| Make another member an admin or moderator | ✔ | |
| Remove an admin or moderator | ✔ | |
| Manage group settings | ✔ | |
| Approve or deny membership and participant requests | ✔ | ✔ |
| Approve or deny posts in the group | ✔ | ✔ |
| Remove posts and comments | ✔ | ✔ |
| Remove and ban people from the group | ✔ | ✔ |
| Pin or unpin a post | ✔ | ✔ |
To add an admin or moderator to your Facebook group, follow the steps from Facebook’s help page on adding an admin or moderator:
- Go to facebook.com/groups and select your group.
- Click Members or People below the cover photo. If you don’t see them, click More.
- Click Options next to the person.
- Select Invite as admin or Invite as moderator, then click Send Invite.
The person must already be an active member. An admin can also remove other admins, so give that role only to people you’d trust with the whole group, and make everyone else a moderator.
Set Membership Questions and Approvals
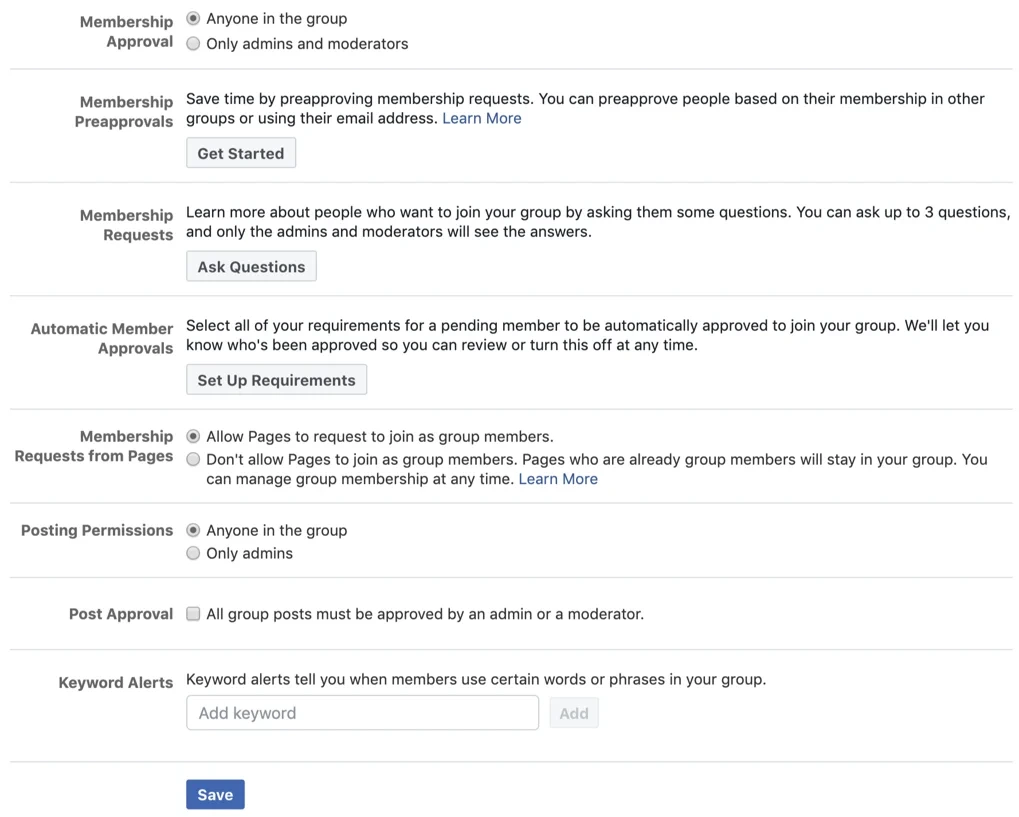
Anyone who asks to join a private group can be asked up to three membership questions first. Admins and moderators see the answers and decide whether to approve the request, which keeps out a lot of spam accounts and people who aren’t the right fit.
To add them, per Facebook’s help page on membership questions:
- Go to facebook.com/groups and select your group.
- Click Manage in the left menu.
- Click Membership questions. For a public group, or a group with limited membership turned on, this shows as Participation questions.

- Click Create or Edit.
- Add your question.
- Choose a question type: Checkboxes, Multiple choice or Written answer.
Each question can be up to 200 characters, and Facebook doesn’t force people to answer, so read the answers as a signal rather than a pass or fail.
Questions that work well:
- “What brings you to this group?” (written answer)
- “Do you agree to follow the group rules?” (checkbox)
- “Which describes you best?” with options like customer, local resident, parent, member (multiple choice)
When requests pile up, open Manage, then Member requests under Admin Assist. Facebook lets you filter requests by type or location and approve or decline them one by one or all at once.
How Do You Get Your First Members and Keep the Group Active?
Invite a small group of people you know will post, put a few real posts in the group before the wider invite goes out, and share moderation with at least one other person. A group with five active members feels alive. A group with 200 silent members feels empty, and new members leave empty groups fast.
Invite Your First Members
It’s tempting to invite everyone you know the minute the group goes live. Group specialist Tonya Kubo argues against it. In her July 2026 walkthrough, she explains “why most group owners should think twice before inviting all their followers right out of the gate”.
A better order:
- Start with five to fifteen people you know will post, such as regular customers, committee members or co-workers. Message each one personally.
- Let them settle in for a few days. Their posts become the first thing everyone else sees.
- Then open the door. Share the link on your Page, in your newsletter, on your website and after events or orders. A pinned post on your Page helps too.
Seed Your First Week of Posts
An empty feed gives new members nothing to react to, so fill it first. Before the wide invite, add five to seven posts, so the feed already shows the kind of conversation you want.
| Day | Post | Why it works |
| Before launch | Welcome post, pinned: who the group is for, the rules, how to get help | It answers the first questions every new member has |
| Day 1 | “Introduce yourself” thread with a simple prompt (“Name, where you’re from, and one thing you want from this group”) | It’s easy to answer, and members see each other right away |
| Day 2 | A useful tip, resource or behind-the-scenes post | It shows the group gives something back |
| Day 3 | A poll with two or three clear options | It’s one tap to take part |
| Day 4 | An open question your members can answer from experience | It gets members talking to each other, not just to you |
| Day 5 | A recap or “what we learned this week” post | It rewards people who took part and shows the group is active |
After launch week, keep one or two of these as weekly habits, since a thread on the same day each week gives people a reason to return. For more ways to engage your online community, watch our session with community builder Janet Machuka.
Moderate Without Doing It All Yourself
Moderation is where new admins burn out, so share it from the start.
- Add a moderator once there are more posts than you can read each day. Helpful early members are good picks.
- Turn on post approval if spam or off-topic posts creep in.
- Point to the rule when you remove a post. It feels fair, and other members learn from it.
- Keep a short daily routine for member requests, reported posts and new comments, rather than one long weekly catch-up.
Build a Facebook Group People Want to Join
Creating a Facebook group is just the beginning. To build an active community, start with a clear purpose, choose privacy settings that suit your audience, and establish rules that encourage meaningful conversations. Add a second admin or moderator, prepare a few useful posts, and invite people who are likely to participate.
If you’re building a community for your business, pair your group with a Facebook Page. Use the Page to share updates and reach a wider audience, while the group gives customers a space to ask questions, exchange ideas, and connect. For more ways to use Facebook to grow your business, explore our Facebook marketing guide.




 Join 55,000+ social media managers


