We often hear people say – Privacy is nothing but a myth.
For most of us, this statement sounds about right. While the digital world has its advantages, there are cons to it too. And jeopardizing privacy is one such con.
Nonetheless, the importance of privacy cannot be contested.
Facebook is not a loner when it comes to privacy concerns. From using data for its own purposes to scams, phishing and known privacy breaches, Facebook has not been behind in making headlines for privacy problems.
When you sign into your Facebook account, all information is set to public by default. You will have to change these settings to make your account more private manually. But before we hop into learning how to make Facebook private, let us first understand it in detail.
What is Facebook Privacy?
The idea of privacy on Facebook revolves around being able to share or not share your Facebook information, activity, and posts.
You can make things “public” or “private” on Facebook. For posts and information that is set to public, people could view those easily.
While the level of privacy that you wish to maintain on your account is up to you. For those who value being private, some best practices exist:
- It is better to keep your address, phone number, email, and birthdate private.
- Making your posts and information not visible to people you do not know is a good practice.
- If you post something that can be deemed as “sensitive” you should likely make it private.
Generally, third-party websites could take information from your Facebook account. This makes it all the more crucial to maintain privacy.
How to Make Your Facebook Profile Private?
We go by first things first; that is why making your Facebook profile private is probably the important step in the process of attaining a decent level of privacy on Facebook.
Steps for Desktop
- To make your Facebook profile private, first head over to Facebook.
- Once here, log in to your account using your account username/number and password.
- After logging into the account, you will come across an arrow sign on the top right corner of your screen.
- After you click on this, a tap for “Settings and privacy” will open.
- From here, select “Settings.”
- Under settings, head over to the tab that says “Privacy.”
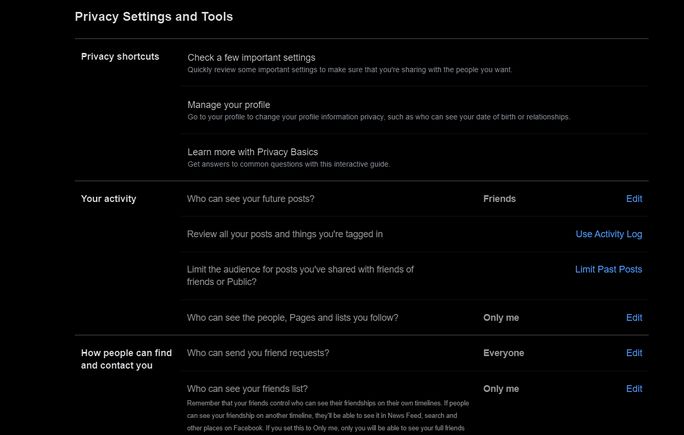
- Within this, you can find areas for different privacy settings and tools. For instance, you can edit the settings for:
- Who can send your friend requests?
- Who can see your friends list?
- Who can look you up using the email address you provide?
- Who can look you up using the phone number you provided?
- Do you want search engines outside of Facebook to link to your profile?
- Who can see your future posts?
- Reviewing tagging activities
But that is not all; you can also understand more about privacy shortcuts. You can also edit the date of birth and relationships from the “Manage your profile” tab.
You can also take a quick review of the settings through the first option of “Check a few important settings” on Privacy shortcuts. You can also educate yourself on Privacy Basics using the “Learn more with Privacy Basics” tab.
Based on what you deem fit according to the level of privacy you want, you can modify these settings for your overall profile.
Steps for Phone
- Start with downloading the Facebook app on your phone.
- Once downloaded, log in to your account using your username/phone number and password.
- Tap on the three-line menu that appears on the top right corner of the Facebook app.
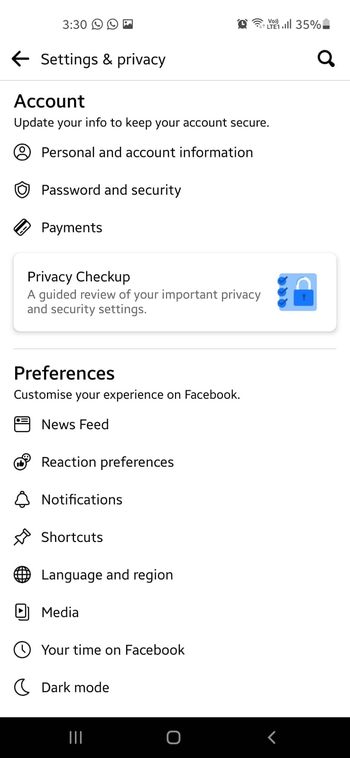
- Scroll to the very bottom of the page and tap on the “Settings & Privacy” tab.
- Here, you will find a section for “Settings”, tap on that.
- A new page will open. You will see the option to update your account info, privacy checkup, preferences, audience and visibility, permissions, your information, and community standards and legal policies on this page.
Most of your privacy settings can be set from this window.
Profile Picture Guard for Facebook Picture
Your profile picture on Facebook is one such picture that is visible whenever someone comes across your account.
In a way, your profile picture signifies you. But at the same time, it is a big source of privacy breach.
With your profile picture readily available to individuals, there used to be instances of people stealing pictures and making fake accounts using those pictures.
So, to be more secure and safe, Facebook came up with the feature of “Profile picture guard.”
This guard allows you to secure your profile photo in three distinct ways:
- Anyone else cannot download or share your profile picture.
- Only you and your friends would be able to tag your profile picture.
- A shield signal appears on your profile picture, showing that people should respect your privacy.
To turn on the profile picture guard for your Facebook profile, you can simply tap on your profile picture, and you will come across the option to enable the profile picture guard.
Click on “Next,” and it will be enabled. Once the guard is put on, you can see a blue guard sign on your profile picture.
Interesting read: The Ultimate Guide to Help Users Stay Safe on Social Media
Understanding Privacy Checkup
The privacy settings on Facebook can get somewhat extensive. This just means that there are so many data points on Facebook that the ordeal of securing each of those can be a demanding pursuit.
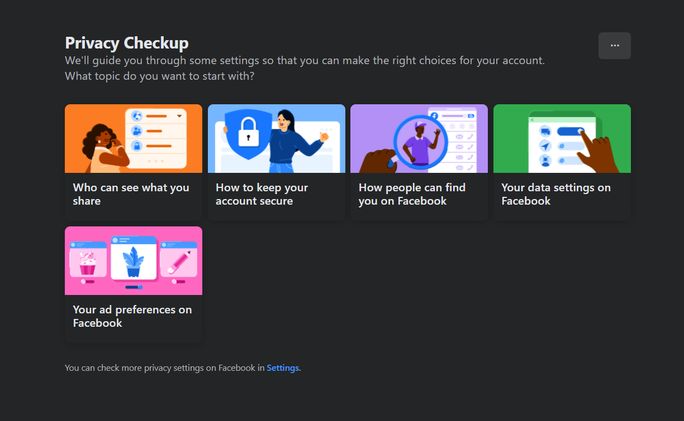
This is why Facebook came up with the feature of “Privacy Checkup”. As they say, it is to make the right choices for your account so that you can be as secure as you wish to be.
Within this, there are four major topics that you can explore. Let us gather some more details about each one by one:
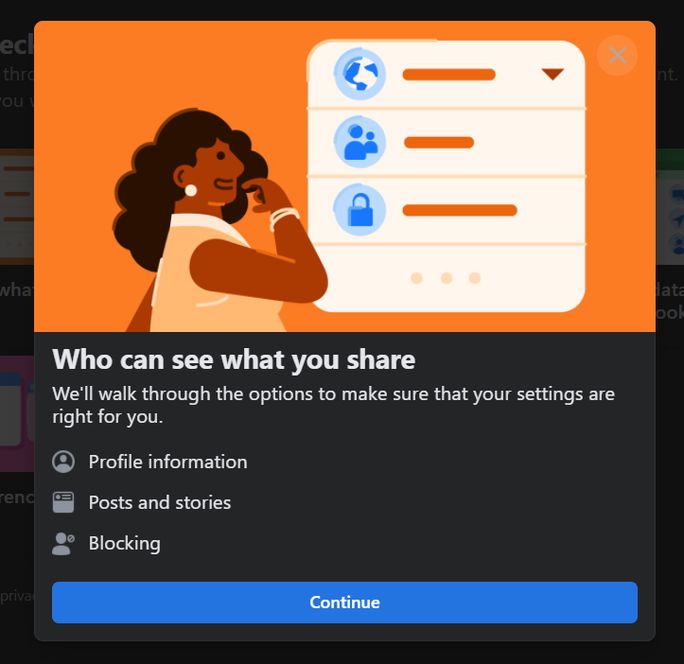
When you click on the section of “Who can see what you share”, Facebook will open a tab that walks you through settings for profile information, posts and stories and blocking:
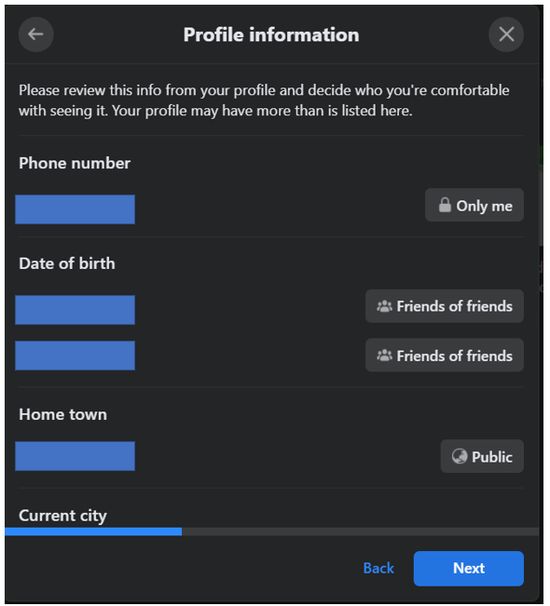
1. Profile Information
Within Profile information, you can edit privacy for your phone number, date of birth, hometown and current city. You can select the privacy between four distinct alternatives. These are only me, friends of friends, custom, and public.
If you set it to only me, only you can see that information. For friends of friends, your friends and their friends can see it. By making your post public, any on and off Facebook can see your information.
Using the option of custom, you can include and exclude certain friends or lists based on your preference.
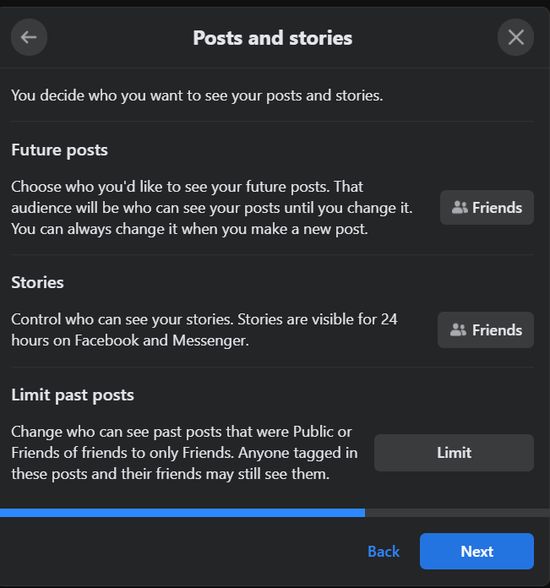
2. Posts and Stories
When you press the button “Next”, you will come across the “Posts and stories” tab. From here, you can decide who can see your future posts, stomit your posts as well.
You can set your audience to see your future, and the settings for past posts would not change, but for future audiences, it will be modified.
You can also control who checks out your stories on Facebook. Stories are only visible for 24 hours.
You can also limit your past posts to define who can and cannot see them. Yet, the people who are tagged in these posts and their friends could see them.
Here, the audience selection range is more diverse. You can select from only me, custom, public, friends, friends except, and specific friends.
Only your friends would see your story and posts by selecting friends, while specific friends or friends will help you select a few of your friends.
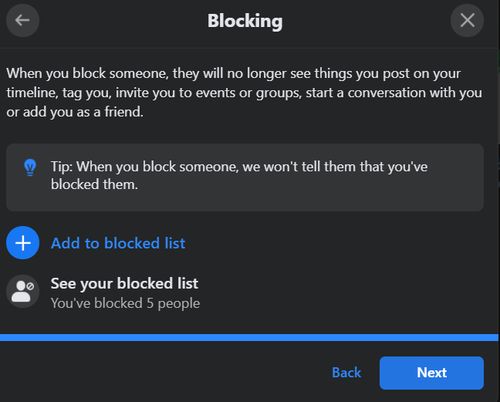
3. Blocking
Facebook gives you the option of blocking an individual when you feel like it. Blocking a person ensures that they cannot see your posts, tag you, invite you, start a conversation, or add you as a friend on Facebook.
Blocking on Facebook is covert as the people who are blocked do not get notified about it.
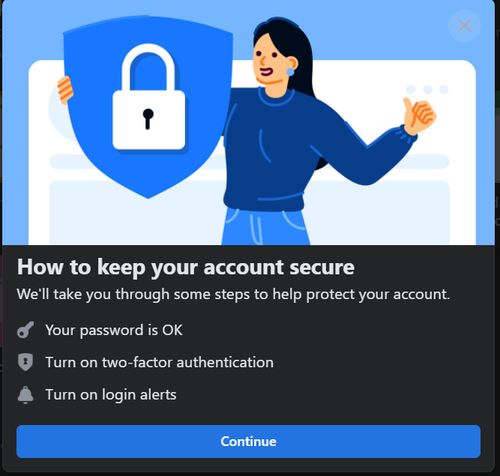
How to Keep Your Account Secure?
Facebook gives you three major options to keep your account secure, namely, password protection level, two-factor authentication, and login alerts. Let us know more about each:
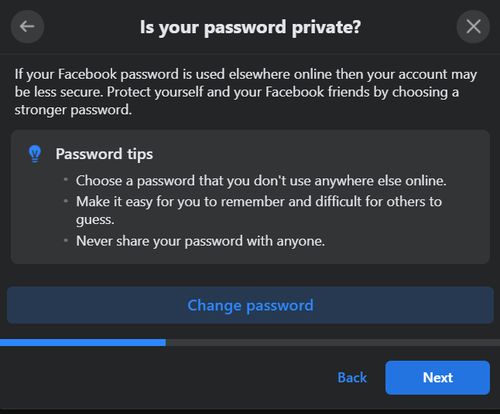
1. Your Password Privacy
Your overall account privacy also depends on the strength of your password. Facebook prompts you to use a sturdy password that others cannot easily guess.
You should also make sure that you can easily remember the password and never tell anyone what it is.
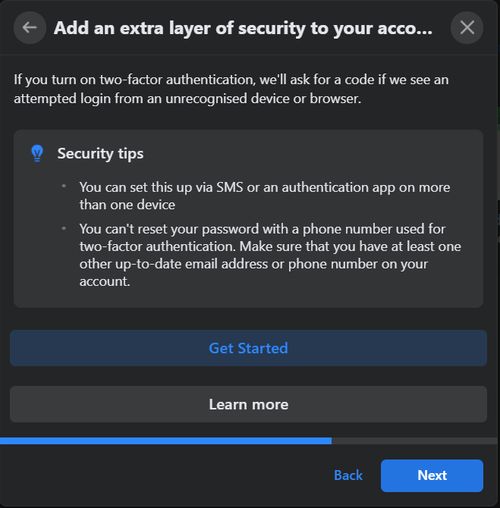
2. Two-factor Authentication
To make your Facebook account extra secure, you can enable two-factor authentication. Once this is turned on, Facebook will send you a code and ask for it if a login attempt is made from a device not recognized by Facebook.
The authentication might be done through SMS or an app. The only catch is that you will not be able to reset your password via the phone number you use for the two-factor authentication. You would require a different phone number and email linked to your account.
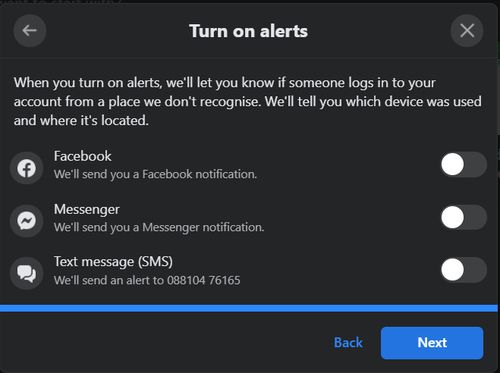
3. Alerts
To know more about the activity that goes on your Facebook account in your absence, you can turn on alerts. You would receive these alerts via Facebook notifications, messenger, or SMS.
How Can People Find You on Facebook?
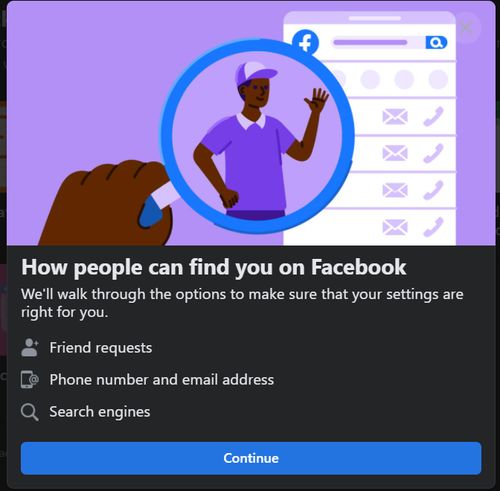
Your discoverability on Facebook can also be customized based on your preference. You can set distinct options for friend requests that you receive, your phone number and email address, and search engines as well.
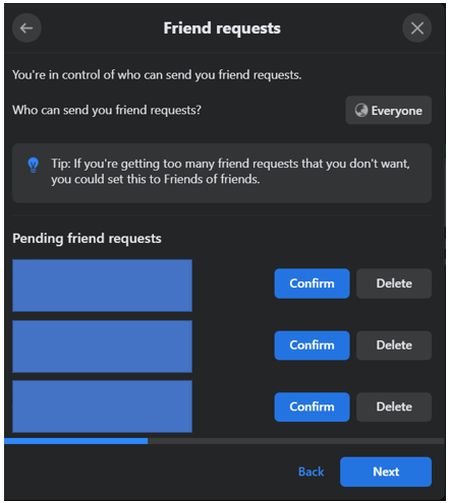
1. Friend Requests
Using this feature, you can decide who can send you friend requests on Facebook. Here you have two options from which you can select. You can either opt to get friend requests by everyone or get friend requests only by your friends.
Within this window, you can also confirm or delete the friend requests that you have already received.
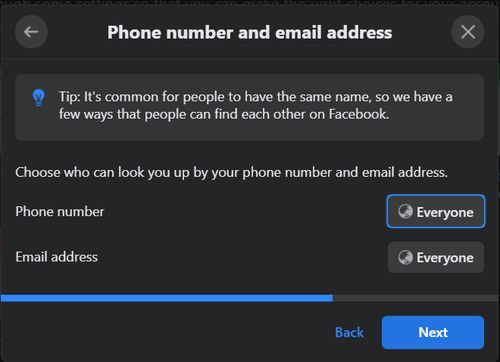
2. Phone number and email address
Under this tab, you can set the privacy setting for your phone number and email address. You can directly decide who will be able to see both. Here, you can choose between everyone, friends of friends, friends, and only me.
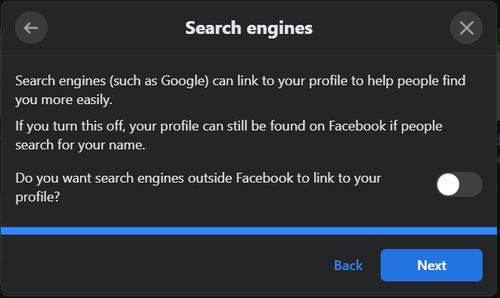
3. Search engine
Through this option, you can enable Google or other search engines to link to your profile. This will make you discoverable if people search for your name through their browser.
Data Settings on Facebook
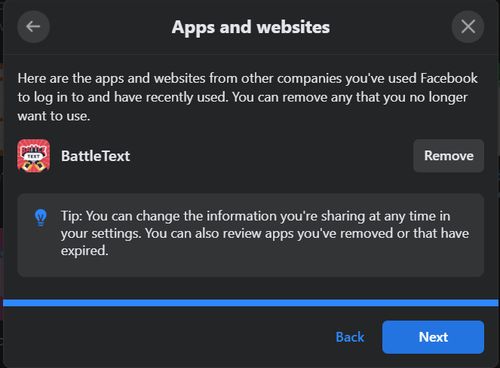
You can change your data settings on Facebook to ensure your account is safer. Under this, you have one major option. This option is for changing the settings for apps and websites.
Through this, you can allow or disallow certain third-party apps and websites to share your Facebook information.
To disable an app from extracting your info, you can simply remove an app.
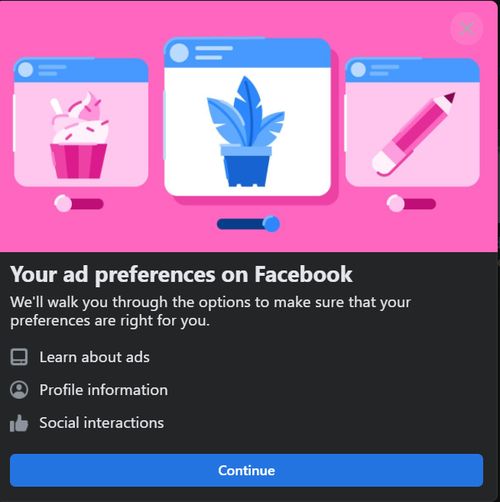
Your Ad Preferences on Facebook
You can set your ad preferences on Facebook under three parallels. You can learn about Facebook ads, change your profile information, and understand more about social interactions.
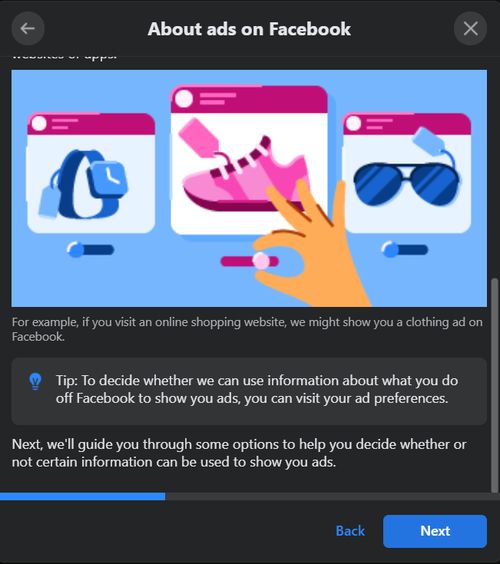
1. About Ads on Facebook
The section about ads on Facebook does not exactly enable you to change any settings but informs about how ads work on Facebook.
In this, you are informed that based on the things you watch and search for, Facebook shows you ads. If you wish to opt-out of watching particular ads, you can simply change the settings via your ad preferences.
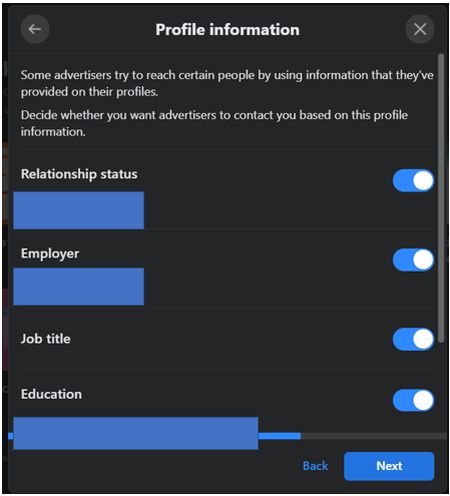
2. Profile Information
Under profile information, you can change the settings for whether advertisers can view your employment details, relationship status and education details.
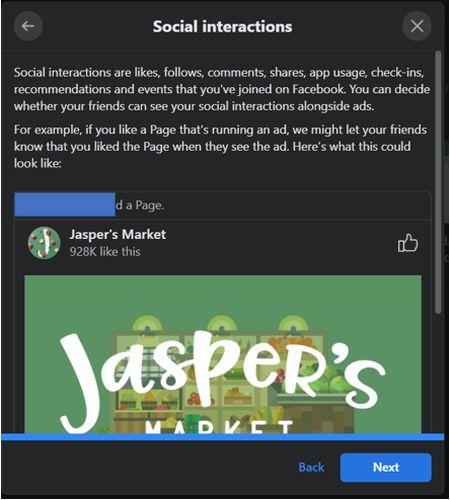
3. Social Interactions
Via this tab, you learn about comments, shares, app usage, check-ins, recommendations, and events that you have participated in.
You can also decide on whether your friends on Facebook see your social interactions on their accounts.
Heading to the Privacy Checkup to change your privacy settings can help you be more secure and safe without being confused about the places from where you can work on these settings.
This enables you to have everything in one place, making the process of being secure hassle-free.
Interesting read: The Ultimate Guide on how to manage Social Media Privacy settings
Your Privacy Matters
While the extent of privacy you wish to maintain is left to your discretion, we would always suggest you keep your details safe.
Some information is too sensitive to show to the whole world. Therefore, showing it to only a defined set of people or maybe not showing it at all is a good practice.
But, do not be too private, otherwise what is the point of being on a social media platform, right?
For all of you social media fanatics out there, if you wish to make the most out of your lives on social media, you can trust SocialPilot to offer you comprehensive social media marketing assistance.
Try its free trial today, to know how it can help you.
