“Getting the like is easy. It’s a light action. Anything else requires trust.”
– Jon Loomer, Facebook Ads expert
Websites and Facebook are two pillars for businesses to drive targeted prospects and expand their reach. As we have seen in the earlier chapters, building an engaging Facebook business page helps you to develop your social media shopfront, get into the shoes of your customers, and grow your business.
But creating a website or a Facebook page for your business isn’t enough. Yes, you heard it right! We live in an era where everything is getting synced to each other; hence, there’s a need to align your website and Facebook business profile and use them as tools to complement each other.
As mentioned above by the Facebook Ads expert, you can get likes on your Facebook business posts, but everything else would require you to build trust. To establish trust, you need to leverage some specific methods or tools that let you promote and share your website with the world to get maximum exposure and traffic via Facebook.
There are different widgets, buttons, and many other features that allow you to use Facebook features on your website. Wow, so much on your plate! But before that, don’t you want to know the purpose of leveraging Facebook on your website? Let’s understand the same:
Ultimately, your Facebook business page aims to drive more targeted traffic to your website, which can be converted into quality leads and paying customers. Being such a hugely popular platform, Facebook offers you an opportunity to cut through the clutter and boost the traffic to your web portal.
There are many ways in which you can set up different features and plugins on your website using Facebook, which can let you lead visitors to your online store. Want to know more about that, right? Let’s begin:
Steps To Integrate Facebook Messenger
Understanding Facebook Messenger
As we know, Facebook Messenger allows you to reach out to your peers through text or video chat. But for businesses, this feature can be a game-changer as it opens the channel of instant communication between you and your customers.
Yes, no more holding back or waiting to find the contact details through this feature, your prospects can reach out to you without any hassle. Also, according to Messenger News FB, 64% of people prefer to message a business rather than calling or emailing. Integrating Facebook Messenger on your web portal has many benefits, but the key ones are as follows:
- Connecting with potential customers through FB messenger allows you to establish a rapport and earn their trust. Also, solving their pain points instantly elevated the quality of your customer service, which is another significant way to grab quality leads.
- After someone reaches out to you on Messenger, you can always do a follow-up, which can encourage them to explore more about your brand and build curiosity. Also, in case any of your prospects wants to discuss something in private, Messenger is the best platform.
Want to know more about implementing these for your business growth? Check out our blog that can help you enhance your business with Facebook Messenger.
Adding Facebook Messenger to your website
By default, your Facebook business page will have access to Messenger, but it’s better to verify once and for the same you need:
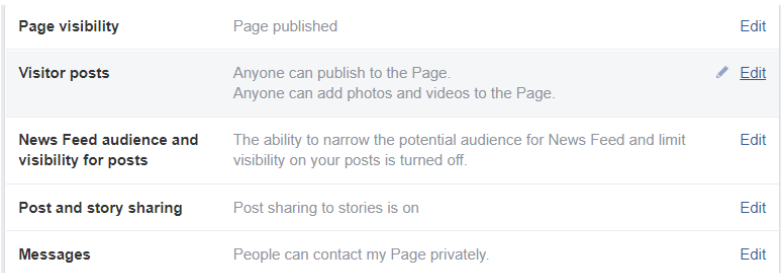
- Click the general “Settings” tab on your Facebook business page:
- Then, check next to the messages tab, the feature “People can contact my Page privately” is checked.
Now, to integrate the Facebook Messenger, you can opt for three key ways:
By creating the Facebook Messenger username and link
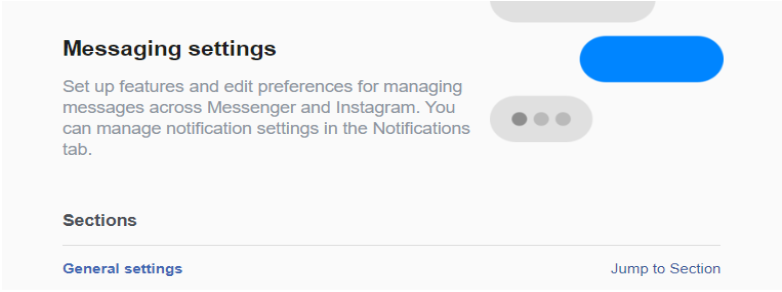
- Go to the General Settings tab under the messaging feature
- In the General Settings section, you will find the Messenger link, which is nothing but m.me/ added at the front of the URL of your pag,e as shown below:
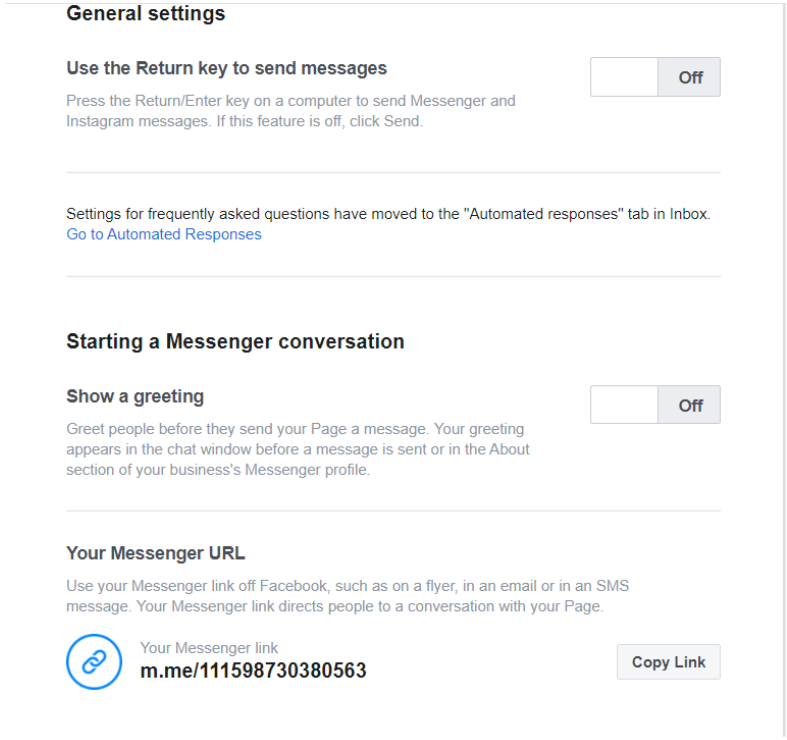
Simply, add this Messenger link to your website or even bios that will redirect your prospects to messenger.com and will open up the chat so that you can interact with them instantly.
Below the Messenger URL on the same page, you will get the following options –
Click on the very first option, “Add Messenger To Your Website,” and you will get something like this:
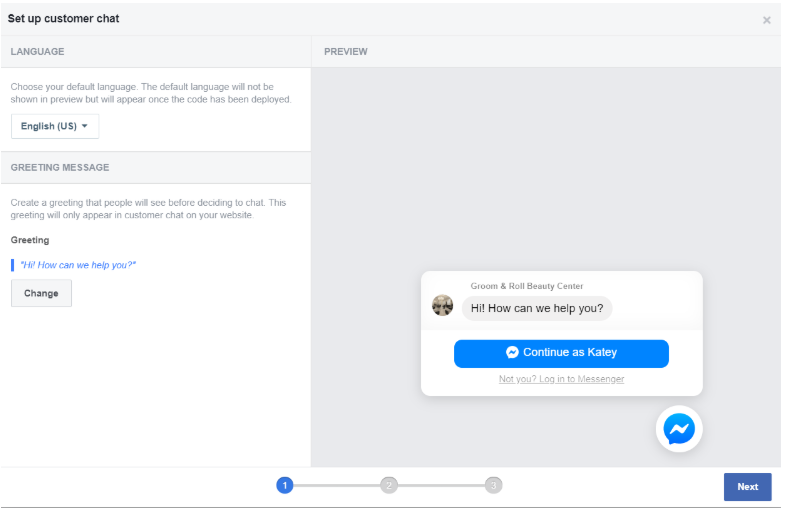
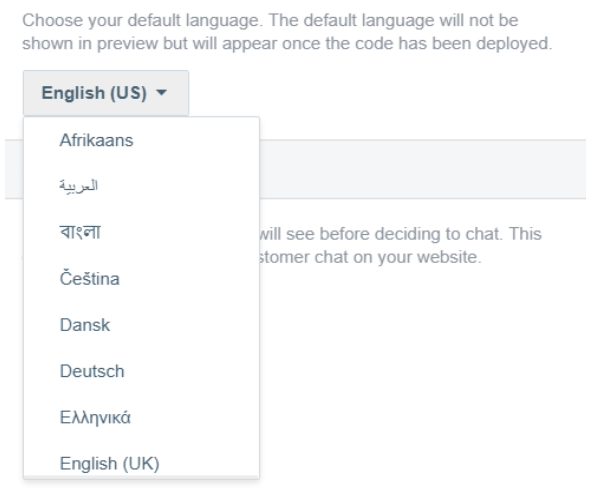
See above, there is an option to change the default language where you can choose the language of your choice:
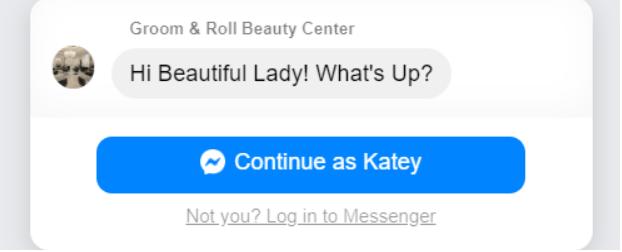
After that, as you can see, the preview is displaying the default greeting message. You can customize the same in the “Greeting Message” tab by clicking on the “Change” button, as shown below:

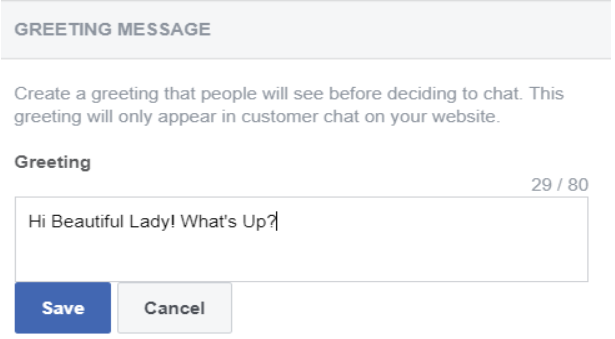
After clicking on the “Change” button, you can customize your greeting message and write something relevant to you, for example, here the business is a beauty salon, and hence the customized greetings can look something like this:
And after putting the customized greeting, your preview will be changed immediately:
Now, after clicking the “Next” button, you will get to the second window shown below:
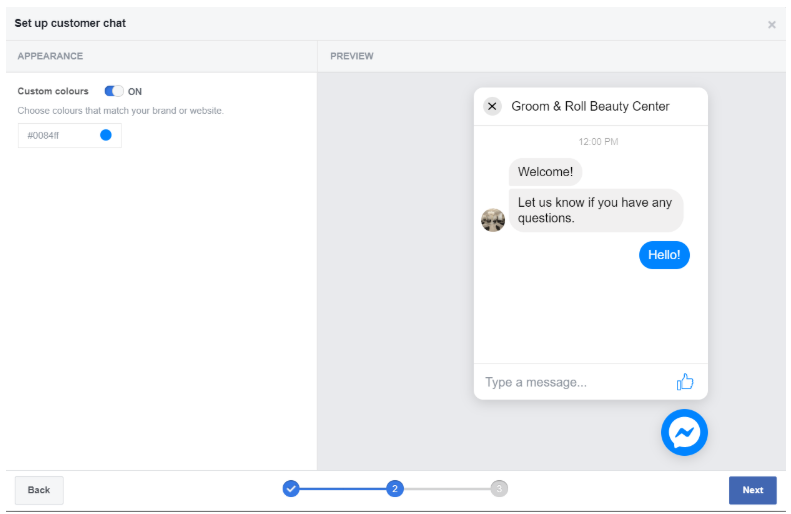
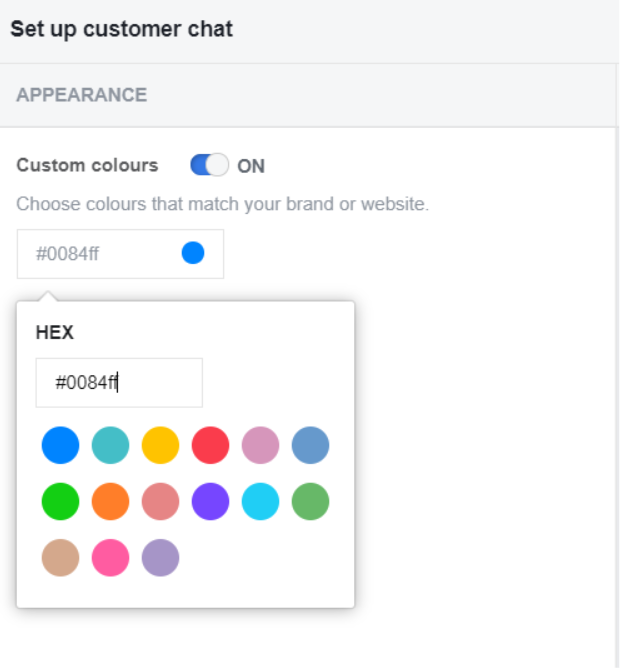
Here, you can cherry-pick custom colors to set up the appearance of your customer chat by picking colors that match the theme of your business:
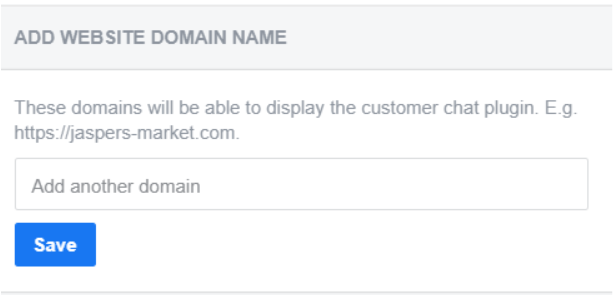
Once this is done, you will have to click “Next,” and the last instruction window will be opened in front of you:

Here, you will have to add the domain of your website first:
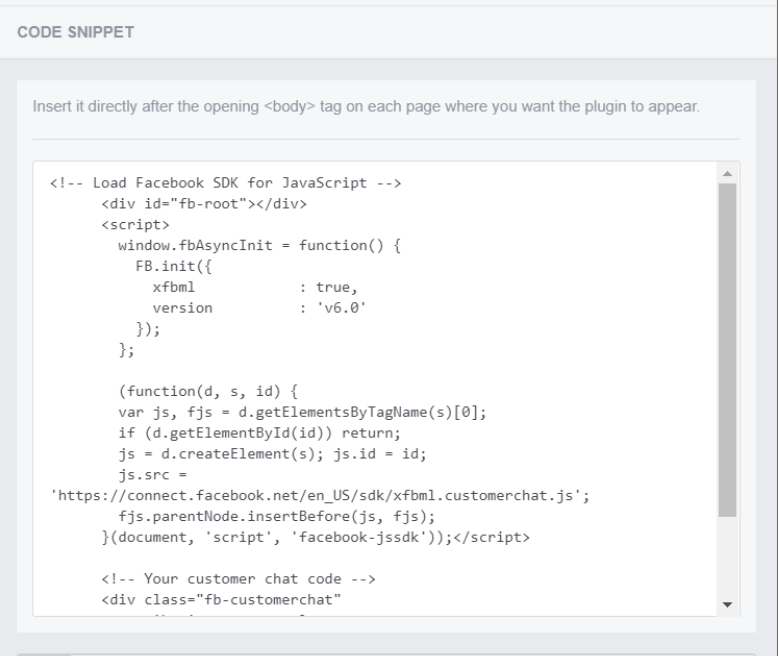
After this, you will just have to choose an option to install the messenger code, for which you can either do the same yourself or email the instructions to your development team:
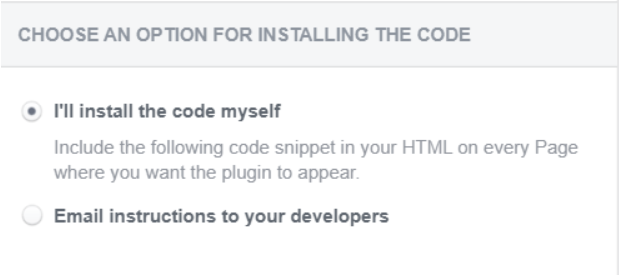
If you choose option one, you will get the instructions on the same page:
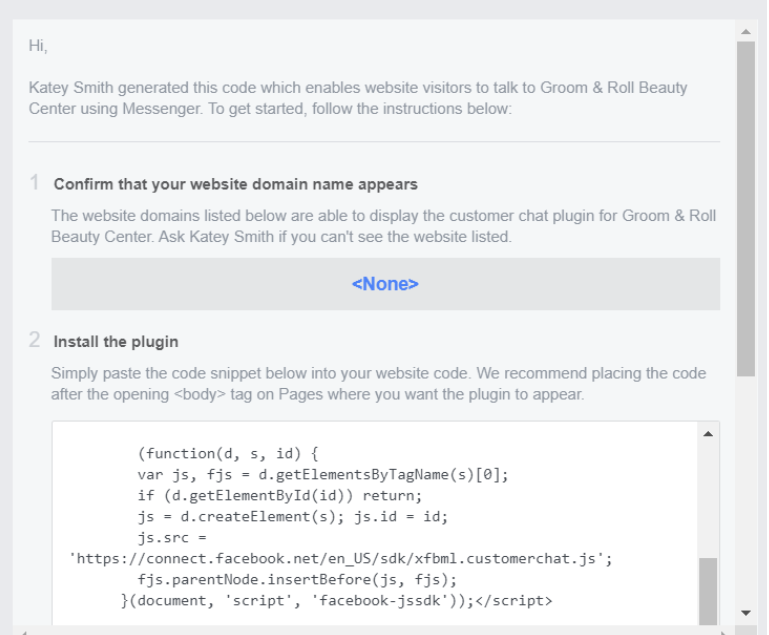
Or, if you choose the second option to email the instructions to your development team, then the same window will show the email preview as well:
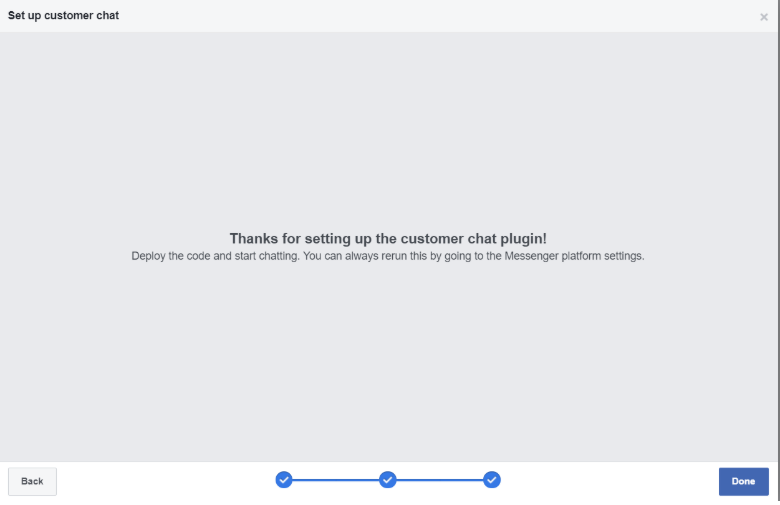
That’s it, whatever option you choose after deploying the code, your customer chat plugin will be established, and you can start chatting with your customers. Just hit the “Done” button as shown in the image below, and the work is done!
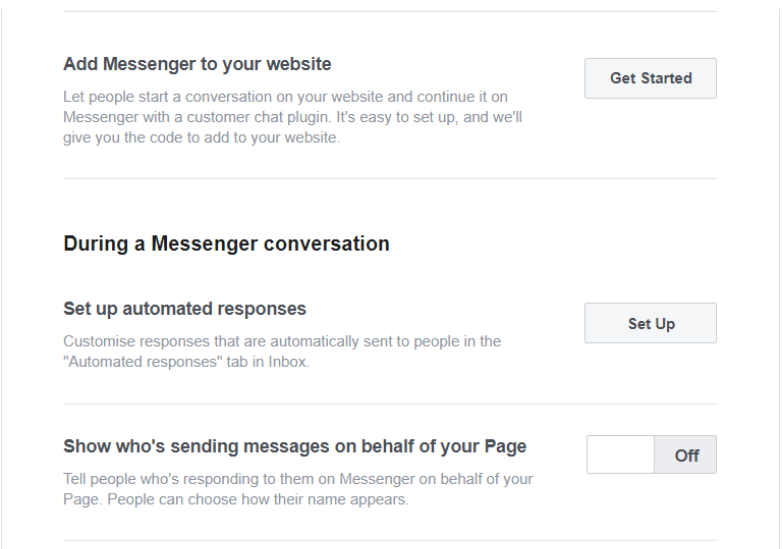
Besides, Messenger also gives you two alternatives. Have a look at the image:
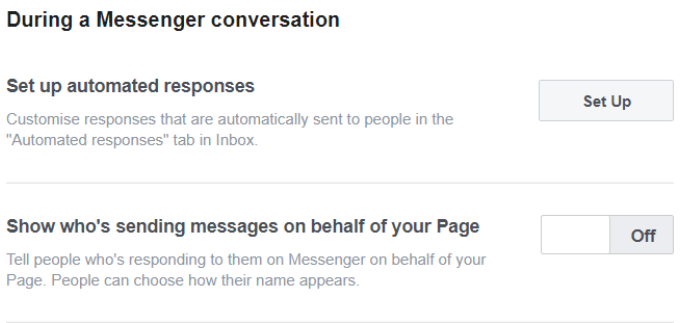
- Set up automated responses using chatbots that allow you to send automated replies to prospects who message you when you aren’t active on Messenger:
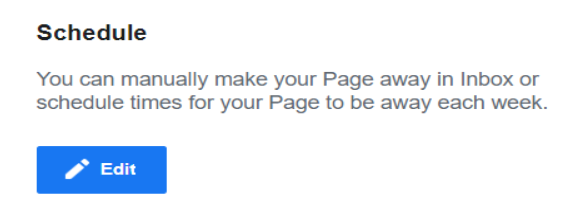
Also, you can manually schedule your page availability by clicking on the “Edit” option under the “Schedule” tab:
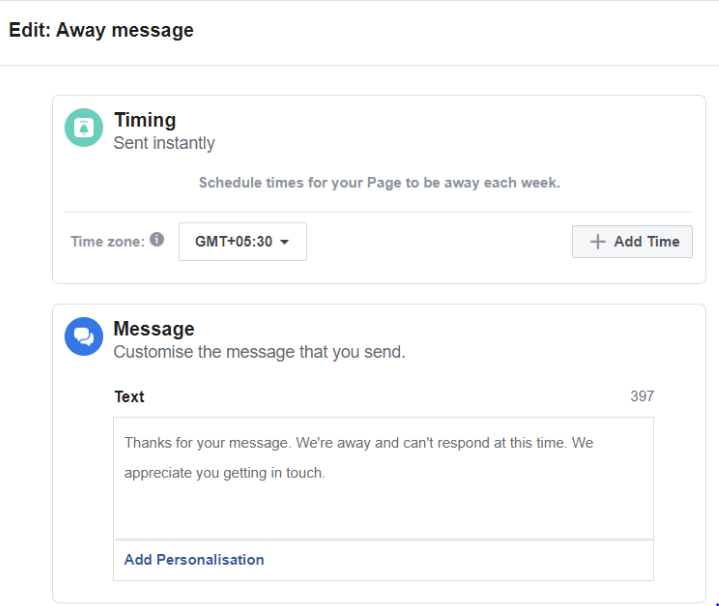
After clicking on the “Edit” button, you will be given a window where you can set the specific timings as well as add a customized away message to give a personal touch to your conversation:
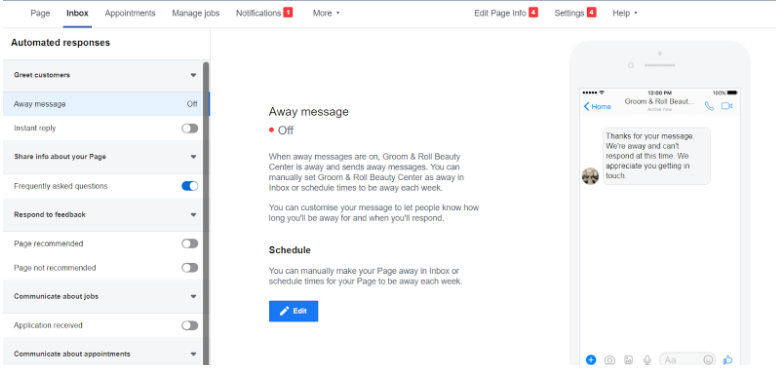
Lastly, the automated responses tab gives you options to set up customized automated replies for several features such as shown below in the image:
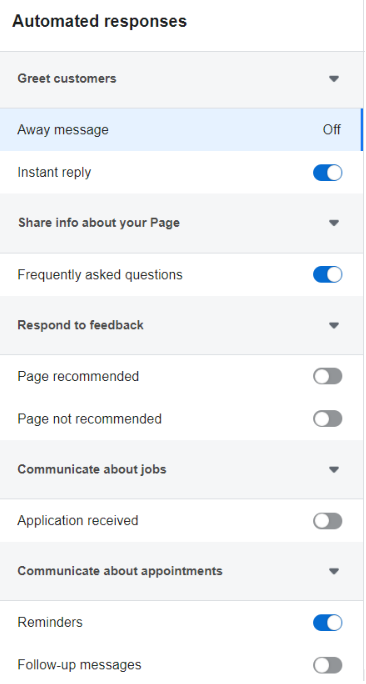
Here, you can customize different features such as instant reply, reminders, follow-up messages, etc., and keep them either “on” or “off” according to your convenience. Once all these steps are done, your Facebook Messenger will be integrated with your website, and you can start using the same successfully.
Yes, Facebook offers a variety of buttons or widgets that you can integrate on your website and let your website visitors like or share your website’s content without even leaving your portal. Now, that’s interesting!
Among so many alternatives, it becomes tedious to cherry-pick which widgets to choose. But we have got this sorted for you as we will focus on two key buttons, “Like” and “Follow”. Let’s get an idea of how to integrate these widgets on your website:
- Manually by leveraging the Extend Facebook Markup Language (XFBML) and getting the code from the official Facebook developer’s page, where you will get customized settings to create and integrate these buttons.
- You can use many WordPress plugins available that can be used to set up these buttons easily on your website.
- The Facebook Follow Widget (Earlier Called “Subscribe” Button). The primary purpose of Facebook’s Follow widget is to expand the reach of your website by letting visitors like your Facebook business page with the help of a single click. Also, once the follow button has been set up, it will show the number of your followers along with their faces. To add this button first, you will need to go to the Facebook developers’ page, but unfortunately, the button is deprecated for newer versions, as you can see in the page itself – https://developers.facebook.com/docs/archive/docs/plugins/follow-button
- The Facebook Like Button (To Make Your Website’s Content Viral). These widgets let your visitors like your site’s content by giving a virtual thumbs up, which appears on their timeline as well as on their newsfeed that giving a link back to your content or a specific page. To add this widget, you need to go back to the Facebook developers’ page and follow the steps mentioned there. Also, you can customize your Like button and fetch the code that’s available in IFRAME, XFBML, HTML5, or a URL to integrate on your website. You can use this – https://developers.facebook.com/docs/plugins/like-button/
- The Facebook Share Button (Ease Of Content Sharing & Commenting). Facebook share buttons are similar to the Like ones, but these also let your visitors include comments or messages when sharing your content. Also, they can share the content in their Facebook groups and send it as a message to specific connections. To install these buttons you need to visit the developers’ page and follow the steps mentioned there – https://developers.facebook.com/docs/plugins/share-buttonYou also need to specify the URL of the content or page that you want people to share and customize the width after which you can generate the code which will be available in two different formats XFBML, and HTML5 also it needs JavaScript SDK that helps in the successful integration of this button on your website – https://developers.facebook.com/docs/javascript
The Final Word
Using your Facebook business page on your website to drive targeted traffic and expand your reach is essential in today’s social media-savvy landscape. By integrating the right widgets and tools, you can seamlessly connect Facebook and your website to boost engagement and conversions.
We hope this guide has provided you with the knowledge to effectively leverage Facebook on your website and turn your visitors into promoters. As you continue to manage and grow your Facebook presence, tools like SocialPilot can simplify your social media management by streamlining your content scheduling, analytics, and more. If you’re looking to enhance your social media strategy, explore SocialPilot’s pricing options to find a plan that suits your business needs.
Stay tuned for more valuable insights to help you elevate your digital marketing efforts!