When was the last time you manually posted on Facebook, Instagram, or TikTok? Don’t remember? Then why do that on YouTube?
YouTube is a platform that provides the perfect stage for long-form videos that take up huge planning and enhancement. So, why waste the effort by taking up the stress of manual posting? Learn how to schedule videos on YouTube and see the difference it makes in your online presence.
This step-by-step guide will talk about how to schedule a YouTube video on mobile and desktop so you can save time and speed up the growth of your YouTube channel.
However, to plan your schedule, you need to activate the YouTube scheduling feature. So, let’s dig in and see how to unlock the features:

How to Activate YouTube Video Scheduling Features
When you want to schedule videos on YouTube, but the “schedule” option doesn’t appear, it implies your YouTube account is not verified. In order to schedule longer-duration videos and add thumbnails to them, your account must be verified.
So, first things first, confirm your account to be able to schedule videos and change the thumbnail of your videos.
Here is the verification process:
Step 1: Check if Your Account is Verified
You may have a YouTube account for your business. If you do, great; if not, you can create and verify one using any Google account.
You can start here:
Go to YouTube, click your profile image at the top right corner, and select “YouTube Studio” from the dropdown menu.

Remember, you can access the menu from the YouTube home page or your profile. But you must sign into your Google account (Gmail, for example) to be able to do so. Then it directs you to your “channel dashboard.”

From the under your profile image on the left-hand side, scroll down and click the “Settings” tab. Once on the settings page, navigate to the left column, click the “channel” option, and select the “Feature eligibility” tab.

Clicking the “Feature eligibility” tab will open three eligibility features:
- Standard
- Intermediate
- Advanced
Google’s YouTube enables the first feature (Standard) by default. But to use the other two (Intermediate & Advanced) features, additional confirmation is required.

Truth is:
If you want to post videos longer than 15 minutes, you must verify the “Intermediate feature.” Also, to create and upload more videos daily, you must confirm the “Advanced feature.”
Now:
Step 2: Obtain Verification
Verifying your YouTube channel in this step requires you to provide essential information, such as your work country and valid phone number. YouTube will send your verification code to your mobile phone to confirm that you’re human.

So you must have an available phone number. To do so, click the “Eligible” tab to open the “Verify Phone Number” tab on the right-hand side.
Step 3: Register the Received Verification Code
Click the “Verify Phone Number” tab to select a confirmation method, as in the screenshot above. YouTube will send you a six-digit confirmation code via SMS or automated voicemail, depending on your chosen method for receiving your verification code.

Once received, register the code or copy and paste it into the code box and hit the submit button. That’s it; you’ve confirmed your account. With the confirmation process sorted out, let’s look at the step-by-step guide on scheduling YouTube videos.
How to Schedule Videos Using the YouTube App
This step-by-step guide is a simple process that covers the native method of scheduling videos on YouTube directly from the app.
Follow the step-by-step guide on how to schedule a YouTube video below:
Step 1. Upload Your Video
Scheduling YouTube videos: The first step is to upload your video(s) on YouTube, get them right, and organize your content for posting at the best times.
You can upload your video from the YouTube home page by clicking the “📹Camera” button near your profile image at the top right corner.

Note; you must log into the platform before uploading your video content. When you click the camera button, it will give you two options:
- Upload video
- Go live
So, clicking the “Upload Video” tab will open a dialog box where you can select the video you want to upload or drag and drop your content from your media library.

However, you may skip the home page and upload your videos directly from the YouTube Studio.

To do so, click your YouTube profile picture and navigate to the “YouTube Studio” tab and click it to open your “Channel dashboard.”

Once accessed, you can upload your content in three ways:
- Click the “📹 Create” icon at the top right corner next to your headshot to open a dropdown menu. Then click the first tab, “Upload videos,” on the menu to add your content.

- You can also add videos by tapping the (Upload) icon below the 📹camera next to your headshot.

- Finally, upload your YouTube content from the BOLD blue “Upload Videos” tab in front of you, as in the screenshot.


Step 2. Enter Details of Your Video
After uploading your video, you must include information about the video. This step is crucial as it allows the YouTube team to examine your video to approve or flag it. Moreover, it enables your audience to find your video and understand its content.

Therefore, add the following:
- Video title
- Thumbnail image, and
- Image Description
But to add a thumbnail, you must verify your phone number as in the previous step above. Besides the added details, there are other video elements to consider; you must choose a playlist(s) for your video.
It enables your audience to find your content. After selecting a playlist, tick or mark one of two boxes to comply with the Children’s Online Privacy Protection (COPPA) law.

Marking a box also informs YouTube whether your video content is for kids. Likewise, you can restrict your video to a specific age group.

When you’re through that section, click the “Next” button at the bottom right corner to open the “Check” page. Here is where you check your video for any legal issues.
As you can see, the video I uploaded has no issues. I can publish or schedule the video for posting at a desired date and time.
Step 3. Schedule YouTube Video
After going through the stages, the final point is “Visibility.” In this section, you will choose what you want to do with your uploaded video through multiple options.

Indeed, it is at this stage that you can schedule your video. But before scheduling your video content, you must choose from one of the options available.
You can choose to make the video:
- Private: only you and your crew can see it when published.
- Unlisted: anyone with the link can see/view the content
- Public: makes it available to everyone
- Publish: instantly or schedule
But since the idea is to schedule a YouTube video, check the “Schedule” box to expand it. Once created, you can set a date and time and your preferred time zone to publish the video for maximum ROIs.
When you set all those components, click the “Schedule” button to schedule your content to go live on your established date.
Step 4. Scheduled YouTube Video
With all those elements in place, you’re good to go. You will see a notification that lets you know whether you planned the video successfully. Here’s what it looks like:

Step 5. Schedule Video With YouTube Premiere
You may want to go further and use “YouTube Premiere” to schedule your videos. A YouTube Premiere is a feature that allows you to share and watch new videos with your audience in real-time.
Unlike traditional YouTube videos, Premiere is a fantastic asset for creators because it alerts subscribers of new content. You can create buzz for your Premiere by sharing a public watch page that lets users set reminders, chat, and leave comments on your video.
Here’s what to do:

After entering your publishing date and time, including the time zone, click the “Set as Premiere” box to check it. Then tap the “+ Set Up Premiere” tab to open the “Countdown” dialog box.

The premiere countdown lets you choose your desired theme and countdown length that will play automatically before your scheduled video start time.
After selecting those elements, click the “Save” button below the page to save your work. It will direct you back to the schedule section to schedule your video.

Once scheduled, you will receive another “Video scheduled” notification that says, “your video will premiere on your selected date and time. But this one comes with various social media share buttons, as seen in the image below.

That’s all you need to do to schedule a YouTube video in advance to go live when your target viewers and prospective clients are active on the platform.
How to Schedule a YouTube Video on Mobile?
In a social media journey, there are times when you don’t have your laptop but need to schedule a video on YouTube. For situations like this, you can schedule videos on YouTube using your mobile phone via the YouTube application.
The steps to learn how to schedule a YouTube video using a phone are as follows:
Step 1: Open the YouTube App and Click on “Create”
The first step is to open your YouTube application and click on the “+” icon at the bottom of the screen.
This “Create” icon is for uploading any type of videos or shorts on the platform.

Step 2: Upload the Video and Fill in the Details
After clicking on the Create icon, you must select the “Video” option and then pick the video from your device that you want to upload.
YouTube also gives you the option to make minor edits to the video before uploading.

Once you have selected and uploaded the video, you should fill in other details, such as title, description, location, thumbnail, audience, commenting options, tagging people, timestamps, etc., to make it look more presentable.

Step 3: Set Visibility and Pick a Suitable Time
You must pick two major details before you can schedule your video, one of which is setting up the “Visibility.”
You have to pick who can view your video. Here, the default setting is Public, which you can change.

After setting the suitable visibility, you must pick a suitable time and date to schedule the video for the time you want to publish it.

Step 4: Click on “Upload Video” and Schedule It
After all this, you are done with all the steps to upload a video to YouTube using mobile.
Now, go back and click “Upload Video” to schedule your video to YouTube on the go.

Scheduling YouTube videos using the mobile app might seem easy, but it lacks advanced publishing and scheduling features.
For features like queuing posts, AI assistant, content library, and more, you need a third-party scheduling tool like SocialPilot and its abilities.
A scheduling tool becomes more than an option when you have to manage multiple accounts across YouTube and, while we are at it, on other social media platforms as well.
Apart from scheduling YouTube videos and shorts, SocialPilot has a long list of features, including a social inbox, content library, inbuilt analytics, etc., for all the major social media platforms.
Sounds like a good deal? Wait till you use it.
As we move forward to see the step-by-step process of seamlessly scheduling on YouTube, start your free trial of SocialPilot to understand the process better.

Step 1: Connect Your YouTube Channel
You must create a SocialPilot account and connect your YouTube channel(s) to your SocialPilot account to upload and schedule videos for YouTube.
Once connected, you’re all set. Head over to the “Connect Account” tab, locate “YouTube” below, and hit “Connect account.”

Step 2: Upload YouTube Video or Short
It’s time to schedule your first YouTube video!
SocialPilot’s interface gives you a native tool-like experience for scheduling YouTube videos, making it super easy to become handy with the tool from the first go.
After connecting your channel, access your SocialPilot dashboard and go to “Create Post.” By default, you will land on the “Original Draft” tab; switch that to “YouTube.”

Here, you start by uploading your video. Click the “Video Upload” box and choose your desired video from your device storage.
Note: There is no separate workflow for uploading YouTube videos and shorts. The tool will automatically detect the difference between vertical and horizontal video.
Next, you need to choose and upload a video thumbnail from the stills of your video or add a customized thumbnail according to your preference.

Now, get creative with your copy skills. Simply, add the video title in the available field. Enter the description of your video in the allotted space and spice things up with emojis, also.
And yes,
Don’t forget to optimize your video title and description with keywords to spruce up your YouTube SEO.
You can also “Preview” your video content on the far right-hand side of the dashboard to double-check things.

Next, pick your choice of “Privacy Status.” You have three options:
- Public
- Private
- Unlisted
Select one of these and set your preference.
Step 3: Configure Advanced Settings
Next, you must select the content category of your video. Tap the “Advance Setting,” navigate to “Content Category,” and choose your video category from the dropdown menu.

After picking your content category, navigate to the “License and Ownership” section and select your best option.
Then, add video tags with keywords to increase visibility and help viewers find your video in search results.
Below the “Video Tags” are three boxes to check:
- Allow Embedding
- Publish to subscribers’ feed and notify subscribers
- Made for Kids
Check the boxes as desired.

Step 4: Schedule Your Video
Now, scheduling your YouTube video is just a one-click task, but let us take you through all the options available for publishing your post:

- “Add to queue” allows you to schedule your video based on a preset schedule, ensuring it will be sent at the next available time slot
- “Share Now” instantly publishes your video without any delay
- “Schedule Post” lets you choose a specific time and date at that very moment
- “Share Next” prioritizes your video to be sent next by placing it at the top of the queue
- “Repeat Post” enables you to schedule the same video for multiple days and times
With these options, you can schedule your YouTube videos and shorts in advance and avoid any potential mishaps.

When it comes to YouTube, there’s more than just uploading a video and hitting “publish.” There’s a lot of preparation involved, from creating eye-catching titles and descriptions to optimizing timestamps, captions, and tags.
SocialPilot’s AI Scheduler doesn’t just help schedule your videos; it can streamline the entire process. Here’s how:
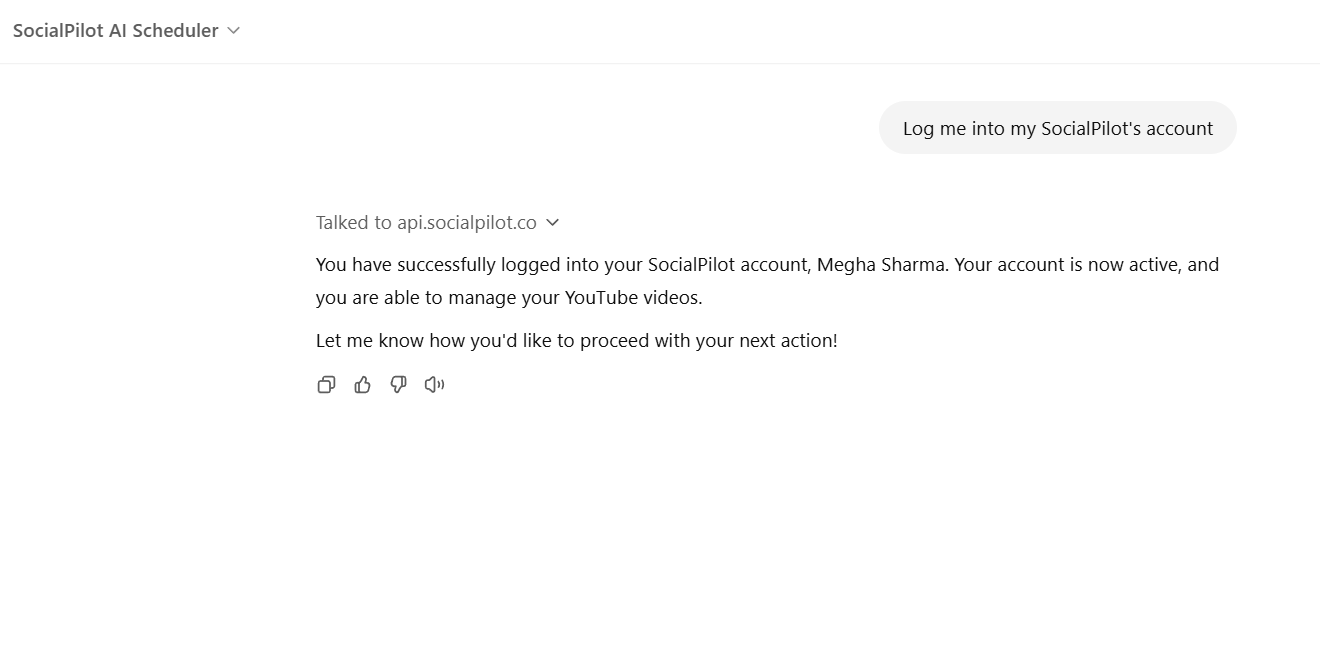
To begin with, Open SocialPilot AI Scheduler in ChatGPT and type a simple prompt like, “Log me into SocialPilot to manage my YouTube videos.” Once logged in, you’re all set to manage your content easily from within the chat.
Step 2: Plan Your YouTube Video Titles
Need some attention-grabbing titles? Just type, “Generate titles for my YouTube video,” and the AI will provide you with several creative, optimized video title options tailored to your content. No more brainstorming for the perfect title!

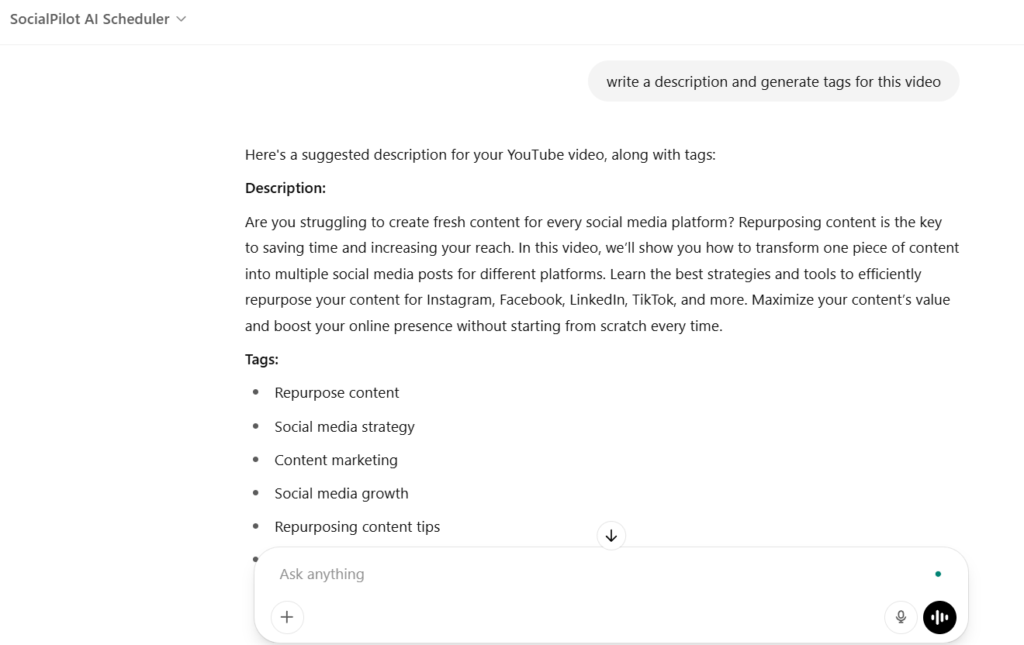
To optimize your video for search, prompt the AI to “Write a description for my video” and “Generate tags for this topic.” It will create SEO-friendly descriptions and suggest relevant tags to make sure your video gets discovered.
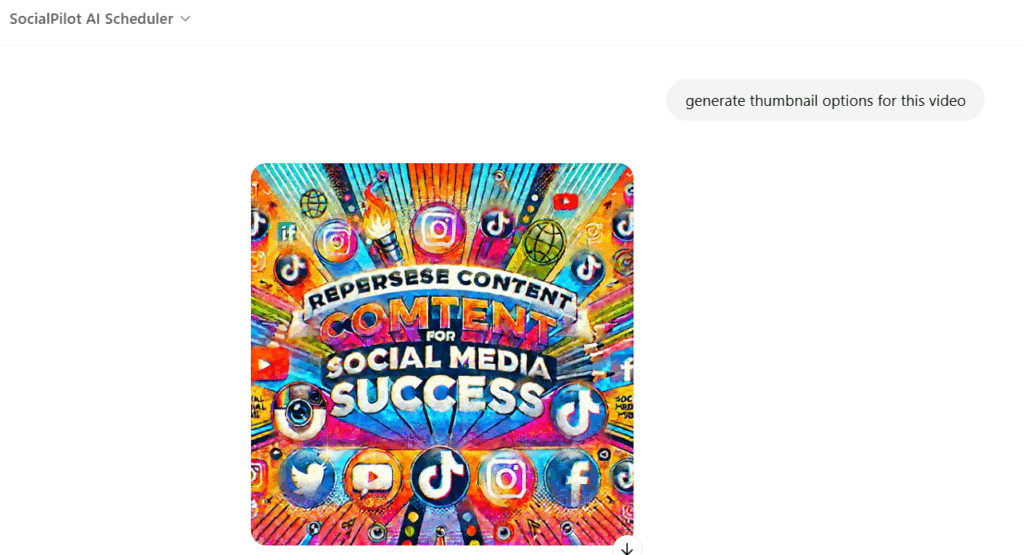
Step 4: Generate Custom Thumbnails
The AI will generate 3-4 thumbnail options for your video. Simply choose the one that best represents your content, download it, and you’re ready to go. It’s a quick way to create a compelling visual that grabs attention.
Step 5: Save Your Video as a Draft
Once you’ve planned your video and thumbnails, save everything as a draft by prompting ChatGPT to, “Save this video as a draft.” However, to create drafts, you must ensure that your YouTube account is linked to SocialPilot.
Creating drafts gives you a chance to review and make any last-minute changes before your YouTube video is officially scheduled.
Step 6: Schedule Videos at the Best Time
Once everything is ready, prompt the AI to schedule the video at any time of your choice. You can also ask it to pick the optimal time based on your audience’s engagement patterns.
This tool allows posting for different time zones, ensuring your video goes live at the perfect time for your viewers.
With SocialPilot’s AI Scheduler, you’re not just cutting down on time – you’re simplifying the whole process of planning, creating, and scheduling your YouTube videos.
It’s the perfect way to stay organized without the hassle of managing each video manually.
Here’s a quick look at the features that make this tool so handy:
-
Instant Video Scheduling via ChatGPT: Just type a simple message, and your YouTube video gets scheduled without hopping between different apps.
-
Schedule Across Multiple Channels: You can easily manage videos for different YouTube channels with a single command.
- Check Scheduled Videos: Need a quick overview of what’s scheduled? Just ask the AI, and it’ll show you what’s lined up.
-
Collaborate with Custom GPTs: If you’ve got a custom GPT for video titles or ideas, simply tag the scheduler, and it’ll handle the scheduling for you.
-
All-in-One Video Management: From logging in to scheduling, manage your YouTube videos all within ChatGPT.
Try it out for yourself to experience the efficiency in content planning!
How to Delete a Scheduled YouTube Video
For some reason(s), you may delete the scheduled video and not publish it. For example, after planning the video in this article, I deleted it since I created it for the sake of this blog.
So, how do you delete your scheduled YouTube videos?
Here’s a simple process:
Step 1: Go to “YouTube Studio” as in “Step One” above and click the “Content” tab from the left-hand menu.

It will open your saved and scheduled videos. Please, see the screenshot below.
Step 2: Check the box on the left of the video you want to delete and click the “More actions” button above.

It will open two options for you:
- Download
- Delete forever.
Clicking the “delete forever” tab will delete your video permanently.

Another option for deleting your video is to hover your pointer/cursor/mouse on your video description, and it will display more actions. The displayed options include three dots or ellipses.

Click the ellipsis “(⋮)” to reveal a dropdown menu. From the dropdown, navigate to “Delete forever” at the bottom of the menu and hit the button.

You have successfully deleted your scheduled YouTube video.
Things to keep in mind before uploading a YouTube video
1. Write a Catchy Title
A YouTube video title is one of the first things any viewer sees before actually watching the video. So it needs to be enticing, short, and crisp, and accurately describe the content of the video to the viewer.
You don’t need to add a clickbait title and fool your viewer into clicking your video. That will only lower the visitor’s trust, and chances are they’ll never view your video the next time.
Another suggestion that you can follow with adding a title to your video is to do in-depth keyword research. You should be aware of what people are researching related to your content. Including a keyword in your title will also help to rank your video in the SERPs.
2. Enter a Complete Description
After your title, the description is a factor that YouTube recognizes the most related to keywords. You should make sure that your keyword appears in the description so it helps the YouTube algorithm notice your video and helps you increase its reach.
Write the complete brief of your video and what it has for your audience. Don’t just try to pad in keywords to extract greater results from SERPs; it will result in zero value for your organic reach.
Here are some of the key aspects you can include in your video description:
- Any links related to the video
- All the credits related to music or any clip of other content creators
- Try to add a link to your channel page
- With all the gadgets you are using and their affiliate links, you want to earn some extra income
- Link all your social media handles
Sometimes, YouTubers include every minute detail of the video in their description; it can also be handy in shorter videos.

Add tags that are SEO-optimized and are relatable to your video content. One of the easiest ways to do that is to search your video’s title on YouTube, copy-paste all the tags in the top 3-4 videos, and you are good with tags.
You can use this guide on tags for YouTube if you want to know how to find tags related to your video.
4. Find an Awesome Thumbnail
Just like titles, thumbnails are another aspect that creates the first impact on your audience’s mind, which plays a decisive role in whether the viewer clicks your video or not.
Your thumbnail should be of high quality, creative, and entice the audience to know what’s inside your video.
You can use some of the powerful tools on the internet, like Canva and Adobe Photoshop, among others, to craft some of the best thumbnails for your video content.
Do not overdo your thumbnail and add too many elements to it, making it unclear and hard for the viewer to understand the message it wants to convey.
5. Monetize Your Video
If YouTube approves you to monetize your videos, then you need to give some attention to monetizing your videos.
If you have a very small audience, you should avoid monetizing your videos as you won’t make much ad revenue from them and spoil the user experience of your regular viewers.
But if you have a huge subscriber base, like 100k subscribers, you should monetize your ads before publishing them.
The majority of the views you’ll gain will be within 24 hours of publishing your video, so you don’t want to waste this golden opportunity of generating some revenue from your YouTube video.

6. Add Info Cards and End Screen
With the recent updates rolled out by YouTube, mobile-optimized, smarter cards have replaced the annotations.
You can add external links or links to your other videos in these cards to make the user take a specific action after viewing your entire content.
You can leave a 5-second black screen at the end where all the cards pop up. It will give your video a cinematic feel and make the user choose any of your cards to be hooked to your content across the internet.
7. Add to Playlist(s)
YouTube wants to give users the best experience on its platform. It wants people to relax and switch from one channel to another, as people do on their TVs. So to enhance and provide a more lean-back experience, YouTube has introduced playlists for individual channels.
You can create complete playlists with multiple videos related to one topic, just like a tutorial on learning Java or something else.
It will help to increase the user’s watch time on YouTube and make them glued to your entire series. You don’t need to add all the videos to your playlist at once. You can create a playlist and add videos to that playlist whenever you want to.

These are some of the important tips you need to keep in mind before hitting the publish button of your YouTube video.
Now let’s hop into the technical process of uploading a YouTube video.
Benefits of Scheduling YouTube Videos
Research compiled by Global Media Insight (GMI) reveals that 95% of global Internet users watch YouTube videos. The study also shows that visitors spend an average of 14 minutes and 21 seconds daily and 10 minutes daily pageviews per visitor on the platform.

Therefore, scheduling YouTube videos for the best times of day can help you get higher reach and viewership. Thus, growing your channels faster on YouTube becomes easy.
Below are some of the most important benefits of planning or scheduling YouTube videos:
Saves Time
One of the significant benefits of scheduling videos on YouTube is that it saves time. It helps you manage time cleverly and improve productivity. Enhanced productivity enables you to increase output and drive revenue.
With the extra time on hand, you can devote additional time to the following:
- Produce more informative and entertaining videos
- Build a loyal viewership for your YouTube channel
- Evaluate your YouTube video marketing results to make informed decisions.
Maintaining Consistency
YouTube video scheduling is ideal because it lets you maintain consistency. Keeping a regular publishing strategy helps you build credibility and brand reputation, and positively impacts user experience and your bottom line.
As a result, you’re helping your target viewers know what and when to expect new video content. Moreover, consistent posting can boost engagement and drive traffic.
It lets you reach your audience when they are active online. Also, it gives you control over your content by allowing you to batch your video production processes.
Maximizing Audience Engagement
Across digital marketing platforms, including YouTube, posting when your target audience is active online to engage with your content is crucial for driving results.
You optimize your publishing time for maximum ROIs by scheduling videos for YouTube in advance at the best times. It helps you increase engagement and reach and improve your YouTube ranking.
Enhancing Your YouTube Search Ranking
One of YouTube’s ranking factors is viewer satisfaction. Increased watch time was considered essential and a ranking factor back in 2012. But since 2015, YouTube has used viewer satisfaction to rank videos.
That’s because creators need to determine whether consumers are satisfied with a video they watched, enjoyed the content, and find it valuable to them. Hence, YouTube prioritizes users’ satisfaction as a top-ranking factor.
So, scheduling and publishing YouTube videos gives viewers a sense of expectancy and increases engagement. You encourage your audience to return for more content and build brand trust.
More engagement and traction means that there’s demand for your content. This activity signals the YouTube algorithm that your video is helpful to your audience. Given this, your YouTube channel will rank on searches.
Gaining a Competitive Advantage
With intense competition for video views and more subscribers, scheduling your YouTube videos in advance makes sense. Not only does it help you save time and maintain consistency, but planning your videos also gives you an edge over your competitors.
That margin sets your brand or YouTube channel apart from the competition. So, it’s crucial to have an edge over the competition to maximize business growth.
It would help if you guaranteed a higher advantage by scheduling your videos to attract more views and reach your YouTube marketing goal. You will build powerful brand loyalty with your target viewers and prospects.
Wrapping Up
Understanding how to schedule a YouTube video is a powerful content marketing strategy that offers significant benefits. By scheduling your videos, you can effectively plan and create a series of content for publication at optimal times, ensuring consistent engagement with your audience.
This approach puts you ahead of your content calendar and gives you more time to experiment with your YouTube marketing campaign. You have enough time to test various video formats to determine the correct frequency.
So, if you need help scheduling a video in advance, follow the above steps and apply them carefully. Also, if you’re looking for a YouTube automation tool to make your life easy, use the SocialPilot YouTube scheduling app to drive ROIs.
Start your free trial today!