Posting Reels consistently is no small task, especially when you’re managing multiple accounts, chasing trends, and trying to hit the perfect posting time.
But the good news is that you don’t have to do it all manually. With the right tools and a few smart workflows, scheduling Instagram Reels can be quick, seamless, and stress-free. These tools will help you stay organized, save time, and show up on your audience’s feeds regularly without stress.
In this blog, we’ll walk you through four easy ways to schedule Instagram Reels and share some simple tips, so you can make the most of your posting schedule.
So, let’s start.
How to Schedule Reels on Instagram? (4 Easy Ways)
Basically, there are four different ways to schedule a Reel on Instagram, each with its own perks. These include using the Instagram Native Feature, Meta Business Suite, Scheduling Tool, and ChatGPT.
Before we dive into the step-by-step process, let’s take a quick look at these four methods:
- Native App: Instagram’s native feature to schedule or post Instagram Reels is useful for those who need it occasionally. It works well for both desktop and mobile users; however, it does have a few limitations that we will discuss later in this blog.
- Meta Business Suite: Using the Meta Business Suite to schedule Reels on Instagram is a good option. However, if you are a beginner, you might be overwhelmed by the complex interface.
- SocialPilot Tool: You can schedule Instagram Reels with SocialPilot. This Instagram scheduling tool has several advantages over the native app and the Meta Business Suite. It boasts numerous features that fill the void left by other options.
- Using ChatGPT: ChatGPT can be used to not just generate captions or thumbnails, but also schedule Instagram Reels. You can do this using SocialPilot’s GPT Scheduler, which we will discuss later in this blog.
Now that we have talked about the methods, let’s explore the steps to schedule Reels on Instagram in all the ways mentioned above.
How to Schedule Reels Natively (Using Desktop)
Those with business or creator accounts can use the Instagram native feature either on Desktops or mobiles to schedule IG Reels.
However, native scheduling comes with some limitations, such as a scheduling limit of 25 Instagram posts per day (including Reels, posts, and carousels) for a period of up to 75 days in the future.
If these limitations work for you, follow the steps below to schedule Instagram Reels using the native feature on desktop:
Step 1: Log in and Upload the Reel
Open your Instagram account on the mobile application, tap “+” (create), and then Reel.

Step 2: Customize the Details of the Reel
After selecting the Reel you want to schedule, customize all the necessary details. Add a cover image, select the frame size, write a caption, tag people, specify your audience, add music, include a location, and complete any other required fields to finalize your post setup.
Now, to find the scheduling options, click on “Advanced Settings.”

Step 3: Pick a Date and Time for You Reel
In the advanced setting, you can turn on the “Schedule This Reel” option and set the preferred time and date for scheduling this Reel.

Step 4: Finally, Schedule the Reel
Once you’ve chosen the best date and time for your Reel, tap “Done” and then hit the “Back” button to finalize the scheduling.

The “Schedule” button on the page will now be active. Just tap on it, and your Instagram Reel will be scheduled.
However, before you begin, please note the following limitations of the native scheduling feature.
How to Schedule Reels on Instagram Natively (Using the Mobile App)
Professional account holders can also schedule Instagram Reels directly using the Instagram app on their iOS or Android devices.
It’s a great option if you’re managing your own content casually without switching to a professional account. Here’s how to do it:
- Step 1: Open the Instagram app,tap “+”, and select Reel
- Step 2: Upload your video and add details – caption, cover, tags, etc.
- Step 3: Tap on Advanced Settings, then enable Schedule this Reel
- Step 4: Choose your desired time and date
- Step 5: Tap “Done” and then hit Schedule to finalize

Note: Make sure your Instagram app is updated to access this feature.
Limitations of the Instagram Native App
As mentioned above, Instagram’s built-in scheduling tool is helpful, but it isn’t without limits. Here’s a quick look at what you should watch out for:
- Mobile-Only Scheduling: The native scheduling option is available only through the Instagram mobile app; there’s no direct way to schedule Reels from a desktop.
- Limited to Professional Accounts: Business and creator accounts can schedule Reels using the native scheduling feature.
- Daily Scheduling Limit: You can schedule only up to 25 Instagram Reels daily.
- Only 75-Day Advance: A Reel through the Instagram native feature can be scheduled for up to 75 days in advance.
- No Collaborations: Collaboration on the Reel is unavailable when you use the native Instagram scheduling feature, which can be problematic for creators.
- No Cross posting: When you natively schedule a Reel on Instagram, you can not enable cross posting on your Facebook account.
- Platform Restrictions: When you natively schedule an Instagram Reel, you cannot share it on other platforms simultaneously.
- No Bulk Scheduling: If you want to schedule several Reels at once, it does not support the bulk scheduling feature.
- Limited Editing: Once a Reel is scheduled, major edits aren’t supported. If you need to make significant changes, you’ll have to delete and reschedule it.
If not all, some of these limitations will hinder your social media game in one way or another. So why waste your efforts when you have great scheduling tools like SocialPilot Social Media Scheduler to support your growth?
But before we dive into how amazing this tool is, let’s wash our hands off by learning how to schedule a Reel on Instagram with Meta Business Suite.
How to Schedule IG Reels using Meta Business Suite
When comparing the Meta feature with Instagram native scheduling, Meta Business Suite has the upper hand, given its flexibility and fewer limitations.
To schedule a Reel on Instagram using Meta Business Suite, follow these steps:
Step 1: Log in and Click on “Create Reel”
Log in to your business account using Meta Business Suite. Click on the “Create Reel” option on the homepage.

Step 2: Select Your Instagram Account and Upload Video
Now select the page on which you want to schedule the Instagram Reel.
Once you’ve done this, upload the video, add a caption, hashtags, and a thumbnail, and invite people to collaborate.

Step 3: Change and Edit the Reel as Needed
In the next stage, you can make changes and edit your video.
Remember, you can only schedule Reels up to 90 seconds or less with Meta Business Suite.
Step 4: Click “Next” and Schedule Reel
After furnishing your Reel with all the elements, click on “Next” -> “Schedule”. Pick the most suitable time and date to schedule Reels.

Meta Business Suite only has a scheduling window of 20 minutes to 29 days ahead. Ensure your scheduling falls within this timeframe.
Several factors limit people from using Meta for scheduling reels on Instagram, such as:
- Maximum reel length can be 90 seconds only.
- The scheduling window is from 20 minutes to 29 days in the future.
- You cannot schedule your reels from personal accounts, only for creator or business accounts.
- Businesses or creators can not tag products while scheduling reels with Meta.
- Cross-posting on other social media platforms is unavailable on the Meta Business Suite.
- It is not possible to share scheduled reels directly on stories.
- The bulk scheduling feature for the reel is not available in the Meta Business Suite.
- There are just a few editing options available for reels on Meta.
These limitations are alarming signals that you need a better social media management tool like SocialPilot to grow your Instagram presence.
Using SocialPilot'[s social media scheduler helps creators bridge that gap with greater flexibility and advanced features that other tools often miss.
Scheduling Reels on Instagram can save a lot of time and ensure consistency while reaching the right audience at the right time. However, native Instagram and MBS schedulers have several restrictions that can eventually hinder your growth.
With a scheduling tool like SocialPilot, you can plan, automate, and manage your Reels effortlessly with endless advanced features.
Let’s learn how to schedule a Reel on Instagram with SocialPilot and leverage its advanced features.
Step 1: Connect Your Profile to SocialPilot
Your journey towards successful social media management starts by connecting your Instagram profile with your SocialPilot account.
To connect, log in to your SocialPilot account on your desktop and click on Account -> Connect Account -> Instagram.
Choose the profile you want to connect: Personal or Business.

PS: SocialPilot also allows you to schedule posts or Reels for private accounts, a feature missing natively on Instagram and Meta Business Suite. Ensure you provide access to SocialPilot while connecting to ensure seamless scheduling.
Step 2: Create a Post and Switch to the Instagram Tab
Once your profile is connected to your SocialPilot account, click “Create Post” and switch to the Instagram tab.
Then, you can pick the option “Reel” to schedule your Reel.

Step 3: Upload the Reel You Want to Schedule
The Next step is to pick the media from your device. Ensure your video is less than 15 minutes long, and follow the recommended aspect ratio of 9:16 for best results.
To schedule Reels with SocialPilot, choose a file from your device or Dropbox, Google Drive, or Box Cloud Storage.

Step 4: Customize and Pick Publishing Option
After uploading your Reel, complete the final setup before scheduling. Add a caption with relevant hashtags and emojis, upload a thumbnail, tag people, add music, set a first comment if needed, and specify the location. Once everything is in place, you’ll be ready to choose your publishing option.
The final step while composing your Reel is to pick between the Direct Publishing or Mobile Reminder option. (only available on desktop)

Direct Publishing: Your Reel will be published directly at the scheduled time. (only available for business and creator accounts)
Mobile Reminder: You’ll receive an Instagram reminder when direct posting, prompting you to share your post further.
Step 5: Select Account and Schedule Posts or Reel
Before you move to scheduling options, select the Instagram account on which you want to share the Reel.
Then, you can pick from our multiple scheduling options and schedule Instagram Reels for the most suitable time.

Still, facing issues scheduling an Instagram reel? Go through our detailed help document to win over Instagram strategy, or watch the video below.
Up next is scheduling Instagram Reels on mobile devices using the SocialPilot mobile application. This can help creators schedule their Reels with advanced features, right on their mobile devices.

Step 1: Log In to Your SocialPilot Account and Click on “+”
After downloading the SocialPilot mobile application, log in and click “+” at the bottom of the screen to start creating the Reels.
Step 2: Compose the Post and Select Your Instagram Account
You can prepare your post by uploading the video and writing a description, and hashtags.
Next, you must select the Instagram account for the Reels to go live.
Step 3: Preview the Post and Pick the Scheduling Option
After composing your Reel, preview it by tapping the “Preview Post” option at the top right corner to catch any errors. Once you’re happy with it, click the “Next” button at the bottom, choose your scheduling option, and you’re set.
Your Reel will go live at the scheduled time.
SocialPilot isn’t just another scheduling tool; it’s your all-in-one command center for Instagram Reels, packed with more features, flexibility, and control than most other platforms.
Advantages of Scheduling Reel with SocialPilot
Let’s learn about the features that play their part in improving content management, better engagement, and boosting online presence.
- Mobile-Friendly: You can schedule Instagram reels or posts using the SocialPilot mobile app anytime. By integrating your Instagram with SocialPilot, you can streamline your scheduling process across various devices, ensuring you’re always in sync with your content planning.
- Private Account Supported: SocialPilot, unlike other reel scheduling tools, also allows you to schedule reels for private accounts.
- No Scheduling Limit: It does not restrict you regarding scheduling limits. You can schedule as many reels as you want for any time of the day.
- Allow Post and Story Scheduling: Not just reels, SocialPilot supports you while scheduling Instagram posts and stories.
- Share On Multiple Accounts: Unlike other tools, SocialPilot allows you to schedule reels for multiple Instagram accounts at once.
- Allows Crossposting: You can share your scheduled reel on Facebook and your Instagram profile together.
- Cater Advanced Feature: SocialPilot provides post preview, detailed analytics, and features like story scheduling and reels.
- Content Library: Our tool allows you to create a safe space for content ideas to use later in the Content Library.
SocialPilot has helped over 13,000 users transform the way they manage their social media. Many marketing agencies are tapping into its smart, data-driven scheduling to plan better, post smarter, and drive real results.
How to Schedule Instagram Reels with ChatGPT
While ChatGPT alone can’t schedule Instagram Reels, we’ve supercharged it with SocialPilot’s AI Scheduler – so you can plan, create, and schedule content without ever leaving your ChatGPT dashboard. Everything you need to manage Instagram Reels is now just a few prompts away.
Step 1: Open ChatGPT to Access SocialPilot’s AI Scheduler
First things first, open the SocialPilot AI Scheduler in ChatGPT. Then all you have to do is type in a simple prompt like, “Log me into my SocialPilot account to start managing my posts.” Then use your SocialPilot credentials (email and password) to authenticate.
You may also need to allow access permissions for scheduling and posting.

Step 2: Generate Content for Your Instagram Reels
At this stage, you have full flexibility: you can either upload your Reel directly, provide an accessible link to your video, or even ask ChatGPT to generate a series of images that you can stitch together as a Reel.
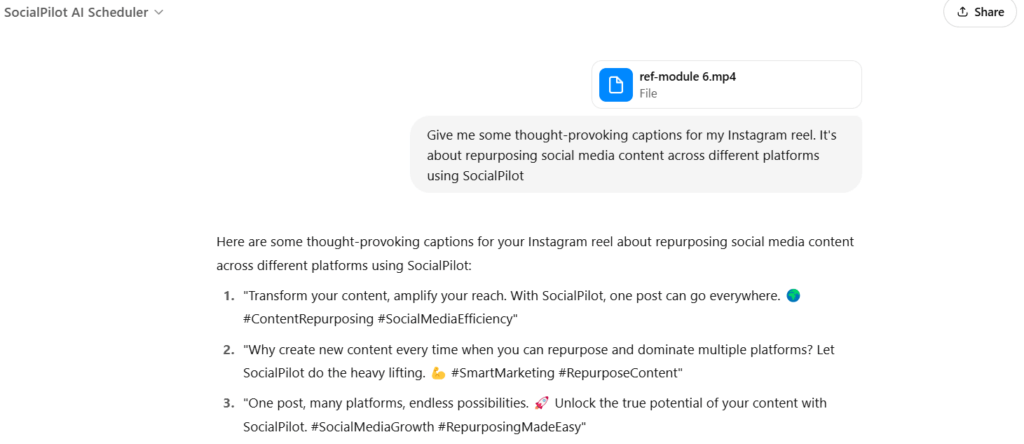
Once the Reel part is sorted, prompt ChatGPT to generate captions, hashtags, and even a first comment to boost engagement.
Here is a ChatGPT prompt you can try for captions: “Give me [5–7] thought-provoking Instagram Reel captions that align with a [tone: witty/inspirational/sarcastic/educational] voice. The Reel is about [insert theme or topic] and is meant to speak to [target audience].”
Step 3: Get a Thumbnail for Your Reel
No need to stress about finding the perfect thumbnails for your Reels. Just ask the AI scheduler to “Generate thumbnails for this Reel,” and it’ll create the perfect background, graphics, or visual elements to match your content.
The tool will come up with 3-4 thumbnail suggestions, just click on them to download and use the one that fits your Reel best.

Step 4: Schedule Your Reel for Optimal Impact
Once you’ve got your content and captions ready, it’s time to schedule your Reel. You can choose the exact date and time that aligns with your audience’s peak activity or you can use ChatGPT’s insights to suggest the best posting times for your audience based on your niche.
Then simply prompt the tool to schedule the post at your preferred time, and SocialPilot’s AI Scheduler will take care of the rest.
And don’t worry if you have different time zones to account for – SocialPilot’s AI Scheduler has got you covered.

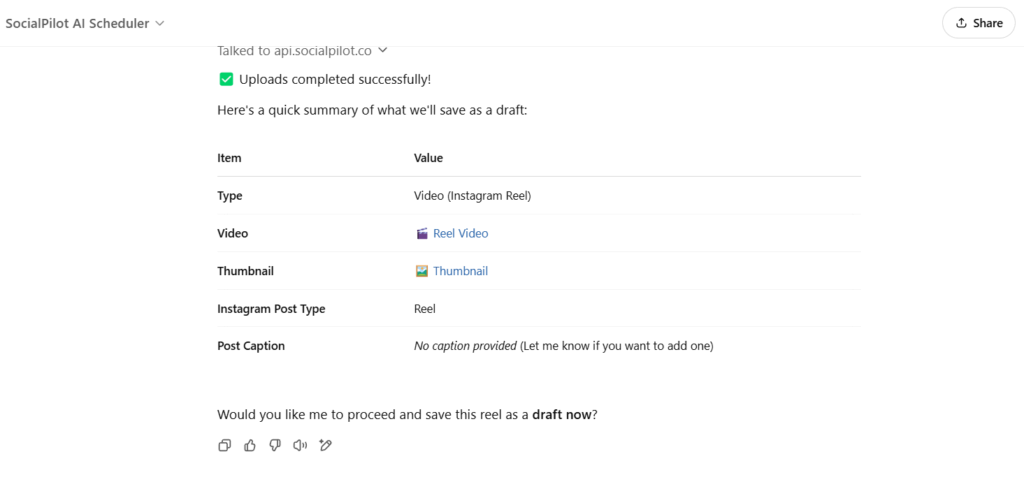
Step 5: Save Your Reels as Drafts
Don’t want to post it yet? Well, you also have the option to save your post as a draft. Just prompt the tool to save the Reel along with the selected thumbnail to your drafts.
This allows you to keep everything in one place and make any final tweaks before scheduling. Plus, you’ll always have time to review your posts!
Step 6: Check Your Pending Draft Posts
Want to check your already existing post drafts? Just ask the scheduler with a prompt like, “How many drafts are pending for publishing?”
It’ll give you a clear overview of your scheduled content, so you always know where you stand.
Using SocialPilot’s AI Scheduler will not just save you time, but will help you streamline the whole process of planning, creating, and scheduling Instagram Reels.
It’s an easy way to stay on top of your content without the headache of manually managing every post.
Here are some of its features to help you understand the tool better:
-
Schedule Reels Instantly via ChatGPT: Just type a message, and your Reel is scheduled without bouncing between apps.
-
Group or Client-Based Scheduling: You can easily schedule Reels for different brands with a single command.
- Check Scheduled Reels in Real Time: Quickly check which Reels are lined up by asking the AI.
-
Tag and Collaborate with Other GPTs: If you’ve got a custom GPT for ideas or captions, tag the AI scheduler, and it’ll take care of the rest.
-
All-in-One Management Inside ChatGPT: Manage your Instagram Reels, from logging in to scheduling, all within ChatGPT.
Give it a try and see how much more efficient your content planning can be!
How to Find and Edit Scheduled Reels on Instagram?
After scheduling, the job is almost done, but what if you face the need to change the time of your scheduled Reel to another date or time? Knowing how to edit scheduled Reels on Instagram is vital for such situations.
Here’s how you can edit Reels:
Edit Reels on the Instagram App
If you have scheduled your Reel using the Instagram native application, follow the steps below.

1. Open your Instagram profile (through which you have scheduled the reel) on mobile.
2. Tap the triple lines menu at the top right corner of your profile, then tap “Scheduled Content.”
3. Next, tap the riple dots menu to open the editing options, then make the changes as needed.
Remember, in the native Instagram app, you only have three options to manage and schedule your Reels: Delete, Reschedule, and Share Now. For more advanced features, you can schedule Reels using SocialPilot.
Find and Edit Instagram Reels on Meta Business Suite
If you have scheduled your Instagram Reel using Meta Business Suite and want to reschedule it, here are the steps to find and edit your Reel.
1. To start, log into your Meta Business account and click the “Content” tab from the left menu bar.
2. After that, select the “Posts and Reels” tab from the left corner and then pick the Scheduled Content tab from the top menu, and all your scheduled reels will appear.

3. Now, just click on the triple dots menu to edit or reschedule your reel for a later date and time, and you’re done.

The next step is editing your Reel if you have scheduled it using the SocialPilot scheduler.
1. On your SocialPilot tool dashboard, click “Posts” and “Manage Posts” from the left-side menu bar.

2. Depending on your access, you can find your scheduled reel either in the Queue post section or the Pending Review section.
Or simply in the “filter post” option, you can select the Instagram account, and all the Reels scheduled from it will appear.

3. Find the reel you want to edit, hover over it, and click on the “Edit” button to reschedule it for another time or simply edit other details.

Edit Instagram Reels on Mobile
Have you scheduled your Instagram Reel using the SocialPilot mobile app? Then follow these steps to edit or reschedule your Reel on mobile.

- Open SocialPilot on your dashboard and find the queued posts listed, which will include your scheduled Instagram Reels
- Click on the Reel you wish to edit and then click on the triple dots displayed over it.
- A pop-up will allow you to edit and reschedule the reel.
- Click on the “Reschedule” button to change the time and date when you want the Reel to go live.
How to Delete Scheduled Reels?
What if you no longer need the Reel you scheduled some time back? You may want to delete the Reel because of the change in plans or campaign.
Below, we have included a simple procedure you can follow to delete the scheduled Reels on Instagram:
Delete Scheduled Reels on the Instagram App
To delete a scheduled Reel on the Instagram native app, go to your Instagram profile and then settings.
In settings, you can find an option for “Scheduled Contents” to locate your Reel.
By clicking on the triple dot menu on the Reel, just delete.

Deleting Scheduled Reels on Meta Business Suite
Deleting the Reel you have scheduled via Meta Business is the same as editing it. Just open your account and go to your content.
Select the “Posts and Reels” tab and then the “Scheduled” tab to locate the Reel you want to delete.
Here, you can see all your scheduled posts. To differentiate your posts better, you can even set filters for your Instagram account.
To delete a Reel or multiple Reels, select them, hover over the preview, click on the three dots, and click the “Delete Reels” button.

How to Delete Scheduled Reels on SocialPilot?
If you want to delete a Reel or bulk-delete scheduled Reels on the SocialPilot tool, here are the easy-peasy steps:
Open the app -> Posts -> Manage Posts -> Add Filter.
Select the Reel or Reels you want to delete. Then, simply click the Delete button on the top menu bar.

Process to Delete Scheduled Reels on Mobile?
Last, let’s learn how to delete scheduled reels on mobile devices using SocialPilot.
Open the SocialPilot mobile app, go to the queued posts section, and find your scheduled reel.
Click on the reel’s triple dot menu. A pop-up will appear with an option to delete the reel.

Best Practices for Scheduling Instagram Reels
We’ve created a feature that facilitates every element you need for scheduling Instagram reels today or any upcoming day. No matter how many clients or accounts you’re managing, the right approach can make a big difference in the reach and engagement of reels.
Here are some of the best practices to follow:
1. Use AI to Generate Ideas and Scheduling
So, without any question, you need to start incorporating AI into your workflow. If you use a scheduling tool like SocialPilot, it becomes easier as you get a built-in AI Pilot tool, which helps you:
- Generate engaging captions and content ideas
- Create relevant, high-performing hashtags
- Help you rephrase posts or adjust tone based on your target audience
- Translate your content into 10 languages for global consistency
For even better sync, you can schedule Reels using the GPT scheduler, allowing you to save time, create content seamlessly, and schedule more efficiently without switching between tabs.
2. Post and Schedule at Peak Hours
The biggest benefit of scheduling a reel is that it allows you to auto-publish it at the best time, pre-preparing the reel for better visibility.
To understand the best time to post reels on Instagram, the SocialPilot analytics tool provides detailed insights into audience demographics and AI-suggested best posting time.
With strategic timing, your Instagram reels will get maximum attention and higher engagement rates.
3. Collaborate with Client and Team
Scheduling is a smart feature for social media managers who struggle to get client approval on time.
When you schedule a reel using SocialPilot, you can collaborate with the team and invite the client for their approval. It spares you from the back-and-forth communication that, after a point, turns meaningless.
With this technique, your Instagram strategy can work with smart scheduling and approval.
4. Capitalize on Trends and Timely Topics
As a marketer, you have a habit of planning months of content in advance, and scheduling tools make this process much easier. However, it is vital to leave some space for real-time trends and topics.
SocialPilot has features to pause all your scheduled Instagram posts for a particular account, so when you have anything fresh coming up, don’t fret; just schedule it and adjust the previously scheduled Reels or posts. This strategy will help you keep up the game without shuffling your scheduled content.
5. Keep Your Schedule Flexible
We all know that Instagram trends and reel format change rapidly, so what works today might not work tomorrow. It’s important to plan and arrange your reels in advance, as it takes time to ideate and develop content, but you also need to leave some flexibility for last-minute changes.
We suggest scheduling evergreen material ahead of time, but be prepared to change, substitute, or halt posts as needed. This would help you maintain your brand as relevant and responsive, regardless of what’s happening online.
Reasons to Schedule Instagram Reels in Advance
Social media managers scheduling Instagram Reels in advance is not just about convenience or saving time; it’s more about staying consistent in posting and executing social media strategy smartly.
Here are a few reasons why scheduling reels on Instagram makes a big difference:
1. Stay Consistent Without the Rush or Delay
When you post reels regularly, your audience stays engaged, keeps your brand visible, and the algorithm helps you reach new audiences. Advance planning ensures you never miss a post, even when you’re on weekend leave or have a hectic day.
2. Save Time and Reduce Stress
When you have a busy schedule, managers scramble at the last minute, which leads to posting the wrong content at the wrong time. However, pre-scheduling can save time to create great reels, write engaging captions, and post at peak hours. So, you can focus more on the strategy and creativity part.
3. Post at the Best Time for Engagement
Instagram scheduling tools enable you to publish Reels at the best times when your audience is most active, utilizing advanced analytics and AI capabilities. It leads your reels to reach higher views, better engagement, and faster account growth.
4. Improve Team Collaboration
When you plan and create reels in advance, it gives your team members and clients enough time to review and approve the content, ensuring it can be scheduled on time. This keeps your workflow smooth, eases internal team collaboration, and avoids last-minute confusion.
5. Align with Campaign Goals
There are many static campaigns that should be pre-scheduled, such as product launches, holidays, and local events, to ensure every post supports your broader marketing objectives and goes live at the right time.
6. Keep Up with Trends Without Losing Balance
Even if you plan ahead, you can still stay flexible. There are many Reel scheduling tools that allow you to reschedule, edit, or pause posts, so you can capitalize on trends without disrupting your overall plan.
Common Mistakes to Avoid When Scheduling Instagram Reels
There are many mistakes that social media marketers and agencies often make, including several scheduling errors.
Here are a few common mistakes you should avoid:
1. Ignoring Trends
Avoiding trends is one of the most common mistakes social media agencies make with their clients’ accounts, as they pre-plan an Instagram calendar in one to two months’ advance that sometimes backfires. Social media changes rapidly; what is trending today might be old news by next week. So, always leave a little room in your calendar so you can jump on new Instagram reel trends or viral music at the last moment.
2. Posting at the Wrong Time
You may notice that the same Reel performs differently when posted at different times from the same account. That’s because if you post at the wrong time, your audience might not be online to see it. Before scheduling your Reels, check your analytics or use AI-suggested best posting times to find when your followers are most active and schedule your posts accordingly.
A great reel alone is not enough to reach the potential audience. You need to blend the reel with an engaging caption and the right hashtags to help people discover your content. So, don’t skip the caption and hashtag while scheduling reels. If you’re looking for the best Instagram caption ideas, feel free to explore our suggestions.
4. Not Reviewing Before Posting
It’s easy to trust AI tools for creating captions and hashtags, but there’s always a chance of mistakes occurring. It’s essential to review your reels, captions, and visuals before they go live to ensure they are free from typos, outdated information, or content that doesn’t align with your brand.
Final Words
Scheduling Instagram Reels isn’t just about convenience; it’s about showing up consistently and making every post count.
If you’re just starting out or posting occasionally, Instagram’s native scheduling feature is a solid, no-fuss option, especially for personal, creator, or business accounts sticking to basic needs.
But if you’re managing multiple accounts, planning content in bulk, or looking for deeper insights and more flexibility, native tools will quickly feel limited. That’s where advanced schedulers like SocialPilot come in.
It combines features like AI-assisted content planning, multi-account management, visual previews, and smarter timing suggestions into your content strategy to ensure your scheduled Reel reaches the audience and truly connects.
Turn every Reel into a standout piece with SocialPilot. Start your 14-day free trial today.